Washoe County Master Gardener Newsletter (2026-03)
In this edition
- About This Newsletter
- A Note From the Editors
- Emeritus Master Gardener Rod Haulenbeek: Farewell to the Tree Hunter and Keeper of the Magic Box
- What's Happening This Spring
- Early Spring Local Wildflowers
- Encouragement from Wild Flowers
- Greenhouse 2026: The Magic Beans
- Four Springtime Steps to Ripe Tomatoes
- Getting Spring Started Early (Safely)
- Joy in Small Spaces
- The Nevada Blue Rooster: A Garden Parable
- Bucket Tool Organizer
- Spring Color With Violas and Pansies
- A Winter Rhyme for Springtime Sprinklers
- Bee & Garden Seminar
- Gratitude
About This Newsletter
Welcome to our newsletter dedicated to gardening enthusiasts in Nevada! Here, the Master Gardener Volunteers of Washoe County are committed to fostering a community of gardening knowledge and education. Through this publication, we aim to provide research-based horticulture insights for our readers. Each quarter, we offer a wealth of information covering various aspects of gardening, from upcoming garden events to advice on topics ranging from pest control to sustainable gardening practices. Join us as we explore the science and artistry of gardening together!
A Note From the Editors
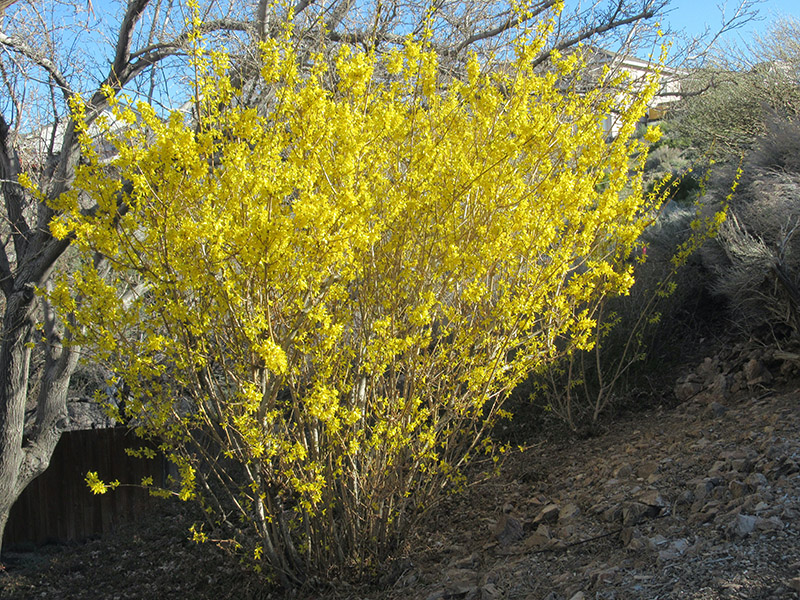
The early-blooming, bright yellow flowers
of the forsythia shrub are a cheerful hello to spring.
Photo by Becky Colwell
Here in the high desert, winter likes to tease gardeners into thinking that warmer days are just around the corner. But, being the trickster that it is, winter seems to want the last say by providing snowstorms into April some years. Even so, as gardeners we are carefully inspecting our yards looking for the first signs of green.
As the days gradually get longer and the birds are singing it’s tempting to stay outside all day doing winter clean-up chores.
And it is the perfect time to get a handle on the weeds in your yard. Many can be hoed or hand-pulled when they first emerge, and they flower and go to seed amazingly fast. Don’t let them do that and add to your weed seed bank!
Spring-flowering shrubs such as Syringa spp. (lilac), Forsythia spp., and Viburnum spp. such as snowball bush should be pruned immediately after blooming. Early spring is also the perfect time to prune summer-flowering shrubs such as Potentilla spp., Hibiscus syriacus (Rose of Sharon), Buddleja spp. (butterfly bush), and Lavandula spp. (lavender). All established shrubs can benefit from “renewal pruning.” This involves removing 20 to 25 percent of older branches from the base to maintain the shrub’s health and keep its size down. For summer-flowering shrubs, this is best done in late March through early April.
Most chores involving the vegetable garden are still being done indoors, in greenhouses or under grow lights. But you may want to trim back perennial herbs like oregano and thyme to encourage fresh growth, clean up the asparagus and rhubarb patches, and pull back any leaf mulch from garlic beds. And, of course, prep the garden for hardy spring crops like spinach, lettuce, and peas.
Happy spring gardening,
Becky and Chris
Emeritus Master Gardener Rod Haulenbeek:
Farewell to the Tree Hunter and Keeper of the Magic Box
From the desk of Rachel McClure,
Washoe County Master Gardener Coordinator

“We make a living by what we get, but we make a life by what we give.” – Winston Churchill
What a rich life Rod must have had. He gave so much to everyone he met. If you shared his passion for life, trees, native plants, any plant really, it was impossible to have a conversation with him without a smile, handshake or a hug. His energy and enthusiasm were contagious, and he had a humorous story to support every point he needed to make. Rod made each day a great day.
Rod loved trees. Rod loved shrubs. Rod loved seeds. Rod loved plants. They called to him and he returned the call. He was lucky enough to realize his passions early in life in his childhood back yard and he took that same joy and curiosity with him into every single day. He found the interesting and new. He learned the whys’ and how’s for all the plants he encountered. In this process he discovered there was a need for information, so he filled that need by writing and publishing several books:
- Tree Adventures at Tahoe by Rod Haulenbeek ISBN: 978188515503
- Northern Nevada Tree Identifier: A Photographic Album of Native and Introduced Trees of Northern Nevada in Winter, Spring, Summer, and Fall. ISBN: 978-1984953834
- Northern Nevada Shrubs and Vine Identifier: A photographic Album of Landscape Shrubs and Vines of Northern Nevada ISBN: 979-8645727345
- Tree Adventures in Yosemite Valley ISBN: 978-1885155023
- A Visitor’s Guide to the University of Nevada, Reno Arboretum: ISBM: 978-1943859320
Rod, also known as the Tree Hunter, played an integral role in finding Nevada’s big trees. He discovered Nevada’s champion Eastern White Pine, which is also the biggest in the nation. The Nevada Division of Forestry’s Big Tree program has some great information. Also, on YouTube all 28 of his tree walks of the UNR Arboretum and campus are archived. He also did many tree walks throughout our communities for industry professionals, Extension Master Gardener Volunteers and community members. Rod was Someone 2 Know as featured on the KTVN segment. Additionally, he worked with the University of Nevada, Reno Extension in creating tree care videos.
Rod took the Master Gardener program in 1999, certifying in 2000. While he lived in Reno, he drove all the way to Carson City to participate in the program. As a Master Gardener, he participated in numerous events, always sharing his passion and his enthusiasm for gardening and specifically, his desire to identify whatever plant he saw, from childhood interest to moving to a new area and not knowing any of the plants or fauna where he moved to. He was part of the Master Gardener Greenhouse, Historic Huffaker School Garden, Home Show, The Master Gardener Seedling Sale, Seed Swap (The Magic Box), Gardening in Nevada: The Bartley Ranch Series (where he volunteered for years before he began presenting and he did 10 or more presentations). He hosted several “Tree Walks” for Master Gardeners and as a presenter for Gardening in Nevada: The Bartley Ranch Series he covered a multitude of topics from Seeds, Trees and Landscaping.
You could always find Rod in the community. Find a plant community, and he would be part of it in some way. He was an active member of the Wilbur May Arboretum and deeply involved with the City of Reno Greenhouse for many years. He was also heavily involved with the University of Nevada, Reno Arboretum and their board. Whether he was leading an educational program, actively volunteering, or simply participating, Rod showed up for anything related to plants.
He also had a gift for building community. Rod was passionate about connecting people with shared plant interests and needs. He collected seeds, hunted acorns with friends, grew plants, and shared them at every opportunity. Many people in our community have a tree grown from one of Rod’s acorns or a plant he nurtured from seed in his own yard. Countless community members and Master Gardeners have plants grown by Rod that they discovered at the Master Gardener seedling sale.
And then there was Rod’s beloved “Magic Box” — always full of carefully collected, sorted, seasoned, and packaged seeds, ready to share. Each packet was thoughtfully labeled with growing instructions, pictures, and anything else he believed someone would need to succeed. Multitudes of Master Gardeners and community members carry seeds from that "Magic Box", and with them, a small piece of Rod’s generosity and spirit.
Rod Haulenbeek enriched our community on so many levels. His passion for plants and his desire to connect everyone around them has had a profound impact. He will be missed every single day.
Thank you for your part in our journey, Rod the Tree Hunter and keeper of the Magic Box. Rest now. Your legacy lives on forever.
*Several organizations are planning memorial activities, and tree plantings in Rod’s honor. The University of Nevada, Reno Arboretum, Washoe County Master Gardeners, Wilbur May Arboretum and others. Please check with these organizations for details.
What's Happening This Spring
Master Gardeners will be giving short presentations on a wide range of gardening topics at various locations this spring, and a mobile Master Gardener help desk will be available at some locations as well. See locations, dates, and times below.
Garden Talks at the Library
Where: Spanish Springs Library, 7100A Pyramid Way, Sparks
Talks will be held monthly on the second Sunday from 1:30 to 3 p.m., and the mobile help desk will be available from 1 to 4 p.m..
April 12, 2026
1:30 p.m - Rose Varieties and Planting Bare-Root Roses: Confused about the different types of roses? Wondering how to plant bare-root roses? Come and learn the basics from Master Gardener Georgette Porter.
2 p.m - Pruning Roses: Early spring is the time to prune your existing roses. Learn all about pruning roses from Master Gardener Valerie Ojeman.
2:30 p.m. - Meet Rosa ‘Dr. Huey,’ the root stock of many hybrid roses: Many hybrid roses are grafted onto ‘Dr. Huey’ roots. This provides additional benefits to the rose plants, but it is not without its own headaches. Master Gardener Carol Munden will teach you about this important rose rootstock, how to identify it, and how to prune your hybrid rose if the rootstock is peeking up.
May 10, 2026
1:30 pm - Straw Bale Gardening: Heard about Straw Bale Gardening? Wonder if it is something you could do? Join Master Gardener Maxine Weiss to learn the basics.
2 pm – Sensory Gardens: Sensory gardens are developed to appeal to all your senses, not just sight. Come join Master Gardner Janet Owens to gather ideas to enhance your garden space by adding elements that relate to your five senses and increase understanding in how they can impact your garden experience.
2:30 pm – Planting a Red, White and Blue Flower Garden: Make a patriotic statement in a flower garden this summer, the nation’s 250th birthday! Master Gardener Bryn Lapenta and Master Gardener Intern Christina Heitzenrader will show you how to plan, select plants, and keep them blooming throughout the summer.
June 14, 2026
1:30 p.m. - The Importance of Planting Native Milkweed to Support Monarch Butterflies: Monarch butterflies are among the most famous and beloved butterflies in North America. These butterflies migrate hundreds of miles from Mexico and southern California to the northern U.S. and Canada, where they lay eggs on native milkweed plants, the only plant their larvae will feed on. Providing native milkweeds in your garden can help sustain these butterflies. Come join Master Gardener Tricia Howarth to learn about native milkweed care and sources for these plants.
2 p.m. - Welcoming Pollinators Into Your Garden: Pollinators are a critical part of our planet’s ecosystems. Master Gardener Leslie Edgington will show you how to make pollinators welcome in your yard with great plants to attract them and nourish them.
2:30 p.m. - Harvesting and Curing Garlic: Did you plant garlic last fall and are now wondering when you should harvest it? Master Gardener Gary Garrett will teach you all about the right time to harvest your garlic and how to cure and store your bulbs.
Third Thursday Evening Garden Talks
Where: Rancho San Rafael Regional Park, 1595 N. Sierra St., Reno
Join Washoe County Cooperative Extension Master Gardeners on the third Thursdays in May, June, July, August, and September for evening garden talks. Talks will be held in the park’s community garden, beginning at 6 p.m., and ending by 7:30 p.m. The talks are hands-on, casual, informative, and free. Also during this time, from June through September, a mobile help desk will be available to answer garden-related questions.
Sunday, April 26, 2026
10 a.m. to 1 p.m. - Farm Days and mobile help desk. Stations will be set up around the community garden discussing different gardening topics.
May 21, 2026
6 p.m. - A Nevada Story: The History of Rancho San Rafael Community Garden presented by Master Gardener Martha McRae
6:30 p.m. - Topic to be determined
June 18, 2026
6p.m. - Growing Roses presented by Master Gardener Georgette Porter
6:30 p.m. - Topic to be determined
7p.m. Topic to be determined
The Nevada Weed Education Station, with examples of weeds present in the garden during the month of June, will also be on display during the garden talks.
Master Gardener Annual Plant Sale:
Where: Extension office, 4955 Energy Way, Reno
Friday, May 15, 2026: 2 -6 p.m.
Saturday, May 16, 2026: 9 a.m. -1 p.m.
Early Spring Local Wildflowers
Article and photos by Becky Colwell
My husband and I like to hike local trails throughout the year. One of our favorites for fall through spring is Ballardini Ranch Trail in southwest Reno off of Lakeside Drive. We avoid this trail during the summer months as it is very hot. The trail is on the western slope of the Sierras facing south and east, where sandy, gravelly soils offer perfect growing conditions for many wildflowers and some shrubs. The following pictures were taken during late March through early April. Most of these wildflowers are found off the hiking trail and are hard to see until you are almost upon them. They’re always a thrill to locate helping to herald in the coming growing season.
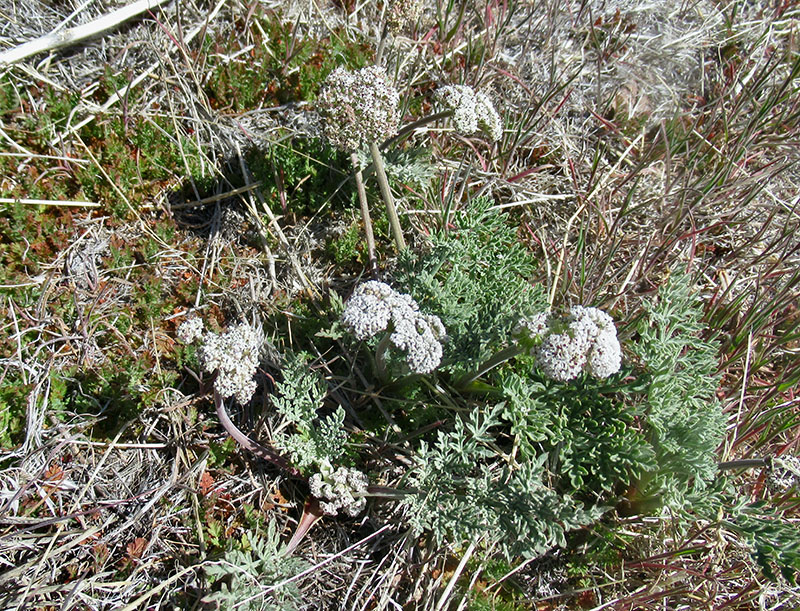
Lomatium nevadense is one of the earliest-blooming wildflowers. The flowers can be mistaken
for patches of snow until closer inspection. Nevada lomatium can be found throughout the Great Basin.
Lomatium nevadense (Nevada
lomatium) in the Apiaceae family blooms in February and March. It is prostrate with finely divided leaves. The tiny white umbel-shaped flowers lie nearly flat on the ground. Sometimes there’s a touch of red at the center of each flower.
Nevadense means “of Nevada.”
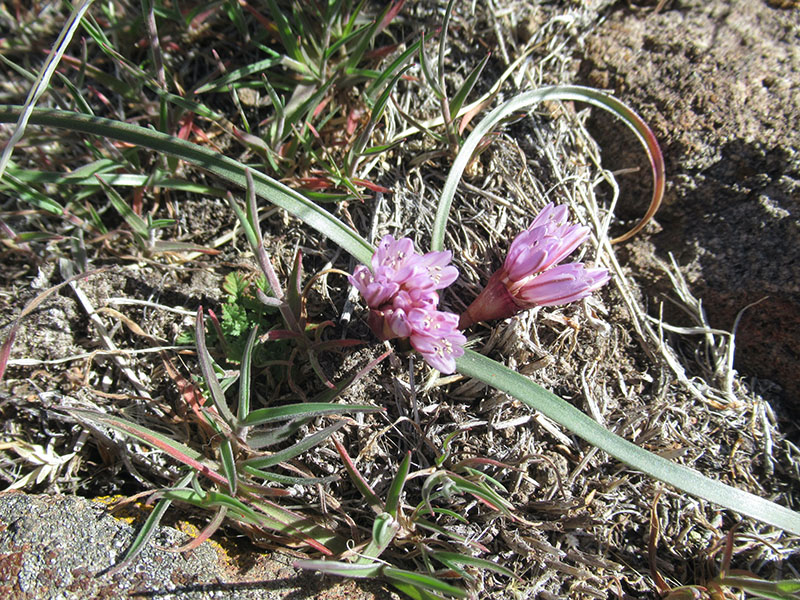
Allium paryum flowers are very close to the ground. Another identifying
characteristic is the dark rose-purple midrib on the outer part of the flower, called tepals.
Allium parvum (dwarf onion) in the Liliaceae family blooms March through July. As you can see, the cluster of pink, rose, and sometimes white flowers lie practically on the ground. There can be one, two, or more grasslike leaves. Parvum means “small.”
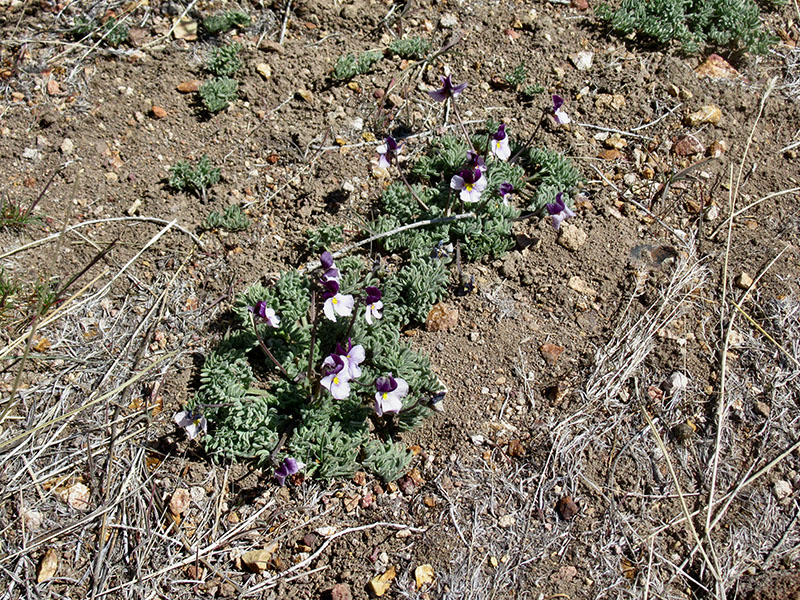
Coming across a patch of Viola beckwithii is always a pleasant
surprise! Their happy faces make one feel spring is here.
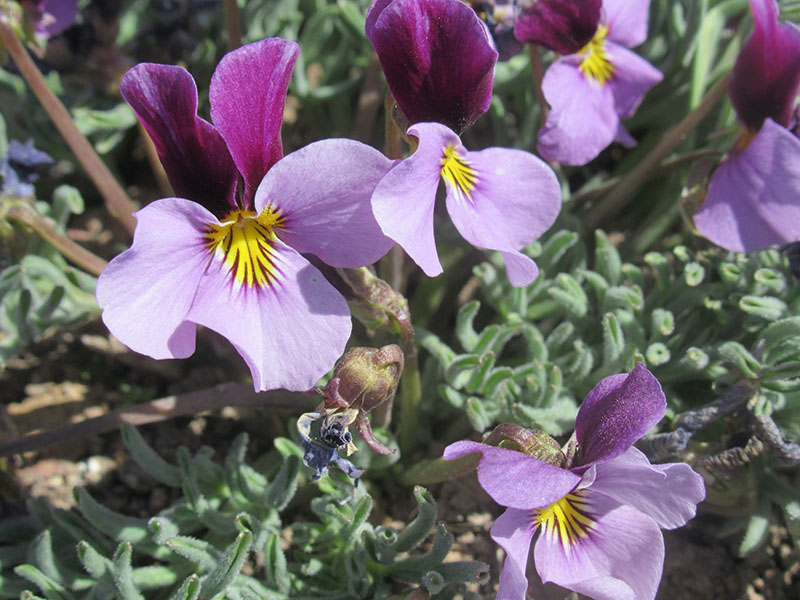
The upper two petals of Beckwithii violets are a velvety purple-maroon, while the
lower three petals are blue-purple. The lower three petals may also be maroon, pink, or white.
Viola beckwithii (Beckwith’s violet) is in the Violaceae family and blooms March to May. This is one of the showiest and most unusual of the viola species in the Great Basin because of its multicolored flowers. Their leaves are basal and deeply divided rather than the usual fan-shaped. The species is named for Edward Beckwith, an Army lieutenant who led one of the Pacific Railroad Surveys through northern Nevada.
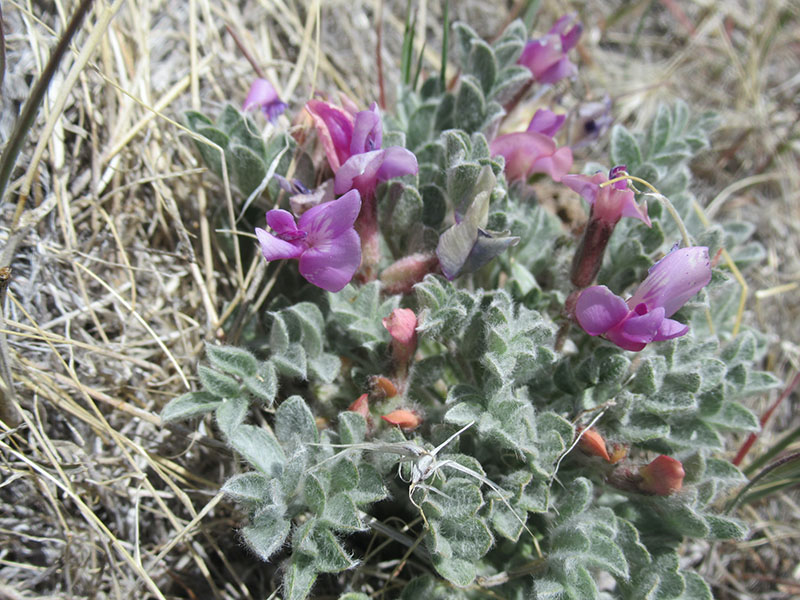
Notice the fine cottony hairs covering the leaves of this Astragalus
purshii plant. They are one of the identifying characteristics of the purshii species.
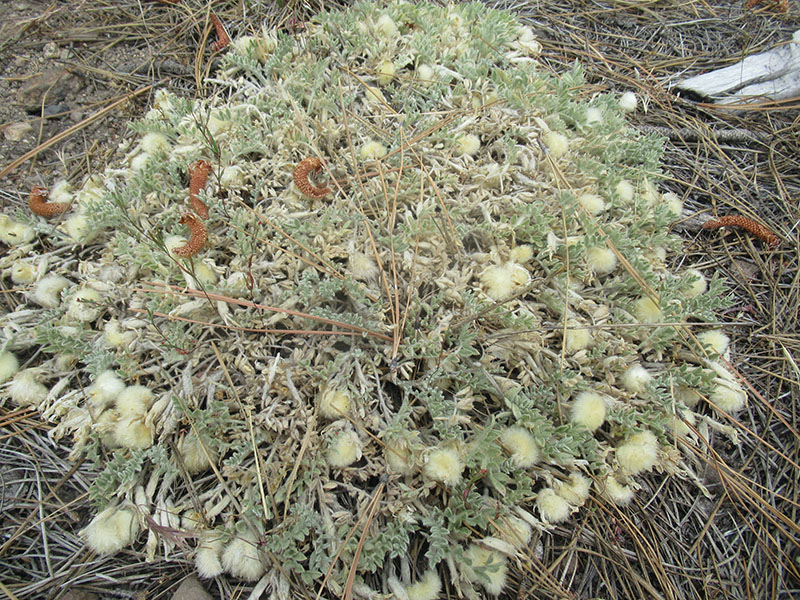
When Pursh’s milkvetch goes to seed, you will see round pods covered with cottony white
hairs that look like cotton balls sitting on the ground, another identifying characteristic.
These pods form in June. This picture was taken at Galena Creek Park.
Astragalus purshii (Pursh’s milkvetch), in the Fabaceae family, blooms from April into June. There are many Astragalus species in the Great Basin, and individual species can be hard to identify. I believe this is A. purshii because of its prostrate growth, three to 17 small, roundish leaflets per leaf, and the fine, cottony white hairs that cover both stems and leaves. It is named for Frederick Pursh, a botanist who helped catalog the plants discovered on the Lewis and Clark expedition.
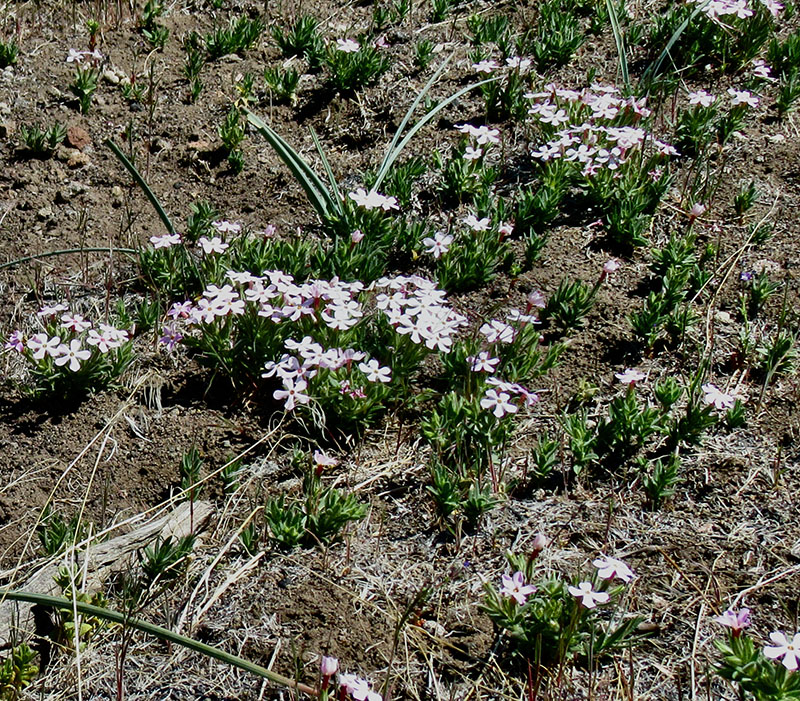
A cluster of Phlox stansburyi putting on a colorful show of blooms.
This species of phlox has a compact growth form, creating a more solid mass of colors.
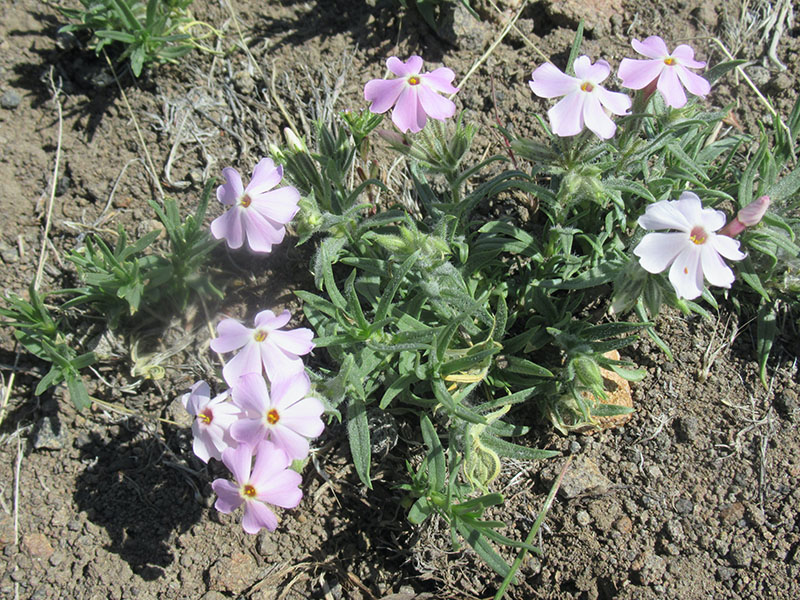
Stansbury phlox flowers have five widely separated petals in white
to light pink. The hairy leaves are linear or lance-shaped.
Phlox stansburyi (Stansbury’s phlox), in the Polemoniaceae family, blooms April through July. Usually they can be found in clusters as they sprout from the same underground, horizontal stem. The one-inch pinwheel flowers have five narrow, clawed petals that are widely separated. The flowers range from white to light pink to dark rose. Phlox means “flame,” in reference to the showy flowers. It was named for Howard Stansbury, an Army engineer who collected it on an expedition to the Great Salt Lake in 1850.
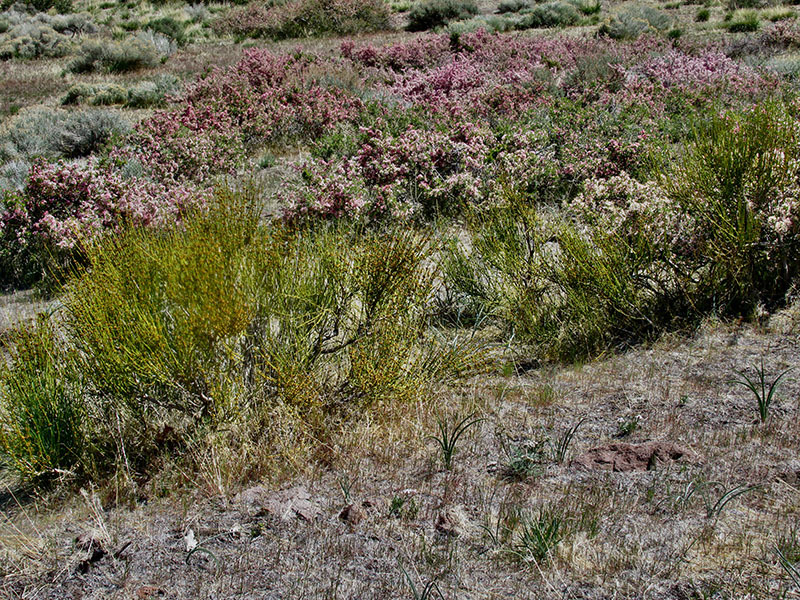
The pink flowers of Prunus andersonii are easily seen when in bloom as the
shrub usually occurs as large clones, individual plants that are connected by underground stems.
By the middle of April the hillsides of Ballardini are swathed in pink from Prunus andersonii (desert peach) a shrub or small tree that thrives on the dry, brushy flats and slopes. This species was named for Charles Lewis Anderson, who discovered and collected many plants in the Carson City area in the 1860s. In the foreground you see Ephedra nevadensis (Mormon tea). The Ephedra species are gymnosperms (cone-bearing) and dioecious (having separate male and female plants).
Reference:
- Blackwell, Laird R., Great Basin Wildflowers A Guide to Common Wildflowers of the High Deserts of Nevada, Utah, and Oregon, 2006 Morris Book Publishing, LLC.
Encouragement From Wildflowers
Article and photos
by Liz Morrow
Once when I was a young girl, sitting in the back seat of the family car heading to a vacation spot, my mother made a comment: “Oh look, dear! I bet you someone threw some of their Lady Bird seeds out their car window on the side of the road.”
Well, that got my attention. My parents explained to me that when Lady Bird Johnson was the first lady she encouraged people to plant wildflower seeds. I thought to myself, what a cool idea.
To this day, when driving or riding as a passenger, I pay attention to wildflowers that grow along the roads. Granted, within our city limits and along our freeways, we really don’t see too many. But on the rural roads and streets that aren’t bordered by sidewalks and gravel, I’ve noticed wildflowers.
Last spring, in 2025, it seemed as if there were a lot of sunflowers along the roads outside of city limits. Stunning, and a joy to see. One of my other favorites is seeing sweet peas blooming along rural roads, often by irrigation ditches. Another charming sight.
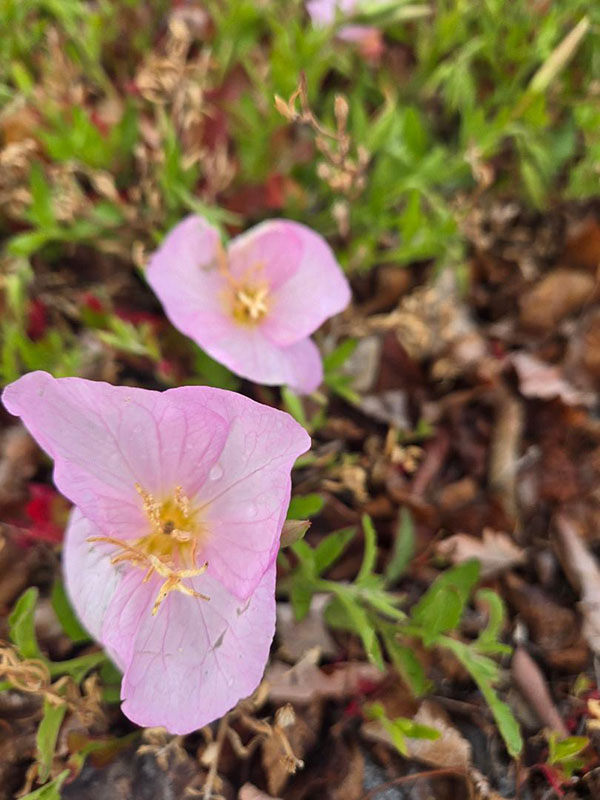
Showy evening primrose,
Oenothera speciosa, widely known
as Mexican primrose, is a vigorous and hardy favorite for landscaping
along parkways Flowers open in the afternoon or evening and bloom time is May through October.
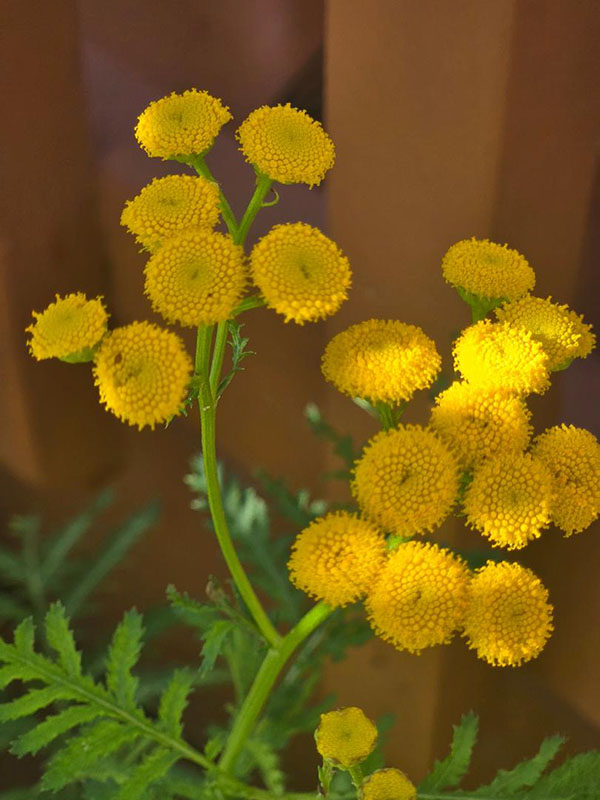
Common tansy, Tanacetum vulgare, from a packet of wildflower seeds.
If you are planting in your garden be aware that it can become invasive as
it reproduces by seeds, rhizomes, and root fragments. It blooms from July to September.
In my first years as a Master Gardener, I volunteered weekly at the Pioneer Center to maintain their flower beds. California poppies were among the plants in the beds. One visit, I noticed a California poppy bravely growing in a crack in the concrete of the building’s courtyard, looking glorious all on its own. It dawned on me that wildflowers have characteristics that can bring encouragement to us humans.
- They’re resilient! As Dolly Parton sang, “Wildflowers don’t care where they grow,” and they flourish in some of the most unexpected places. They grow where they find themselves, even in conditions less than favorable, with nutrition and water not always or consistently available.
- Their seeds can be scattered by the wind! Wherever they land, they germinate, put down roots, send up shoots, and produce blooms. How many times in our own lives have we been placed into circumstances where we had to make do and, well, “bloom where we’re planted”?
- Rarely do they grow alone! Wildflowers do well in groups – they perform as a team.
It’s said that humans are herd animals, like horses, elk, and cattle. I believe that wildflowers are “herd” flowers. Where there’s one, there’s almost bound to be another, or many. They have this ability to share and spread their seeds.
Wildflowers have practical applications as well. They increase and enhance the biodiversity of our open areas, providing a food source to wildlife and pollinators.
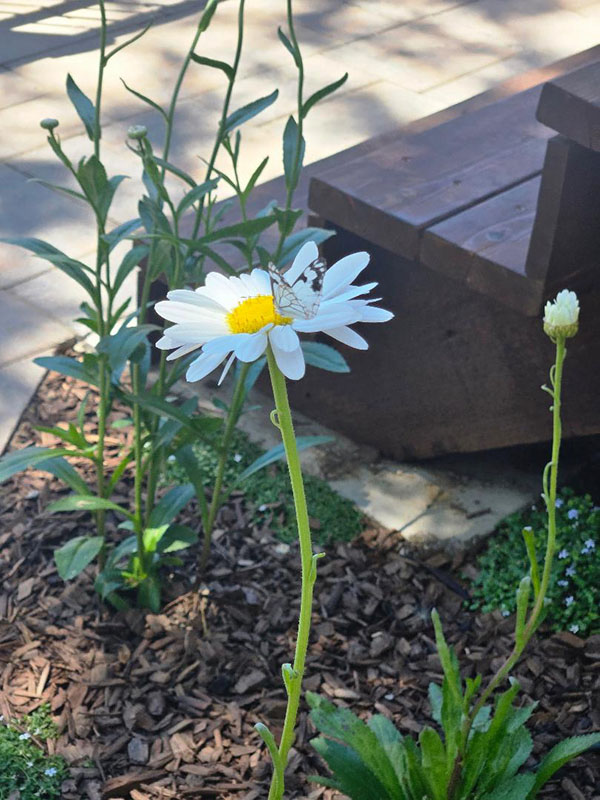
Daisy with a western white butterfly, Pontia occidentalis, visiting.
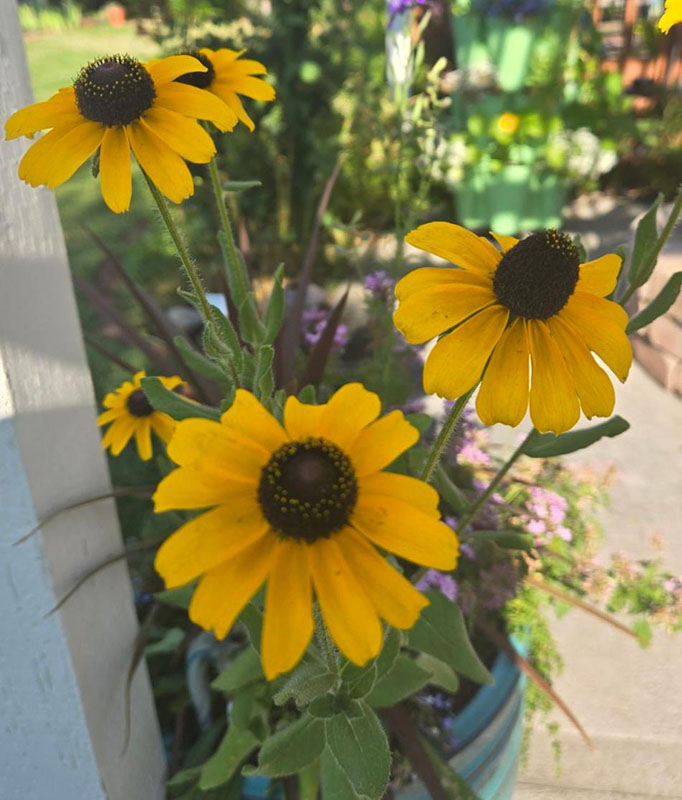
Black-eyed Susans, Rudbeckia hirta, from a packet of wildflower seeds.
Black-eyed Susans are great for pollinators and have a long bloom time, from June through
September. Their seedheads provide off-season interest in the garden and will attract seed-eating birds.
Their roots help stabilize fragile soils in areas prone to high winds and erosion, they help filter pollutants that might contaminate groundwater and streams, and they add nutrients to the soil. As hardy plants adapted to their area, they require minimal care and little in the way of chemical fertilizers and pesticides.
I’m sure there’s a plethora of other critical roles for wildflowers, but for me, the beauty and joy they provide are enough.
Greenhouse 2026: The Magic Beans
by the Greenhouse Leads: Cindy Edwards,
Milan Slikkerveer & Diane Miniel
The greenhouse growing season will be well underway by the time you read this article. The greenhouse leads, Cindy Edwards, Milan Slikkerveer, and co-lead Diane Miniel, have met for months to plan for Greenhouse 2026. We have washed pots and trays, chosen what we wanted to grow, submitted seed requests, planned the seeding schedule, and cleaned up the greenhouse.
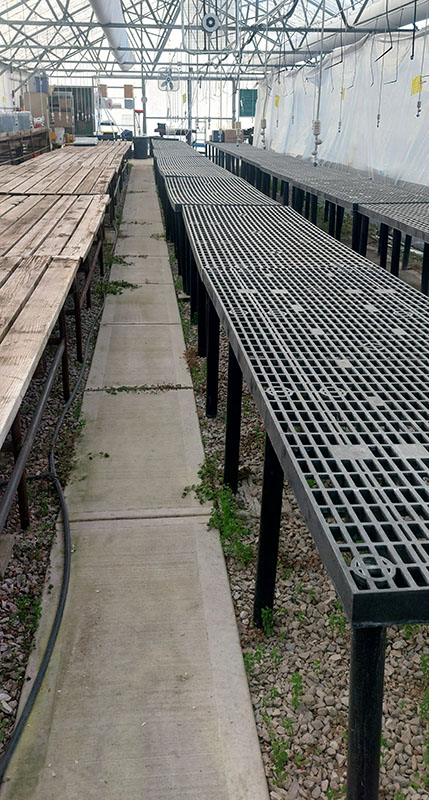
A clean and empty greenhouse ready to start the 2026 growing season.
Photo credit Cindy Edwards.
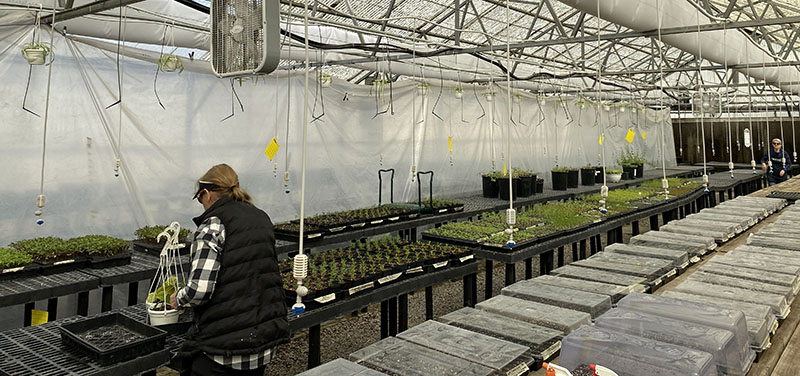
By late February to early March the greenhouse is coming alive. Here a
Master Gardener volunteer is “up-potting,” or transferring a growing seedling into a larger pot.
Photo credit Diane Miniel.
We are looking for energetic and focused individuals to participate at least twice a month and to be available to participate in the annual plant sale May 15 and 16, 2026. The plant sale is one of our biggest fundraisers, and helps support our whole program. It takes a lot of dedicated volunteers to pull off a successful growing season and sale.
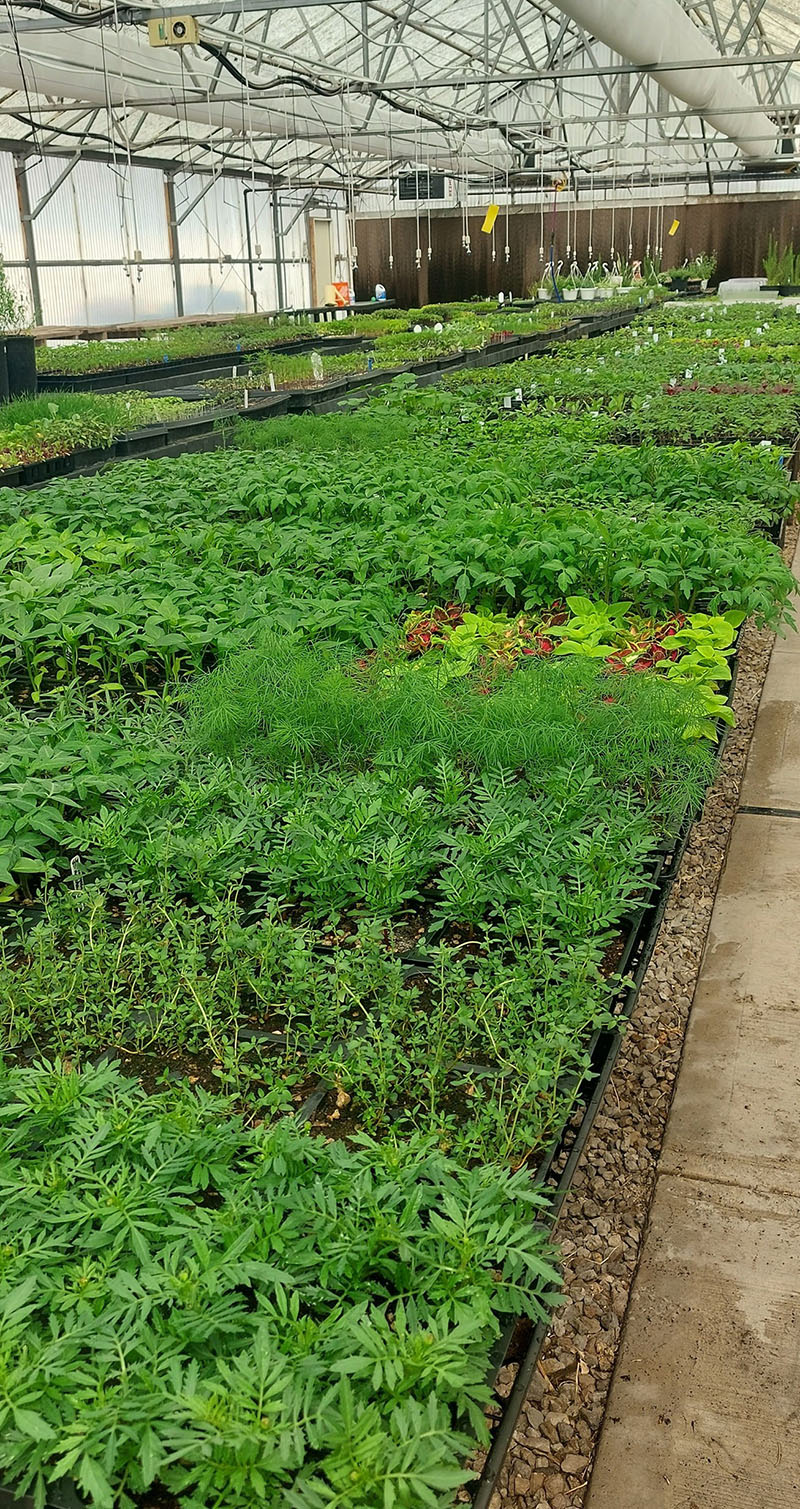
After months of Master Gardeners’ diligent work, plants are ready for the May plant sale.
The greenhouse also grows plants requested by the leads of other Master Gardener projects.
Photo credit Cindy Edwards.
Here are the key expectations we have for our volunteers:
- Punctuality & Reliability: Be on time for your shift. No late entries will be admitted.
- Ability to Handle Physical Demands: Be prepared for heat, humidity, dirt, standing for long periods, bending, lifting, carrying, and repetitive motions.
- Willingness to Tackle a Variety of Tasks: These range from weeding, basic seeding, planting, pruning, repotting, cleaning, and assisting with our annual sales or events.
- Attention to Detail: Follow specific instructions for plant care and the seed packet (e. g. identifying types of growing medium for seeding, transplanting and perennial plants, watering, and pruning after being trained).
- Willingness to Learn: Be open to training, willing to learn specific care, and ready to adapt to new protocols and plant needs.
- Good Attitude & Teamwork: A positive attitude, good communication, and teamwork are essential.
- Appropriate Gear: Wear comfortable, durable clothing and shoes. Bring sunscreen, a hat, and weeding tools, as needed.
Being a Master Gardener greenhouse volunteer has its rewards. We receive a huge sense of accomplishment watching the greenhouse go from empty to rows of seeded flats, then transplanting the seedlings to pots where they mature and finally grow into strong and healthy starts ready for sale. Knowing you were part of the team that made it all happen is one of the biggest rewards.
Then there’s knowing that our efforts have contributed to helping sustain the Master Gardener program. Along the way, you learned to seed and propagate from vegetative cuttings, care for plants the greenhouse way, and identify insects. You’ll make new friends and have fun being in a calming greenhouse environment with like-minded volunteers. We hope you will feel the sense of awe that those of us that are seasoned volunteers experience every year.
Look for pictorial updates in future newsletters.
Four Springtime Steps to Ripe Tomatoes
By Beth Heggeness
Are you already dreaming of biting into a juicy home-grown tomato this year? I am. As a kid, I totally under-appreciated tomatoes, because in Ohio, my farm-raised gardening relatives easily produced big slices of beefsteak tomatoes on plates for hamburgers, or cut up as a salad side, sprinkled with salt and pepper.
Producing the same ripeness, juiciness, and taste is much more difficult in my own garden. Our Northern Nevada growing season is shorter than Ohio’s and subject to extremes of hot, cold, dry, and windy. Still, our climate has warmed and the advent of products like Wall O’ Water frost protectors and floating row covers has made tomato-growing a bit more manageable. Throughout 2026, I hope to offer some useful advice about tomato-growing, both the basics for novices and some tips for seasoned veterans.
1. Getting Ready
Snow or rain in February, as we recently experienced, makes it easier to start preparing the garden for spring planting. The soil has gotten a good drink, and it’s cool enough to keep it from drying out too fast. These are perfect conditions for preparing your summer tomato beds, so let’s get to work!
Choose a location that gets at least four to eight hours of sun, if possible in an area where you didn’t plant tomatoes or other solanaceae crops (peppers, potatoes, eggplants, and tomatillos) the previous year. Members of the same botanical family are often vulnerable to the same diseases and pests and make heavy use of the same nutrients, so it’s best to move them around.
Tomatoes like medium-textured, fertile, soft, well-drained soil. Sadly, Northern Nevada soils are typically light and sandy, or heavy with clay, and lacking in organic material. If that describes your garden, you can improve it by adding organic material such as compost, aged manure, leaf mold, or peat moss, and a “complete” fertilizer before planting. A complete fertilizer contains the three primary plant nutrients essential to plant growth: nitrogen, phosphorus, and potassium. Planting in raised beds or containers makes soil-building and drainage a little bit easier.
Before working the soil, make sure it is moist but not soggy. Use a shovel, tiller, rake, or, ideally, a digging fork to loosen the top one to two inches of soil and break up any clods. Deep rototilling is not recommended because it disturbs the soil structure. Remove and dispose of any debris and roots of diseased crops from last year. Debris from clean crops can be composted or left in the garden, at least until mid-spring, to provide shelter for overwintering beneficial insects.

Beth using a digging fork to loosen
the top one to two inches of her planting area.
Photo credit John Heggeness.
Loosening the soil is likely to encourage weed seeds to germinate, so let that happen as part of the bed preparation process. Water the bed well, wait a week or two, then work it again to kill those tiny weed seedlings. Monitoring garden weeds and interrupting their early life cycle makes eradicating them much easier,
Tomatoes grow best in slightly acidic soil with a pH of about 6.0 to 6.5, which can be another challenge in Northern Nevada, since many native soils are alkaline, with a pH of 7.0 or above. Getting a soil test for your bed can eliminate guesswork about what nutrients and adjustments for pH are needed. The University of Nevada Extension Master Gardener help desk (775-784-4848, Tuesday, Wednesday, and Thursday from 10 a.m. to 2 p.m.) can provide a referral list of soil testing labs and advice about collecting and preparing a soil sample. Send the test in early March, because getting results may take six to eight weeks.
Soils differ widely in their content of plant nutrients. Adding organic material to your tomato and other garden beds is always good practice to improve soil structure. However, organic matter is not necessarily a balanced fertilizer. Research has shown that supplementing garden soil for tomatoes with both organic matter and commercial fertilizer may be the most beneficial for healthy and productive tomato plants. All commercial fertilizers are labeled by the percentages of N-P-K-- nitrogen (N), phosphorus (P), and potassium (K), the three essential plant nutrients. Tomatoes need all three, but prefer fertilizer relatively low in nitrogen, high in phosphorus, and medium to high in potassium. Too much nitrogen, which supports the growth of foliage, could result in vigorous vines and little fruit.
The fertilizer label will give a ratio of those nutrients in numbers, like 5-10-5 or 10-10-10, which represent percentages of that nutrient per 100 pounds of the fertilizer. Apply to the garden bed before planting according to the results of your soil test, at the rate directed by the label.
2. Choosing Varieties and Starting Seeds
Starting seeds is not mandatory, but all gardeners like to experiment. If you’re starting your own seeds, you will need starter trays, pots, a grow light (very highly recommended for healthy, sturdy seedlings), heating mats, and seed starting mix. A helpful guide to equipment may be found here: https://extension.usu.edu/permaculture/files/SeedsHandout-OY-Mar2017.pdf.
The seed packet will include useful horticultural information, including the time it will take for the variety to produce a harvestable crop. First, check the USDA growing zone for your ZIP code at: https://planthardiness.ars.usda.gov/ This will tell you when you can reasonably expect to be able to put your tomato plants into the ground.
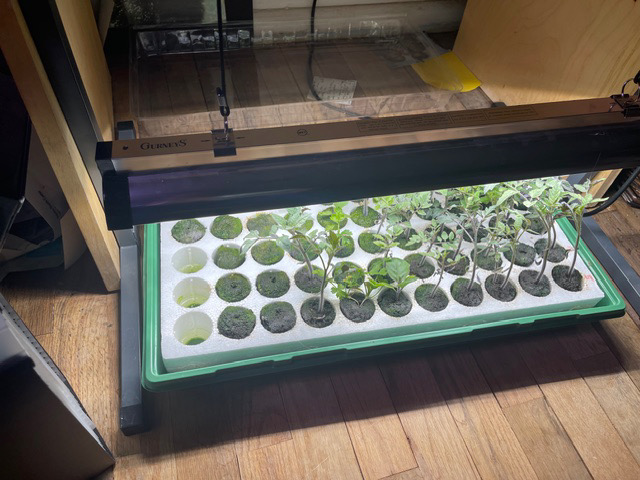
A seedling tray with an adjustable grow light.
Photo credit Beth Heggeness.
In Northern Nevada, the tomato growing season is typically from mid-May to mid-September (at higher elevations, it can be quite a bit shorter, which is why you need to know the zone for your location). Maturity dates for vegetables like tomatoes that are typically transplanted, not direct-seeded, are calculated from time of transplant. From mid-May to mid-September is roughly 120 days, so varieties maturing in under 100 days from transplant are likely to be more successful.
Then, consider whether you have the space and support for “indeterminate” varieties (vining types that will continue to grow and produce throughout the season) or if you prefer “determinate” varieties (plants that grow to a specific size and tend to ripen at about the same time). Gardeners who grow in containers or growers who like to can their produce may prefer the determinate type.
Many “tried and true” varieties are available for sale, in seed packets or as plants, at local nurseries and stores. Early Girl, Ace, Celebrity Plus, Cherokee Purple, Roma, Sweet 100, and many others have proved successful here. The University of Nevada Extension Master Gardeners and other nonprofits have plant sales in May that may feature new varieties to try. Local home gardeners and Master Gardeners have reported the following favorites: Berkeley Pink Tie Dye (70 days), Blush (65 days), Evergreen (72 days), Purple Bumblebee cherry tomato (65 day), Costoluto Fiorentino (80 days), and Tiny Tim cherry (49 days and it can be grown in a 6” to 10” pot).
3. Watering, Weeding, Frost Protection
April is the time to tune up your irrigation system, if you have one. Tomatoes like plenty of water, one to two inches per week, but they also like a bit of dry time between waterings. Whether you have an automatic drip, use soaker hoses, or hand water, avoid overhead watering for the best results. Keep the baby weeds from turning into a big problem by hoeing regularly. Do not ever let those weeds produce seeds! Some gardeners like to put down a layer of black plastic mulch to warm the soil and keep weeds under control. When planting into black plastic, cut a hole big enough so the stem of the plant does not touch the plastic.
Some gardeners like to use row covers, or Wall O’ Water teepees to get a two- to three-week head start on tomato production. April weather is unpredictable, so check forecasts to protect young plants from late spring frosts.
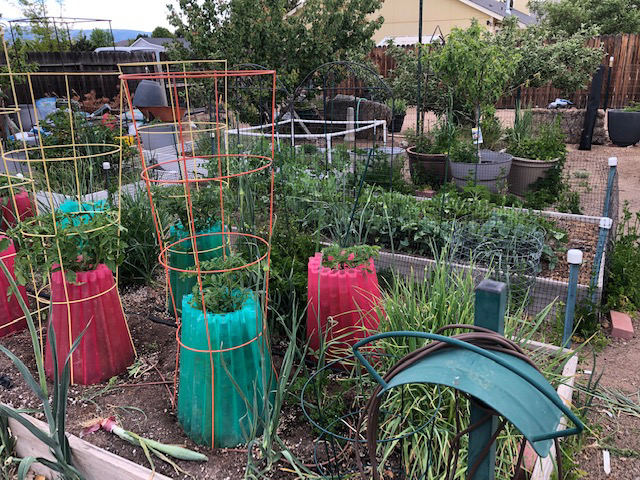
“Wall O’ Water” teepees help protect young tomato plants from late frosts.
Photo credit Linda Fulton.
Before setting out any indoor seedlings, acclimatize them to the outdoor environment for seven to 14 days, a process called hardening off. Set your plants outside when temperatures are 45-50 degrees F (bring them back in if frost threatens). Initially, place them in a sheltered, shaded location for two or three hours. Gradually increase the amount of outside time and sunlight over the two-week period. The last few days the plants can spend 24 hours outside. Do not allow them to wilt, but do not overwater.
4. Planting
Once hardened, the plants can go into the garden. Tomato plants have a superpower of sorts. They can produce roots all along their stems, so your seedlings will benefit from being planted deeply, up to about six inches. Trim off lower leaves, if needed, leaving three to four sets of true leaves and set them in. If your tomato plants are a bit leggy, you may also dig a shallow trench, about four inches deep, and plant them sideways. Again, trim off any leaves from the stem buried in the soil. Plants should be spaced about 2 ½-3 feet apart and stakes or cages placed at the time of transplant so the roots won’t be disturbed later. Indeterminate plants need more support as they will continue to grow upward throughout the season.
Resources
- University of Nevada Reno Extension, College of Agriculture, Biotechnology and Natural Resources. “Getting Started with a Vegetable Garden.”
- Utah State University Extension. “How to Grow Tomatoes in Your Garden.”
- Oklahoma Cooperative Extension Service. “ Improving Garden Soil Fertility.”
- Utah State University Extension. “Start Your Own Seedlings Indoors.”
- Penn State Extension. “Hardening Transplants
Getting Spring Started Early (Safely)
Article and illustration by Rene King
Last year I wrote about extending the fall garden, listing many strategies and tips to stave off cold-weather damage and make the growing season last a bit longer. Extending the spring season relies on many of the same techniques, but the point is getting the garden growing earlier, not adding more time in the fall.
Our actual growing season in Washoe County can be unpredictable, but it almost always involves harsh weather conditions at either end (and in the middle as well -- think 100-degree temps when tomatoes are trying to set fruit). Jump-starting your plants from seeds indoors while it’s still freezing outside will give you and your future harvest an opportunity to thrive and (figuratively, of course) hit the ground running sooner. Plus, nothing gets a gardener’s juices flowing like seeing snow on the ground outside while tender seedlings are sprouting healthy roots and leaves indoors.
You can use an actual greenhouse for this, if you have one, or start seeds indoors under timed grow lights. But the need for protection doesn’t stop when it’s time for those hardened transplants to go into the ground.
Because late frosts are inevitable, you will have to get creative with protecting your plants. Wall-of-Water plant protectors (cones of water-filled tubes erected over the plant) are a popular solution, but there are simpler and cheaper ways to get a plant through a cold night. Milk jugs with the bottoms cut off can be placed over small veggie plants. Overturned baskets and buckets, weighted down with rocks, can shelter bigger ones. Just be sure these homemade “cloches” are big enough that foliage doesn’t touch the sides, where it may get nipped, and don’t forget to remove them when the sun is up.
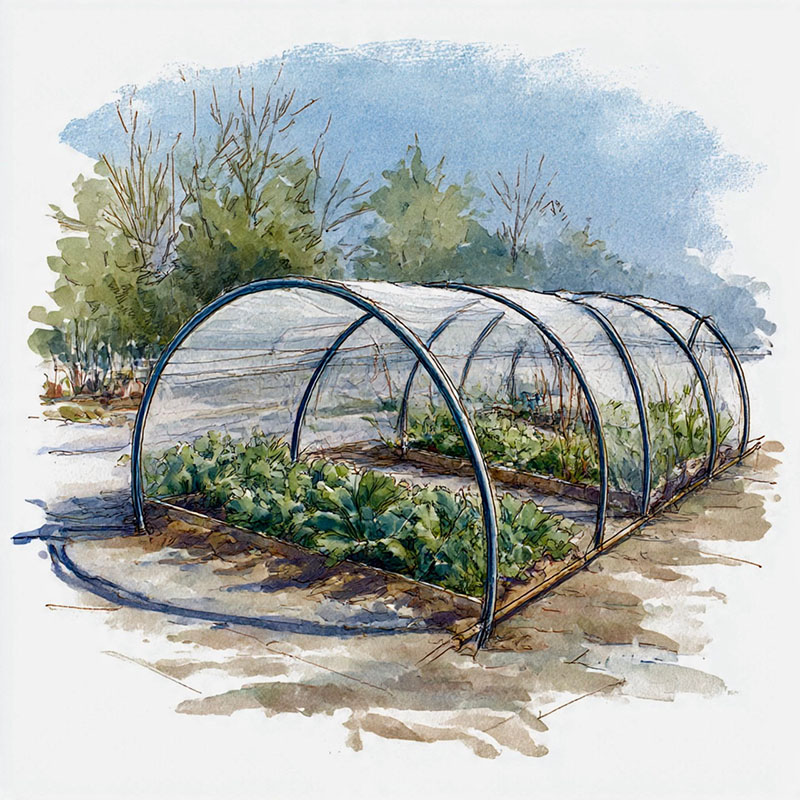
A more elaborate technique, as useful in the spring as it is in the fall, is a row cover, as pictured below. This is a temporary greenhouse erected over a garden row, using hoops made from heavy-gauge wire or PVC pipes and covered with clear plastic or translucent garden row covers. This material comes in various weights, from a light gauze to protect from light frost to a heavy-duty material that can protect plants even if temperatures drop into the mid-20s. Use garden staples to pin down the material.
Want even more protection? Researchers at Colorado State University strung Christmas lights along the hoops in their row covers (these need to be standard bulbs, not LED lights, because heat is the point). One 25-light string of C-7 lights gave 6 to 18 degrees of frost protection to a 4’ –by-5’ raised bed. And the garden looked festive as well.
These “hoop house” solutions are more work and more expensive, but they can stay in place until the threat of frost is truly over, and have the added benefit of keeping out animals and insect pests.
A cheaper (but not necessarily less labor-intensive) method is layering the garden with straw (not hay, which may bring in weed seeds). Pile the straw loosely between your rows. When frost threatens, rake it up onto your young plants. When the threat passes, you can brush the straw back into the aisles. If your garden plot is in a windy area, it may be necessary to cover it with netting to keep the straw from blowing away.
Another tip: If you’re trying to protect tomato transplants, don’t stake or trellis them until the frost threat is truly over. Otherwise it will be difficult to cover them with straw. They will grow happily along the ground until spring is established.
Leave the straw between the rows to discourage weeds through the growing season. As it decomposes, it will also enrich your soil for the next season.
Plants can also be harmed by excessive heat buildup on sunny days, especially if you’re using plastic sheeting instead of commercial garden covers, which can admit some air through the fabric. Pay close attention to weather forecasts, and keep a thermometer inside your outdoor hoops or greenhouses.
Allow your plants a little breathing room with manual venting if needed, pulling the cover aside on warm days. It can easily be draped back over the hoops when the threat of frost returns.
Raised beds also help extend the season by maintaining slightly higher temperatures compared to the surrounding ground. Raised beds cool down faster than flat ground in cool weather, which is why it’s beneficial to mulch winter crops like leeks and carrots to keep them growing into the winter.
Raised beds also warm up faster in the spring, because of better drainage. That encourages quicker germination of direct-seeded crops, like radishes, beets, salad greens, peas, and beans. Those beds will warm even faster if they are oriented east-west, giving the tops and sides of the beds maximum exposure to the sun throughout the day.
Springtime weather protection techniques are designed to insulate plants from the cold, trapping heat that rises from the soil and forming a protective barrier to your seedlings. Early planting indoors is an obvious solution for tender vegetables that require a long growing season to reach maturity. But it isn’t always feasible for plants that dislike transplanting, or for gardeners without the indoor space for seedling trays or grow lights.
Still, many vegetables like peas, carrots, beets, lettuce, and other greens are hardy enough to be sown directly in the ground even when frost is still possible. Providing them with warmer soil will encourage them to germinate quickly and could add days, even weeks, to your growing season.
References:
- https://ucanr.edu/sites/default/files/2011-01/71329.pdf
- https://gardening.ces.ncsu.edu/2020/05/frost-and-freeze-protection-for-vegetables-2/
Joy in Small Spaces
photos & article by Deb Barone
Watching things grow, whether people or plants, is a wonder and a joy!
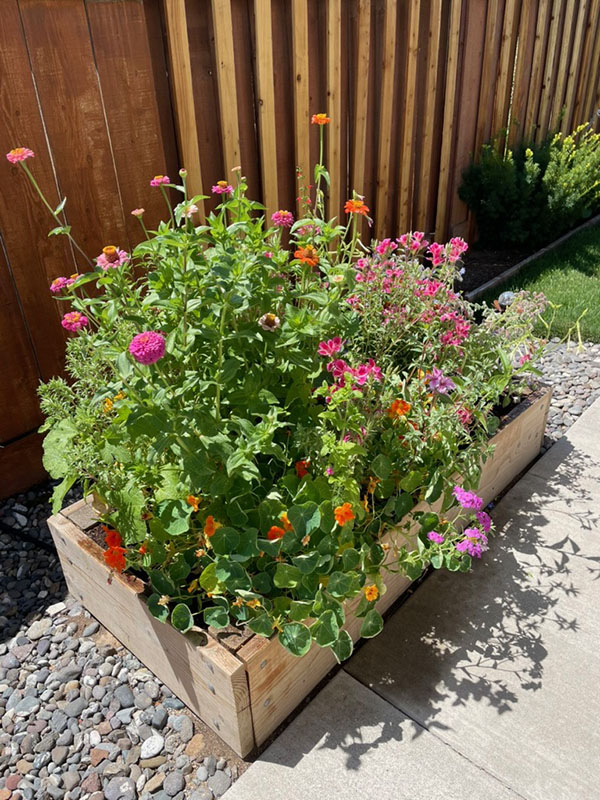 This was planted in April of 2024 with the Botanical
Interests flower mix “bring home the butterflies,” assorted species.
The past three years, I’ve used a small above-ground garden bed in my hot, full-sun side yard to plant a mixed seed pack of pollinator-friendly plants. For the cost of about $5, with garden soil fed in the fall with manure, I’ve had great results.

A honey bee visiting a cosmos flower, Cosmos bipinnatus. Notice the full
pollen sacs on its hind legs. Pollen is used by honey bees primarily as a source of protein.
The first year I purchased a bee-friendly seed pack. In April of 2024 I planted a flower mix from the Botanical Interests seed company called “bring home the butterflies,” and the next April I planted a Botanical Interests flower mix called “hummingbird haven.” Every mix attracted a multitude and variety of bees. The butterflies and hummingbirds were also attracted to each variety but with less vigor than the bees.
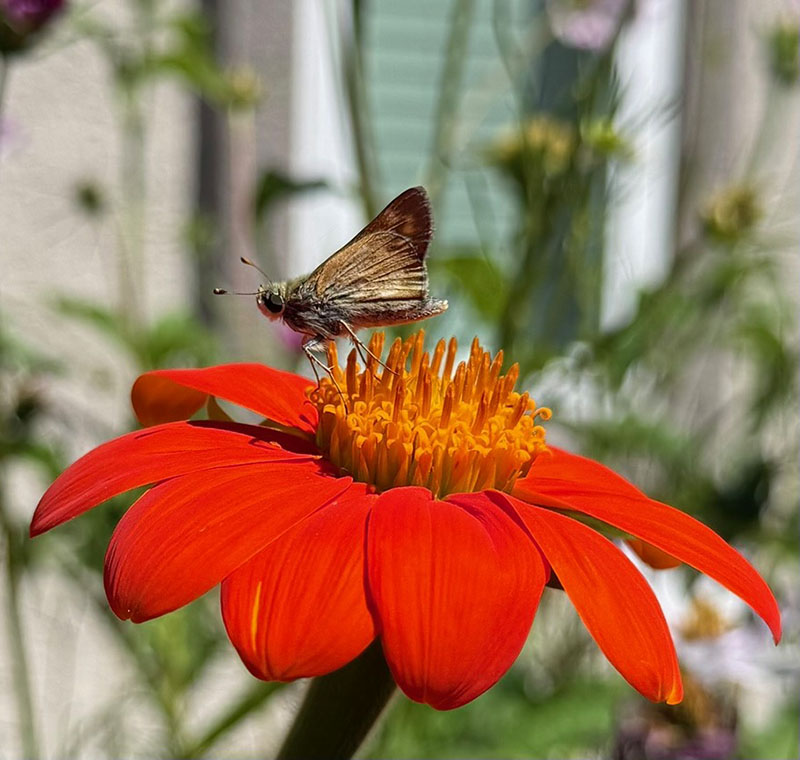
A skipper butterfly visiting a zinnia flower, Zinnia spp. Skipper
butterflies belong to the Hesperiidae family. They are small butterflies and get their name from their
rapid, darting flight pattern, which makes them appear to be skipping about the flowers.
I placed 1/4” soaker hose in rows up and down the bed for watering, secured with u-shaped pins. The bed was watered three times a week for 15 minutes each day during the hottest part of the summer.
My family watches that little bed of flowers more than any other plant in the garden. One never knows what flowers will appear on any given day or what pollinators you will see while just standing there observing the buzz.
Happy Growing!
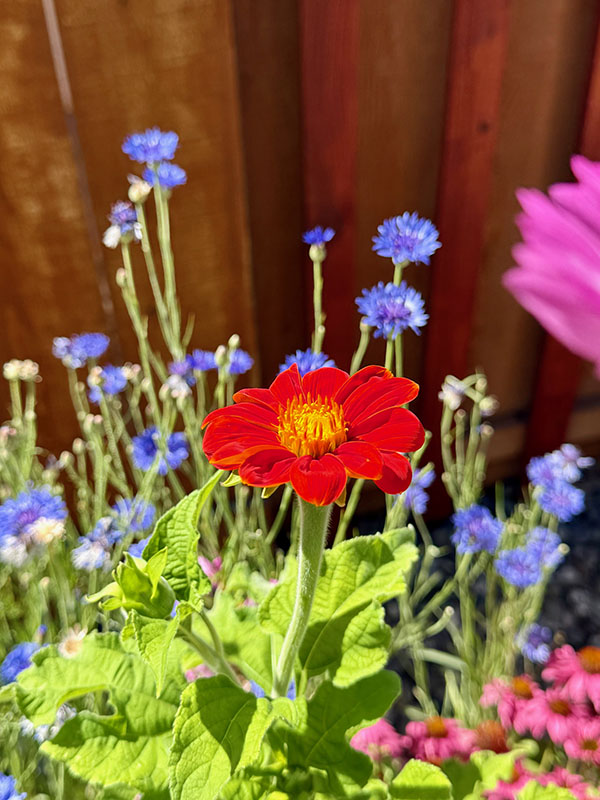
A colorful zinnia flower with blue bachelor
buttons, Centaurea cyanus, in the background.
The Nevada Blue Rooster: A Garden Parable
Article and illustrations by Diane Miniel
Many years after the Little Red Hen made her bread from wheat seeds, her distant relative, the Nevada Blue Rooster, was inspired to plant fresh greens to eat with Red Hen’s wheat bread, made from a recipe passed down over the generations.

Nevada Blue Rooster, a distant relative of the Little Red Hen.
Never having planted Swiss chard, Nevada Blue decided to simply follow the directions on the outside of the seed packet. In the case of Swiss chard, a favorite of both roosters and hens, instructions were also inside the packet.
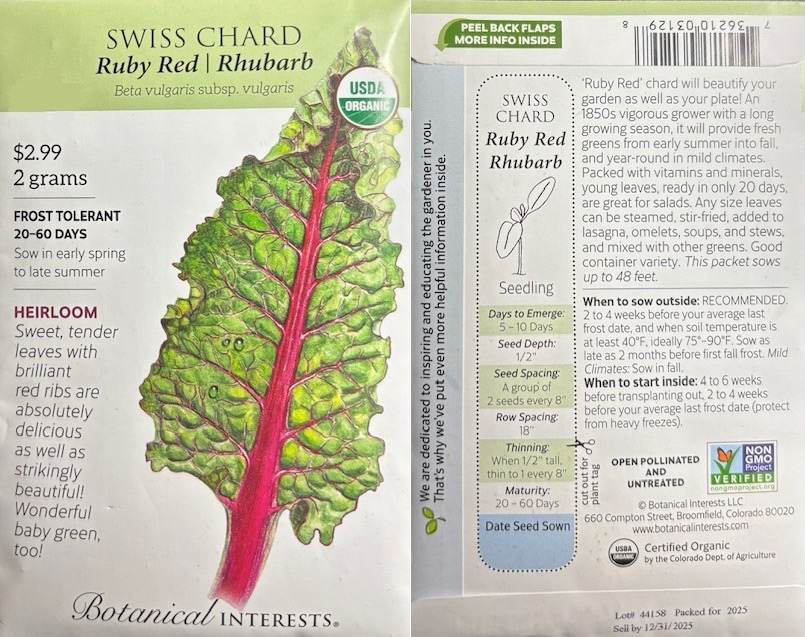
Front and back of Swiss card seed packet.
A rooster and chicken favorite.
Big Blue knew that seeds were usually good for three to five years. Therefore, he checked how old the seed packet was to make sure the seeds would grow.
At the bottom on the back of the seeds, the seed packet said:
Packed for 2025
Nevada Blue also knew timing was important if the Swiss chard was to be ready to eat with the wheat bread. The seed packet said:
Maturity: 20 – 60 Days
Nevada Blue figured he needed to plant the seeds at least 20 to 30 days before the wheat was harvested in July. He had seen red hens, descendants of Little Red herself, planting the winter wheat seed in mid-September for a summer harvest. It was already mid-May, so after reading the seed package, which said:
Soil: Average, well-drained, and rich in organic matter
Exposure: Full sun to part shade
Nevada Blue marked off a small plot near the growing wheat bed that had at least six hours of sun a day and a bit of shade in the hot afternoon and scratched at the soil to get it ready for planting.

Lazy Cat’s great-great-grand-cat.
Cat and Dog helped Nevada Blue Rooster to ready the soil. Lazy Cat and Lazy Dog, their great-great-grandparents, had taught them Red Hen’s lesson that he who wanted to eat the bread had to share in the work to produce it. While Cat and Dog preferred lettuce to Swiss chard, they enjoyed a little variety now and then.

Lazy Dog’s great-great-grand-dog.
Before planting the chard, Nevada Blue noticed there were special sowing instructions inside the seed packet, which said:
Special Sowing Instructions: To hasten and improve germination, soak seeds for 2 to 24 hours before.
Thus, Nevada Blue Rooster plopped the seeds into one of the water bowls in the yard to soak.
Once the garden bed was ready, and the seeds soaked, he consulted the seed packet again. It said:
Seed Depth: ½"
Seed Spacing: A group of 2 seeds every 8”
Between Dog and Cat, they marked off eight inches, and Nevada Blue Rooster pecked a half-inch hole and dropped two soaked seeds into it. Then Cat walked over the seeds, covering them up with soil.
The inside packet then said:
WATER: Keep evenly moist. Swiss chard will tolerate some drying but drought stress impacts flavor and may cause premature flowering (bolting).
Thus, Nevada Blue Rooster, Dog, and Cat took turns making sure the Swiss chard soil stayed moist after planting. Dog enjoyed getting wet and shaking off the water droplets on the garden bed, and even Cat tolerated dipping her paws in the water bowls and flinging the droplets at the Swiss chard. Nevada Blue Rooster often supervised by crowing, “Cock-a-doodle-doo!”
Soon, the little chard seedlings poked out of the soil. Nevada Blue Rooster carefully followed the instructions that said:
Thinning: When ½" tall, thin to every 8”
Thus, he and his garden crew carefully thinned by eating the smaller of the two seedlings planted together, leaving only one plant every eight inches. “Meow!” “Woof!” (which means “Yum! Yum!”)
When the wheat was harvested, milled into flour, and baked into bread, Nevada Blue and his garden team again followed the seed packet information:
Harvesting: Pick up to 1/3 of the outer leaves as needed and let more leaves grow from the center of the plant; or harvest the whole plant 2” above the ground, and it will grow back.
Harvesting the whole plant 2” above ground was easier for Nevada Blue’s crew to do.
When the red hens served the bread, Nevada Blue’s crew brought the Swiss chard greens, and surprise, surprise! The Lazy Rat’s great-grand-grand-rat brought a variety of lettuce leaves he had grown, which both Cat and Dog preferred.

Lazy Rat’s great-great-grand-rat.
All enjoyed the bread and greens that their labor had made possible.
References:
- How to draw a dog: https://www.youtube.com/watch?v=KPkYp0r8yks
- How to draw a rat https://www.youtube.com/watch?v=0NTMtJ6WVMQ
- How to draw a rooster https://www.youtube.com/watch?v=FcIW3NeJqQE
- Page-Mann, Petra. “How Long Do Seeds Last,” Cornell Small Farms Program. 13 Jan. 2020. https://smallfarms.cornell.edu/2020/01/how-long-do-seeds-last/
- USDA Hardiness Zones: https://planthardiness.ars.usda.gov/
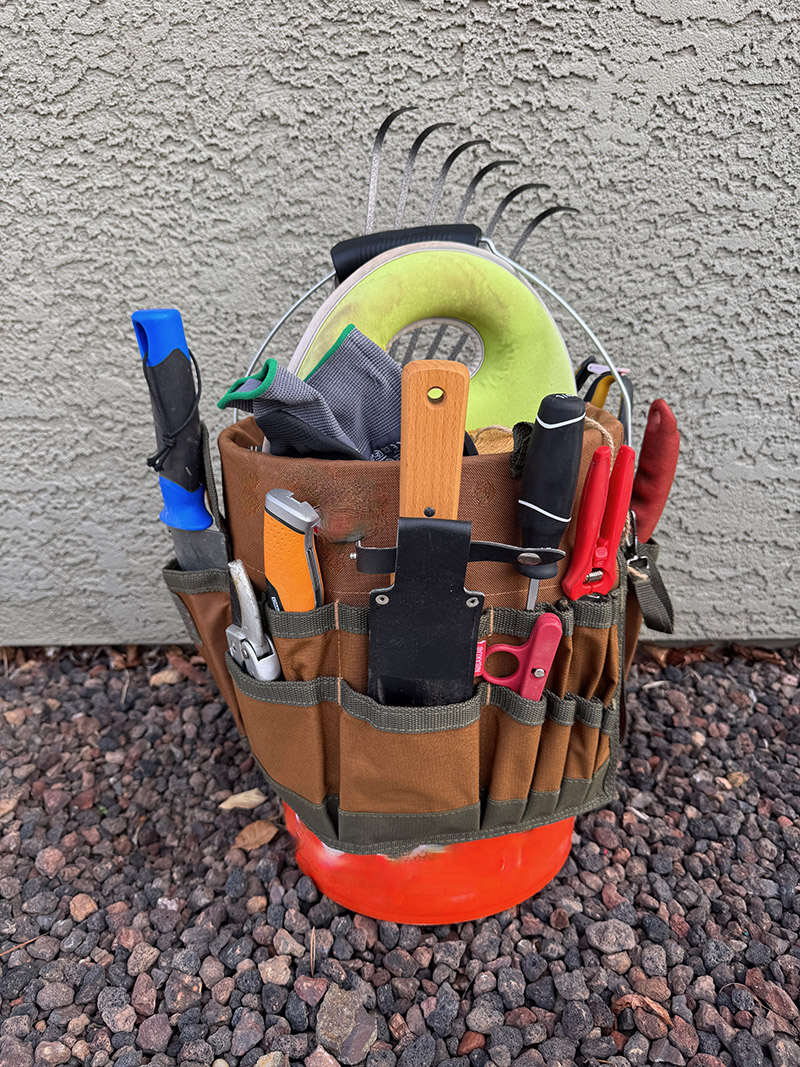
Bucket Tool Organizer
Article and photo by Joanne McClain
One of the best gifts I have given to myself is this bucket tool organizer. A fellow Master Gardener recommended it. I had so much fun filling it and buying a few new tools to do so. I am ready for the new growing season and cannot wait to use it!
Spring Color With Violas and Pansies
Article and photos by Joanne McClain
Violas and pansies can be set outside about a month before the last frost date to give your garden an early burst of color. Plants may start to appear in stores in early March. Violas and pansies can easily withstand a light frost. They can survive temperatures down to 25 degrees as long as the low temperatures are not prolonged.
Viola is a genus containing over 500 species. The heirloom Viola Tricolor (common name Johnny Jump-up) is a purple, yellow, and white European wildflower. Violets, violas, and pansies are part of the Violaceae (violet) family. Pansies (Viola X wittrockiana) are hybrid plants that were developed from the Viola Tricolor back in the 1800s. There are over 250 cultivars of pansies. Interestingly, African Violets are not violets but are in the genus Streptocarpus.
What is the difference between a viola and a pansy?
- The main difference is the size of the flower. The pansy flower can be over two inches across while violas are under an inch.
- Violas are more resistant to frost.
- Pansies require more fertilization.
- Violas have more blooms than pansies and tend to be a lower, more compact plant.
- Pansies typically have the distinctive “face” versus the lines that are common on violas.
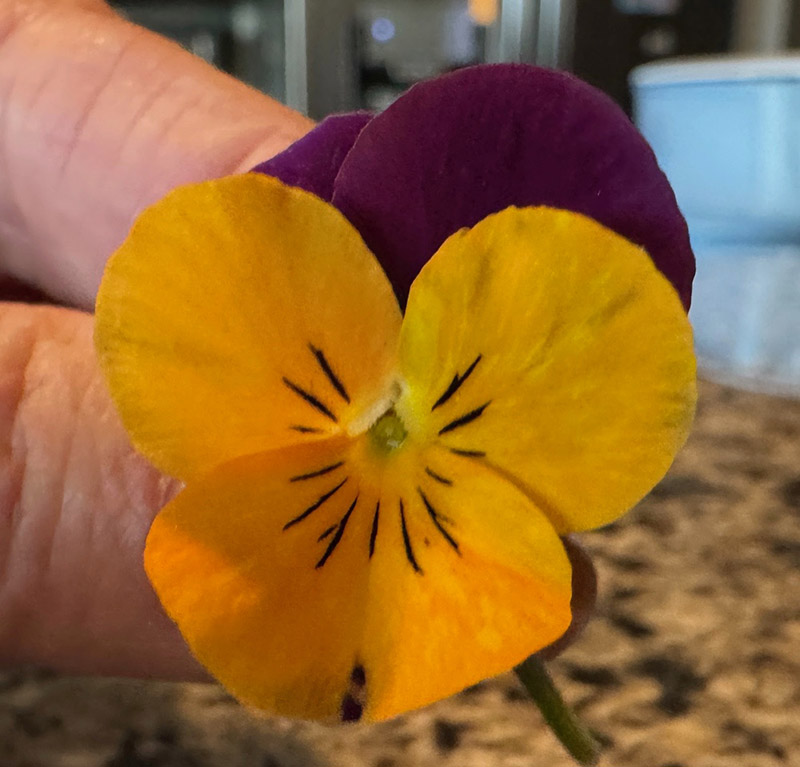
Viola flower featuring the characteristic lines on the petals.
Violas have smaller flowers than pansies and the plant is more compact.
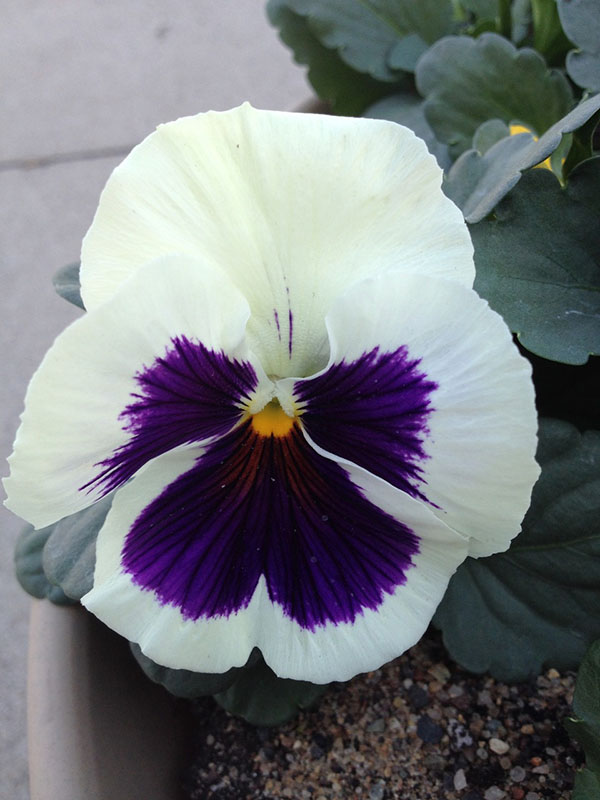
Pansies have larger flowers, with “faces”of color at the base.
The patterns on both flowers act as nectar guides for pollinators.
Seeds
Violas and pansies easily reseed. Their seed pod splits into three boat-shaped sections. As the sections dry and shrink, the seeds are squeezed and shoot out into the air. This process is called ballistic dispersal or explosive dehiscence. This explains why you will often see violas pop up in your lawn or garden far from where they were planted.
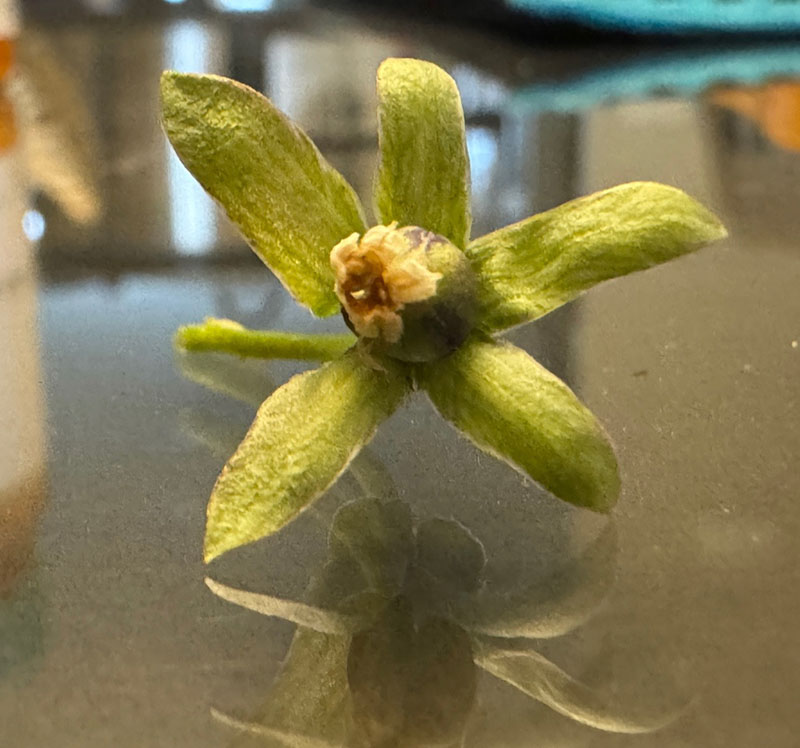
Viola seed pod just starting to dry in the center. The green structures below the
drying seed pod are bracts. One of the functions of bracts is to support seed pods after the petals have fallen off.
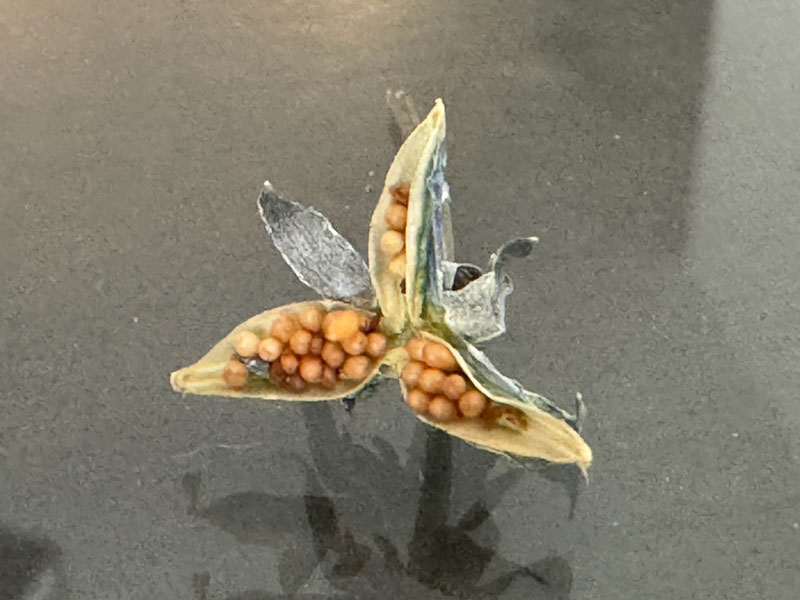
Here the seed pods have split and will soon dispense the seeds.
If you save seeds or have volunteers come up in your garden, they will not always grow true to the parent plant because they are hybrids. Violas and pansies will also readily hybridize among themselves.
Planting
Violas and pansies can be planted in full sun or partial shade. Plants will have fewer blooms and become spindly if they do not have enough sunlight, so make sure they get at least five to six hours of sunlight. They are considered cool-season annuals and thrive in cool temperatures of around 40 degrees at night with a high of 60 degrees during the day.
Plants may stop producing flowers and wilt when temperatures get above 80 degrees. For this reason, gardeners often discard them when summer begins. If they are kept out of the hot afternoon sun in a cooler part of your garden, they may perk up and bloom again in the fall. Newer varieties have been grown to become more heat-resistant.
Deadheading, while not necessary, will encourage larger flowers and more vigorous blooming by preventing the seed pods from forming. Follow the flower down to its base and pinch with your finger.
If your plant has suddenly lost its flowers the likely culprit is a rabbit or a squirrel. Rabbits seem to find pansies particularly appealing.
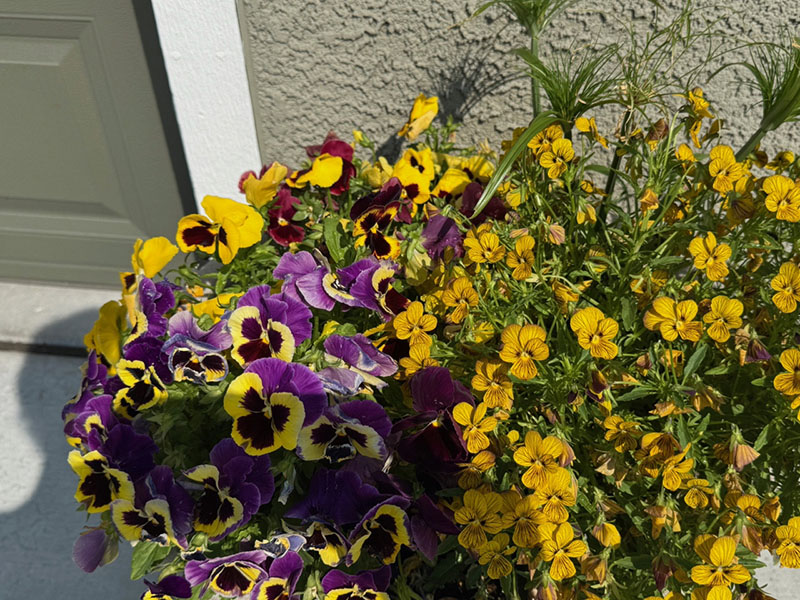
A colorful early spring planter with pansies and violas.
A Winter Rhyme for Springtime Sprinklers
By Ryan Daugherty
Here’s a lighthearted reminder of what to check before you turn the irrigation back on:
’Twas the month before watering, and all through the yard,
not a sprinkler was running, the ground frozen hard.
The hoses were drained and the backflow was bare,
in hopes that no freeze cracks had hidden in there.
The nozzles were nestled all snug in their heads,
while visions of runoff danced off their beds.
And I in my beanie, with gloves on my lap,
had just settled down for a long winter’s nap.
When out on the lawn there arose such a clatter,
I sprang from my chair to see what was the matter.
Away to the garden I flew like a flash,
tripping over some drip, I land with a crash.
The moon on the snow and the frost in the air,
reminded me spring would be coming with care.
And what to my wondering eyes should appear,
But a vision of sprinklers all working next year.
With a cautious young gardener, lively and keen,
I knew in a moment what this vision might mean.
No flooding, no geysers, no wasted supply,
but careful inspection beneath the spring sky.
“Now valves, now filters, now rotors and sprays!
Check emitters, check hoses, on this sunny spring day!
Turn each zone on slowly, don’t blast them full bore,
or cracked fittings and couplers will leak by the score.”
A nozzle that’s leaning, a head out of line,
can waste gallons of water, not pennies but dimes.
So straighten and level, clean filters with care,
and aim every sprinkler to water plants there.
A lesson for all as the spring season nears,
to start up with patience, not flooding and tears.
For trees and for flowers, for lawns green and tall,
happy watering to Washoe, and good growing to all.
Springtime Irrigation Checklist:
- Turn the water on slowly to let pressure build gradually.
- Inspect valves, filters, and backflow devices for leaks or cracks.
- Run each zone one at a time and watch for broken or misaligned heads.
- Clean or replace clogged nozzles and filters.
- Make sure sprinklers water plants, not sidewalks or driveways.
- Adjust run times gradually as the season warms.
Bee & Garden Seminar March 21 & 22, 2026
Join the University of Nevada, Reno Extension in Douglas County for a two-day Bee & Garden Seminar designed for both beekeepers and home gardeners. Saturday, March 21, focuses on beekeeping, with sessions covering pests and diseases, hive anatomy, and even hive dissection. Sunday, March 22 shifts to home horticulture, featuring topics such as fruit tree care, integrated pest management (IPM), and vegetable gardening.
Your registration fee includes all materials, snacks, and lunch for both days. Proceeds support the UNR Extension Douglas County Master Gardener Program and the UNR Extension Douglas County Bee & Pollinator Club. Come learn, connect, and grow!
Special note: Washoe County Master Gardener Gary Garret will be presenting.
Tickets on sale - February 20, 2026
Tickets: $75 full weekend,
$40 - One day (Saturday or Sunday)
Optional Add-on Workshops (space is limited)
Seed Starting & Transplanting $30
Build Your Own Bee Hotel $50
All Materials provided
https://BeeGardenSeminar2026.eventbrite.com
Gratitude
We have so much to be thankful for. The University of Nevada, Reno, Extension Master Gardener Volunteer Educator program is full of amazing volunteers who are committed to finding and providing scientifically based, university researched horticultural information for people in our community.
We could not do what we do without the help and support of our community, our University and Extension partners, and the dedication of our Master Gardener volunteers. Within our program we have some special volunteers known as Leads. Leads are Master Gardeners who dedicate extra time to organize, plan, and execute tasks related to their project or activity. They do this by committing extra time to the program to lead and mentor other Master Gardener volunteers and give them the resources and confidence to support our community. They make a huge difference in our community as a whole and especially to the Master Gardner program.
One of the main ways we support our community is through the Master Gardener Help Desk. The Help Desk provides our community with resources to help them with insect identification, plant disease and many other horticultural concerns, techniques and best practices. The Help Desk is instrumental in what we do and we have two Leads that help make it happen. Bryn Lapenta and Shari Elena Quinn are dedicated to helping our Master Gardener Interns feel comfortable in this space. Let’s take a minute to get to know them.
Q: What sparked your interest in gardening?
Bryn Lapenta: 4H projects when I was young. I always had a flower garden.
Shari Elena Quinn: It's not actually learning how to grow things properly. When we came here we wanted to make a beautiful landscape. I wanted to improve the environment. I wanted to look at it and say we grew these things. I was raised indoors in Chicago and then lived in LA in an apartment with just indoor plants
Q: What is your gardening passion?
Bryn Lapenta: Trying new things. This year I’m going to try vertical gardening (trellising) and soil blocking. What is soil blocking? Soil blocking involves starting seeds in soil blocks rather than in pots which can give plants a head start when transplanting.
Shari Elena Quinn: To be successful with whatever I am working on at the time. I’ve probably propagated 70 Spider plants with the help of Linda at the Northern Nevada Veterans Home. I like to find something I’m interested in and try to grow it from seed and see how well I do.
Q: How has the Extension Master Gardener Program scientifically helped you in your garden?
Bryn Lapenta: When I try new things, I try and find something that is researched and vetted.
Shari Elena Quinn: It’s actually made me stop and think. The more I do the research on something I end up thinking: “well I really screwed that up.” My wisteria used to come back with huge clumps of lavender flowers and now it doesn’t. So through research and trying to improve I discovered it’s how I prune and feed it.
Q: What makes you smile about the Master Gardener Program?
Bryn Lapenta: All the camaraderie.
Shari Elena Quinn: I think it’s at the end of doing projects. For example we plant seeds or starts and water it, nurture it, watch for insects and then we get produce and flowers to give to the community. It’s not only trying to educate the public but also giving back to the community
Q: Share a meaningful Master Gardener volunteer experience.
Bryn Lapenta: I really like volunteering at the Veterans Home. For example, we might help the residents plant seeds, and they get to see what happens.
Shari Elena Quinn: Four years ago we were at Mariposa Academy with 9-10 M.G.s We were at the school in the garden teaching the little kids twice a week. We would take the students to their raised bed and plant seeds. With the Kindergarten students we planted radishes because they grow fast and when they saw the results from that they were “stoked”. The older students (5th grades) were stoked when they got to pick grapes, peppers and tomatoes.
Q: One word to describe the Master Gardner Program.
Bryn Lapenta: Involved.
Shari Elena Quinn: Rewarding and Challenging (two works)
Q: Describe your project.
Bryn Lapenta: The Help Desk is how the community can get answers about what is going in in their yard/garden related to plants. My role is in training interns. Last year I was an intern, and I spent a lot of time at the Help Desk. (Bryn very much enjoys training people so this is a good fit for her skill set).
Shari Elena Quinn: The Help Desk is about educating individuals on how to research topics or concerns clients call about. It’s about how to approach diseases. How to ask questions like triage in the emergency room. What are the symptoms? How long has it been happening? Are they watering? It’s teaching new individuals at the help desk how to look at the plant and insect world.
Q: What is your vision for your project?
Bryn Lapenta: For everybody to feel comfortable working the Help Desk.
Shari Elena Quinn: To make everybody feel comfortable with clients walking in the door or phone calls. Master Gardeners don’t want to do the help desk because they feel they lack the knowledge. We teach them how to approach specific questions, so it isn’t frightening.
Q: How will you put that vision into practice?
Bryn Lapenta: By making sure everyone is comfortable during training. I like to focus on showing how to find things and the process and that it’s okay not to know the answer.
Shari Elena Quinn: I think just being as instructional as I can. Being someone that’s approachable and calm and can focus on how to solve the problem or the question.
Q: How does your project benefit the community?
Bryn Lapenta: By providing real time answers to community questions about gardening and plants.
Shari Elena Quinn: It benefits the community when someone calls or walks in with a specimen or a plant. I want to help individuals feel comfortable asking questions and using the microscope. I want them to realize they don't have to answer the question immediately. The help desk shouldn’t be frightening. It not life or death because that plant has been dying for a while.
Q: What Keeps you involved in the Master Gardener program?
Bryn Lapenta: I like it. I think it’s fun. It’s so useful.
Shari Elena Quinn: I think it’s because there is always something new and challenging to do. Like Bowers Mansions (a new project for 2026). it is starting over again.
Q: What little known fact about your project would you like others to know that they likely don’t know?
Bryn Lapenta: We don’t identify mushrooms.
Shari Elena Quinn: I truly believe when you walk into your place of employment or volunteering your attitude alone is what makes your day or your shift. If you go in feeling negative it will be a sh**y day. If you’re positive, you’re gonna have a good day and learn something new. You’re going to give back to the community.
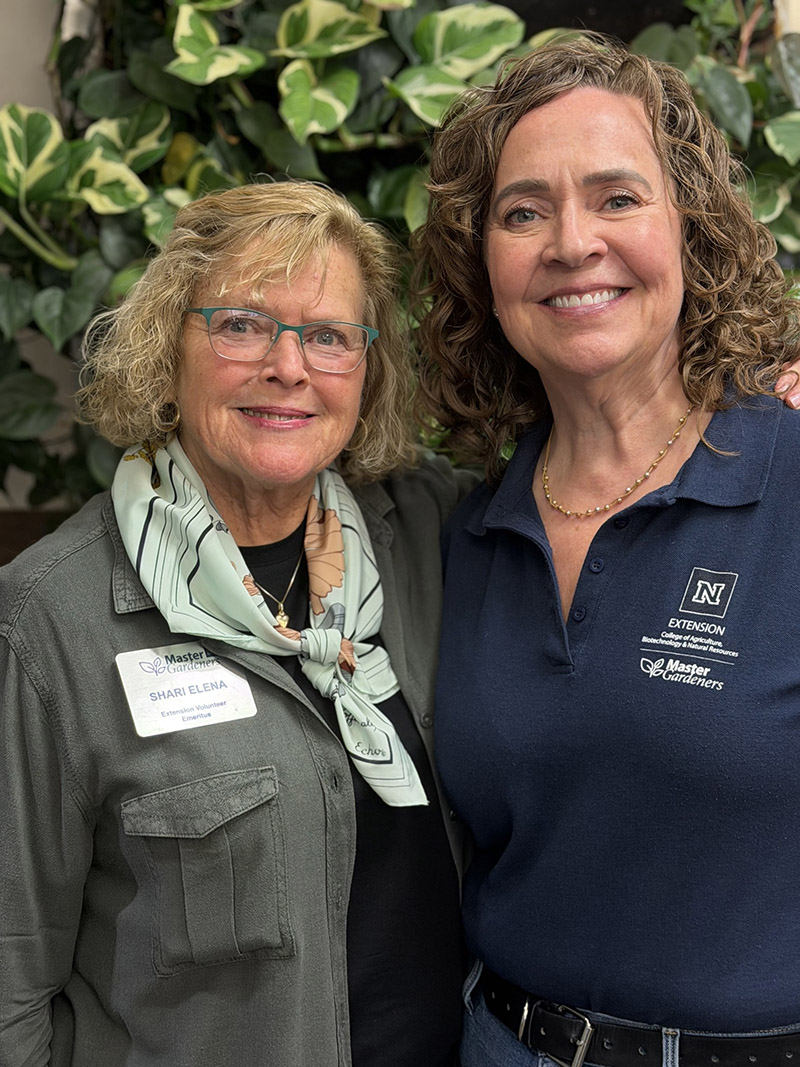
Photo by Rachel Mcclure
Questions or comments?
Reach out to us!
Help Desk Hours: 10 a.m. - 2 p.m. Tuesdays, Wednesdays & Thursdays
Phone: 775-784-4848
Email: ExtensionWashoeMG@unr.edu
Rachel McClure Master Gardener Coordinator
Phone: 775-336-0274
Email: rmcclure@unr.edu
How to become a Master Gardener
WASHOE COUNTY MASTER GARDENER EVENTS
MASTER GARDENER HELP DESK
Published by:
McClure, R., Colwell, B., Doolittle, C., 2026, Washoe County Master Gardener Newsletter (2026-03), Extension, University of Nevada, Reno, Newsletters
An EEO/AA Institution. Copyright © 2026, University of Nevada Cooperative Extension.
A partnership of Nevada counties; University of Nevada, Reno; and the U.S. Department of Agriculture