Washoe County Master Gardener Newsletter (2025-12)
In this edition
- About This Newsletter
- A Note From the Editors
- Proud to be a Master Gardener
- What's Happening This Winter
- Why You Might Want to Wait Until Spring to Clean Your Garden
- Indigenous Garden Project: Honoring Tradition and Growing Together
- Meet Jueves en el Jardín
- Our New Apple Tree
- Penstemon: More Than Just a Pretty Face
- Poinsettia Fun Facts
- Ongoing Experimentation With Soils
- A Moment of Gratitude
- Winter Tree Care: Water and Pruning Myths
- What’s Cooking in My Garden?
- Master Gardener Photos
About This Newsletter
Welcome to our newsletter dedicated to gardening enthusiasts in Nevada! Here, the Master Gardener Volunteers of Washoe County are committed to fostering a community of gardening knowledge and education. Through this publication, we aim to provide research-based horticulture insights for our readers. Each quarter, we offer a wealth of information covering various aspects of gardening, from upcoming garden events to advice on topics ranging from pest control to sustainable gardening practices. Join us as we explore the science and artistry of gardening together!
A Note From the Editors
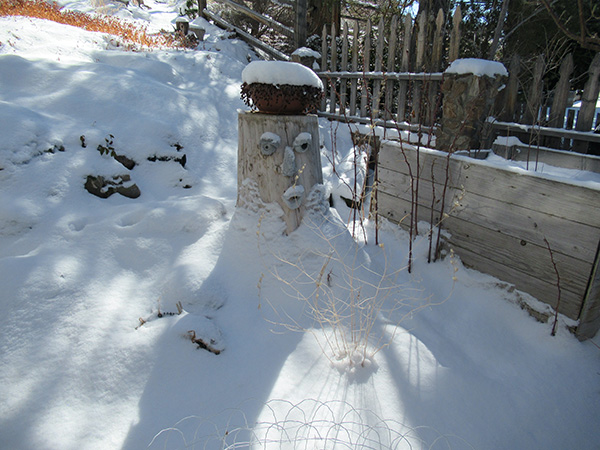
Waiting for Spring
Photo by Becky Colwell
Yet another gardening year has come to a close. Now is the time to rest, reflect, and ruminate on how to get off to the best possible start in just a few short months.
- Resolve to be ready with clean, sharp tools. Before storing them away, wash and dry each blade, sharpen blades, oil moving parts, and rub linseed oil on wooden handles to avoid cracking.
- If you have fruit trees, make sure you have cleaned up and discarded any fallen fruit or fruit that is still on the tree. This will help prevent disease and pest problems next season.
- While this year’s vegetable garden is still fresh in your mind, draw up a crop rotation plan for next year. For rotation to be most effective in preventing disease and minimizing insect pests, you should avoid planting vegetables belonging to the same plant family (like squash, melons, and cucumbers) in the same spot more often than once every three years.
- With irrigation shut off, make a note to remember to water or mound snow on landscape plants that are under the eaves or other sheltered sites shielded from rain or snow.
- Then turn your thoughts to what garden additions might make 2026 even better. Consider adding shrubs that will not only provide early spring flowers for pollinators and beneficial insects but will also provide winter berries for our avian friends.
- If you had periods in 2025 with nothing in bloom, research what flowering plants might fill that gap in the new year. A garden with continuous bloom from early spring through late fall is a boon to pollinators and beneficials.
Enjoy your winter respite,
Becky and Chris
Proud to be a Washoe County Master Gardener
Article and photo by Rachel McClure
Washoe County Master Gardener Coordinator
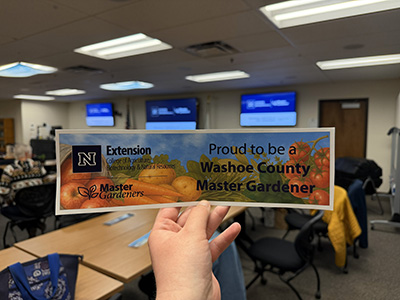
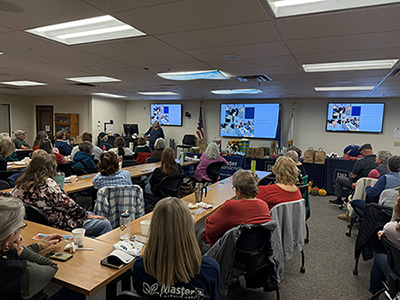
We just completed our end of year celebration at our December potluck. What an honor it is to work with such passionate and committed individuals. So much fun.
We had around 70 people attend our year end celebration. Certified Master Gardener Volunteers, Master Gardener Interns, Master Gardener Students and Friends of the Master Gardener program. These are all people in the horticultural world, from University of Nevada faculty and staff to Washoe County Parks and Open Spaces Rangers. We do a monthly recap of Master Gardener activities, and it is incredible to see the involvement and support these volunteers provide for our community.
I always consider myself lucky to work with such amazing people. Events like this one make clear how much Master Gardeners do in and for their community. I am proud to work with such amazing people!
What's Happening This Winter?
2026 Garden Talks at the Library
Where: Spanish Springs Library, 7100A Pyramid Way, Sparks
January and February talks are scheduled for the 4th Sunday of the month; March through
December talks are scheduled for the 2nd Sunday of the month.
Jan. 25, 2026
1:30 p.m. - Gardening Tools for Home Landscapes: Learn what tools help make gardening accessible. Let the tool do the work! Join Master Gardener Deb Barone to gain valuable insight on garden tools.
2 p.m. - So You Got a Holiday Plant – Now What?: Did you receive or purchase a holiday plant, and now don’t have a clue of how to take care of it? Come join Master Gardener Abby Jarrett to learn how to get your holiday plant to survive and thrive.
2:30 p.m. - Ground Squirrel Control: Did ground squirrels invade your garden last summer? Expect their return. Master Gardeners Mimi Richards and Cindy Edwards will share insights on the life cycle and habits of ground squirrels and effective control methods.
Feb. 22, 2026
1:30 p.m. - Reading Seed Packets: After you have decided what you want to grow, the next step to creating a successful garden begins with understanding seed packet information and specific terminology, such as annual and perennial, warm season versus cool season plants, germination, direct sow, plant variety, and days to maturity. Come to this hands-on class where you will receive a seed packet and learn valuable growing information from Master Gardener Diane Miniel.
2 p.m. - Propagating Plants: Planting seeds is not the only way to start new plants. Propagating plants from cuttings is another method. Join Master Gardener Michael Hilker to learn how easy it can be to make new FREE plants from your existing plants.
2:30 p.m. - Starting Seeds: A great way to get a jump start in the vegetable garden is to start your vegetable seeds indoors. Come learn tips on growing vegetables from seed, when to start the seeds, and how to transplant them outdoors. Join Master Gardener Beth Heggeness to learn how to start seeds.
March 8, 2026
1:30 p.m. - Container Gardening: Growing plants in containers is a great way to garden with limited space and/or poor soil. Come learn tips and strategies for successful container gardening from Master Gardener Barbara Ramsey.
2 p.m. - Not All Bugs Are Bad: Many insects are beneficial in the garden. Many of these same insects overwinter in your yard. Early clean-up of your yard may disturb or even kill these valuable workers that aid in pest control in your yard. Come learn how to help these beneficial insects in your yard with Master Gardener Sandy Parrish.
2:30 p.m. - Early Spring Weeds Identification and Control Methods: Troubled by weeds in your yard? Come and learn identification and control methods for the early spring weeds cropping up in your yard right now from Master Gardener Melody Hefner.
April 12, 2026 All About Roses
1:30 p.m. - Rose Varieties and Planting Bare Root Roses: Confused about the different types of roses? Wondering how to plant bare-root roses? Come learn all about roses from Master Gardener Georgette Porter.
2 p.m. : Pruning Roses: Early spring is the time to prune your existing roses. Confused about the process? Come and learn all about pruning roses from Master Gardener Sharon Fabbri.
2:30 p.m. - Meet Rosa Dr. Huey, the Root of Many Hybrid Roses: Many hybrid roses are grafted onto Dr. Huey root stock. This provides additional benefits to the rose plants, but it is not without its own headaches. Come learn from Master Gardener Carol Munden about this important rose root stock, how to identify it, and how to prune your hybrid rose if the root stock is peeking up.
Why You Might Want to Wait Until Spring to Clean Your Garden
Article and photos by Sandra Parrish
As an advocate for natural gardening, I value the beneficial organisms that help with tasks such as pest control and soil health. There are many opinions on how to manage garden clean-up for the winter. While pest insects can survive freezing winter temperatures in garden debris, so do beneficial insects. Pest insect populations often recover more quickly than the predator insect populations, so you might want to weigh the pros and cons before removing all the debris from last year's garden before spring.
How are insects beneficial in the garden?
Less than 1 percent of the insects in your garden do damage to your plants. Many of the insects in your garden are beneficial in various ways. They provide helpful services such as pollination, pest predation, and decomposition.
Some of the more common beneficial insects include:
- Bees and Wasps – Everyone knows the value of bees when it comes to pollination. Wasps are not only pollinators, but some are very effective predators. While honeybees live in hives, some bees and wasps need hollow stalks and stems to lay their eggs. Others nest in the ground or under debris such as twigs and bark.
- Praying mantises – Praying mantises are one of the top predators in the garden. Most adults won't survive the winter, but female praying mantises lay between 200 and 300 eggs in a protective, foam-like shell or ootheca. The egg cases can be found attached to branches, twigs, walls, and fences. Removing the protective cover exposes the eggs, making them vulnerable to predation, so leave them where you find them.
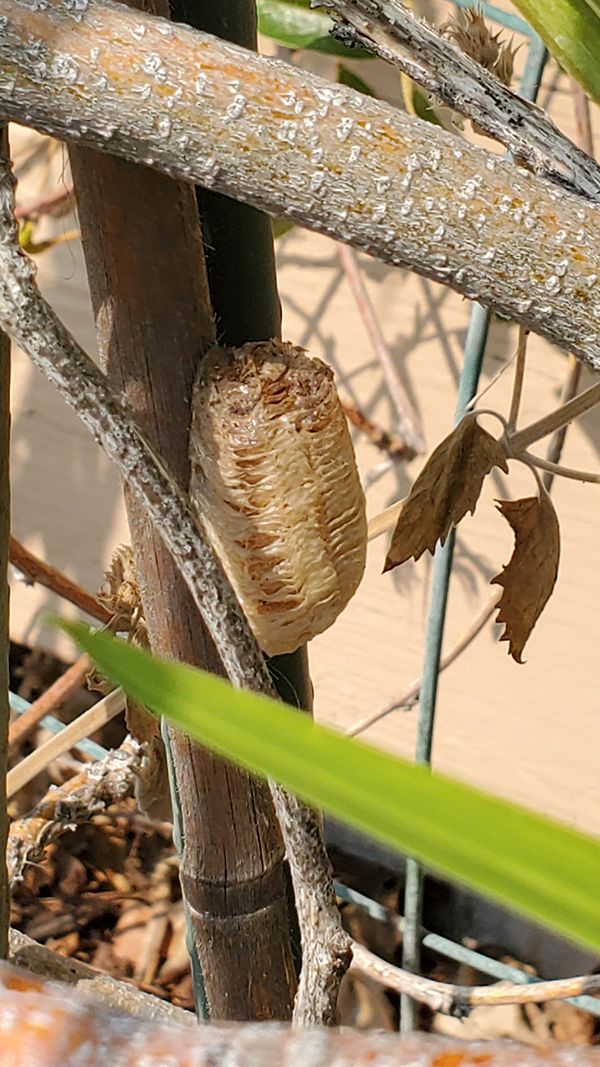
The hard, outer covering of a praying mantis egg capsule, called an ootheca, protects the
eggs from microorganisms, parasitoids, predators, and weather. The nymphs will emerge in early spring.
- Ladybugs – Both adult ladybugs and their pupae have voracious appetites. One of their preferred pests to consume are aphids. Ladybugs often overwinter in huddled masses in crevices and under bark and twigs. In the spring and summer, they lay their eggs under leaves and in hollow spaces.
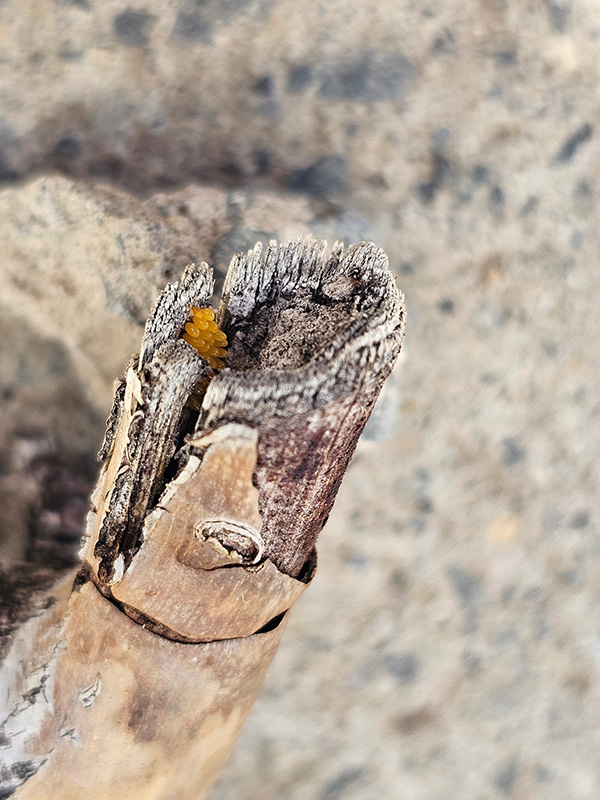
Lady beetle eggs in a hollow twig. The female lays her eggs
near pests, such as aphids, in spring or early summer.
Other beneficial winter garden guests are toads, nematodes, and fungi.
- Toads consume large quantities of insects that can damage the garden. Toads burrow into the ground and hibernate under debris and leaf litter.
- Beneficial nematodes live in the soil and feed on harmful insects, bacteria, and fungi.
- Beneficial fungi provide help in the garden by breaking down organic matter, which helps put nutrients back into the soil. They also help with pest control and disease by outcompeting harmful pathogens or directly attacking them.
Ways to help the beneficials during winter.
When cleaning your garden for winter, you might want to consider leaving some of the non-seeding weeds and grasses. Planting perennials in your garden is also a good way to provide shelter. You can further provide shelter with the use of cover crops. These can be planted in late fall and will not only benefit the creatures overwintering in your garden, but will also improve soil health and keep weeds down. A layer of leaf mulch will not only compost in your garden through the winter, but also provide insulation for the overwintering creatures. Don’t use pesticides to kill harmful insects, as this will also kill the beneficials.
Outside your garden, insect hotels are also a good way to provide shelter for overwintering. Creating a rock pile in a corner of your yard provides cracks and crevices for insects to hibernate. Leaving your pruning cuttings in a pile to decompose over winter offers another form of shelter for beneficials in your garden.
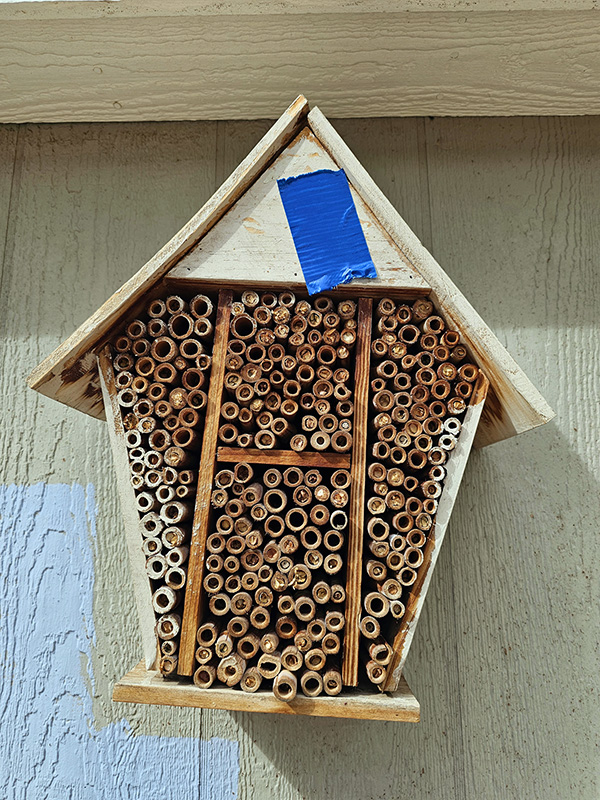
A mason bee house should be hung by early spring. Since mason bees don’t
fly far for nectar and pollen, the house should be located close to blooming flowers.
Keep them around.
Giving the beneficial organisms shelter to survive the winter will not only keep them in the garden but also give them a head start on taking care of your pest problem in the spring. Although the temptation to clear the garden in fall and get it ready for spring planting might be high, consider waiting until spring to clear out the beds. That will give beneficials a head start so they can start working on pest control early.
References:
- Dawson, C. “Delay Garden Cleanup to Benefit Overwintering Insects.” Penn State Extension, 5 July 2023, extension.psu.edu/delay-garden-cleanup-to-benefit-overwintering-insects.
- Sawyer, A. “Living Soil, Healthy Garden.” University of Minnesota Extension, 2018, extension.umn.edu/managing-soil-and-nutrients/living-soil-healthy-garden.
- Megares, Pat. “Good for the Garden: Praying Mantis Prey on Insects.” K-State.edu, 2023, www.ksre.k-state.edu/news/stories/2023/04/horticulture-praying-mantids-preserve-garden.html.
Indigenous Garden Project: Honoring Tradition and Growing Together
Article and photo by Brooke O’Byrne
The Indigenous Garden Project is a student-led initiative housed within UNR’s Desert Farming Initiative. The program began in 2022 after the Indigenous Student Organization approached the university with a vision to raise awareness of traditional foods and medicinal plants while creating a welcoming space for indigenous students to practice cultural traditions. Each year, two student interns take the lead in cultivating the garden, called Pesa Pookwae Namasuana (“The place where good things are grown”), and in sharing their knowledge with the campus and community.
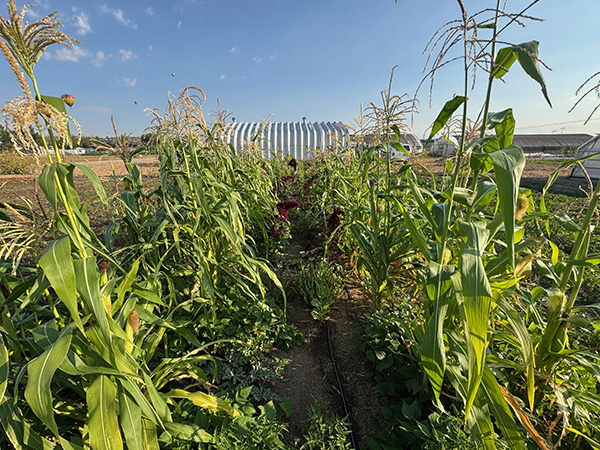
The Indigenous Garden at UNR’s Desert Farming Initiative contained
native tobacco, amaranth, corn, beans, peppers, tomatoes, eggplant, and basil.
Master Gardeners play an important role in supporting the students’ goals. We provide guidance on seed-saving and harvesting practices, share best practices for maintaining the space, and work alongside the interns throughout the season. This partnership allows students to bring forward traditional growing methods while also benefiting from research-based horticultural knowledge. This year, interns Lance and Nina have done an incredible job leading the project, and we look forward to welcoming two new student leaders in January.
The year culminates in Paba Tuka (Big Eat/Feast), a community celebration that showcases the produce grown in the garden and highlights traditional foods and practices. Guests enjoy foods prepared from the garden and from the Desert Farming Initiative while learning more about Indigenous food sovereignty. For Master Gardeners, this partnership is a meaningful way to advance our mission by supporting culturally rooted gardening practices, strengthening student leadership, and celebrating the vital role of traditional plants in community wellness.
Meet Jueves en el Jardín
Article and photo by Brooke O’Byrne
Jueves en el Jardín (Thursday in the Garden) began in April as a collaborative effort of Master Gardeners and staff members of Soulful Seeds, a Reno-based nonprofit food-producing organization. Started as a pilot to teach native Spanish speakers and second-language learners new gardening skills, it quickly became something bigger -- so much so that when it was scheduled to end in August, participants asked to keep going.
Attendance continued to grow through the growing season’s end in October, which has been one of the most rewarding outcomes. And plans are to bring the program back in 2026.
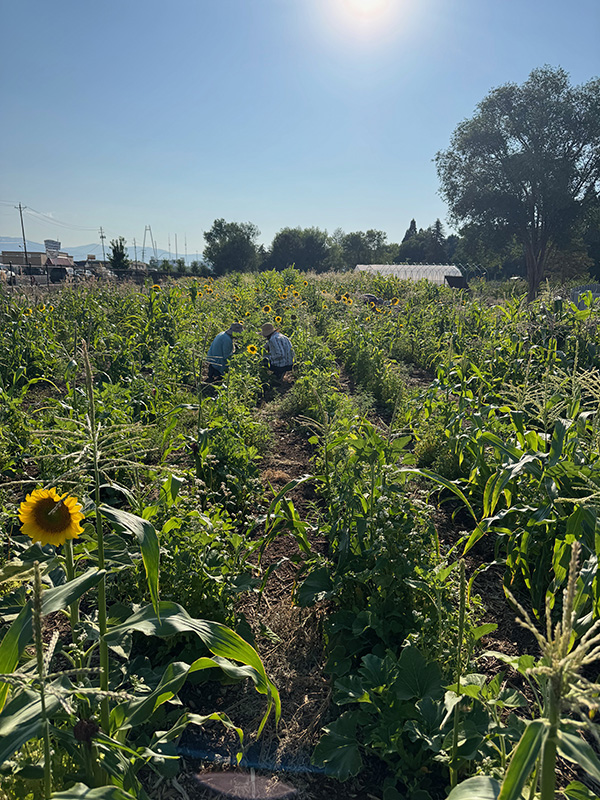
Jueves en el Jardin participants at a Soulful Seeds garden in
Sparks, where gardening shares the stage with language practice.
The group has been a wonderful mix of Master Gardeners, community members, children, native Spanish speakers, and second-language learners. Together, we’ve shared lessons on gardening topics like cool-season crops, integrated pest management, and harvesting practices, while also practicing Spanish in a supportive environment. The combination of gardening and language skills created a strong sense of camaraderie, with participants learning from each other in meaningful ways.
In 2025, we met the second Thursday of each month at 5:30 p.m. in the Soulful Seeds Garden on the Our Place Campus at 605 S. 21st Street in Sparks. This is a public gardening program facilitated in Spanish for both native speakers and second-language learners, and all language and gardening skill levels are welcome.
Our New Apple Tree
Article and photos by Rene Lazare
The Master Gardener Teaching and Demonstration Garden at Rancho San Rafael Park is excited to announce a new resident. On Oct. 2, a small group of Master Gardeners gathered to plant a 5 foot 5 inch, 55-pound Malus domestica. It was welcomed by our existing family of apple trees.
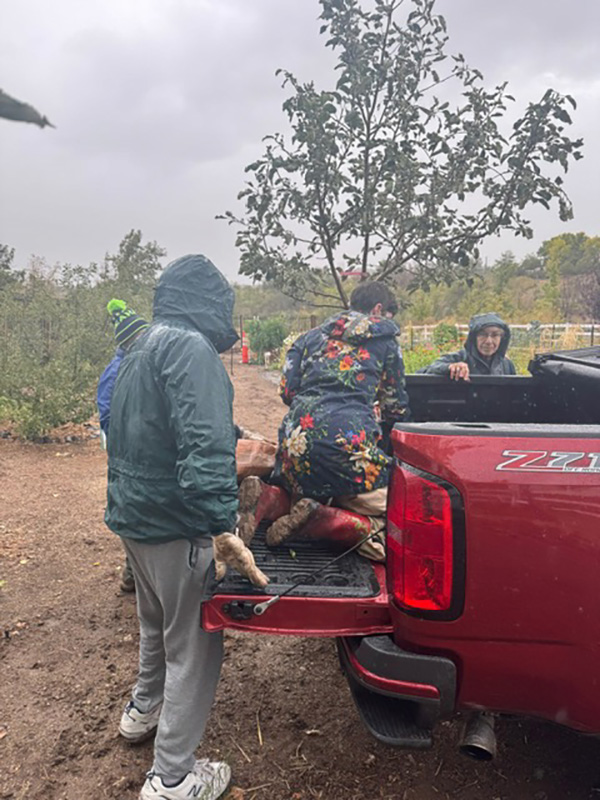
A chilly, cloudy day, the perfect weather for planting a tree.
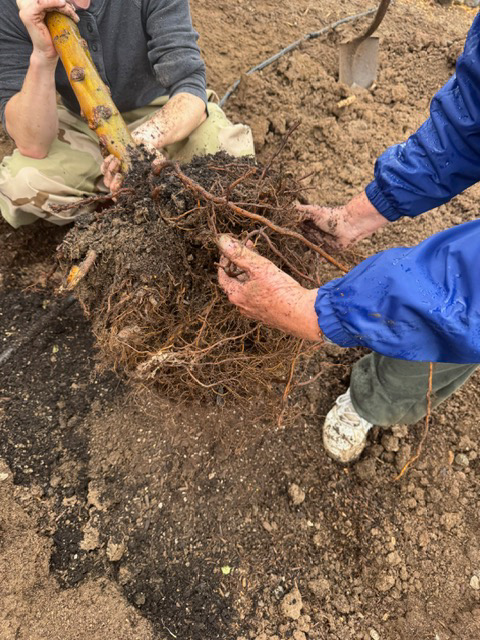
An important step in transplanting a tree is to loosen up surface
roots with your fingers and straighten out any large roots.
Donated by master gardener Milan Slikkerveer, the apple tree has been grafted with four varieties of apple: ‘Golden Delicious,’ ‘Melrose,’ ‘Jonagold,’ and ‘Honey Crisp.’
Please stop by the garden and say hello to our new addition.
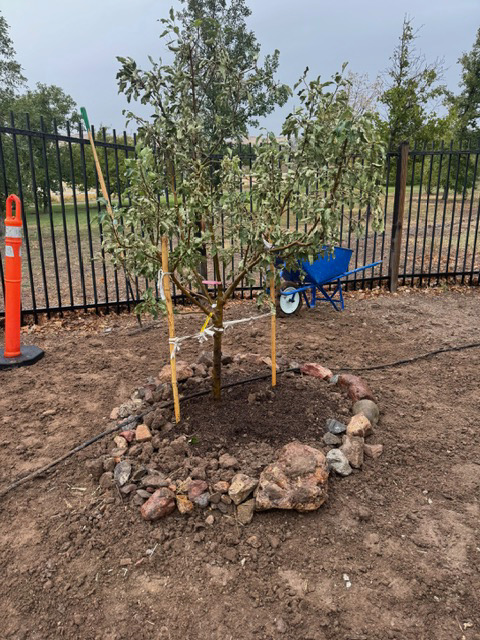
After planting it is important to stake the tree for support until the roots get established.
Two 4-foot stakes were placed about 10 inches from the trunk and soft ropes connected the trunk to each stake.
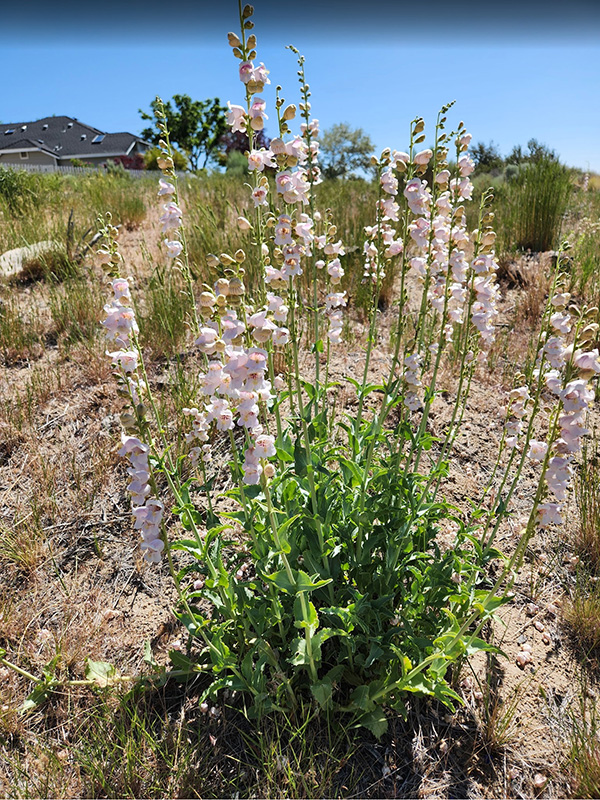
Penstemon: More Than Just a Pretty Face
By Janice Brown-Silvia
I confess that I love wildflowers. In the spring of 2024 I completed my first penstemon rescue in an HOA common area near my home in Reno. After discovering several wild low penstemons (Penstemon humilis) just over my fence, I got permission from the HOA landscape crew to take as many as I wanted. Otherwise they would be treated the same as cheat grass. I was able to successfully relocate several of the plants into my yard and give away a few more.

The blue flowers and large lower petals for
bees to land on makes Rocky Mountain beardtongue (Penstemon strictus)
a popular choice for gardens. Beardtongue is a common name for penstemons.
Photo by Becky Colwell
My second penstemon adventure began in the fall of 2024 when I spread firecracker penstemon (Penstemon eatonii) seeds throughout my xeriscaped yard. The xeriscape showed no signs of the firecrackers in the following spring, but my husband spotted one coming into bloom along a curbside -- again, in the HOA common area. Once again, I retrieved it and it is now successfully settled into the xeriscape next to one of the other 2024 rescued penstemons.
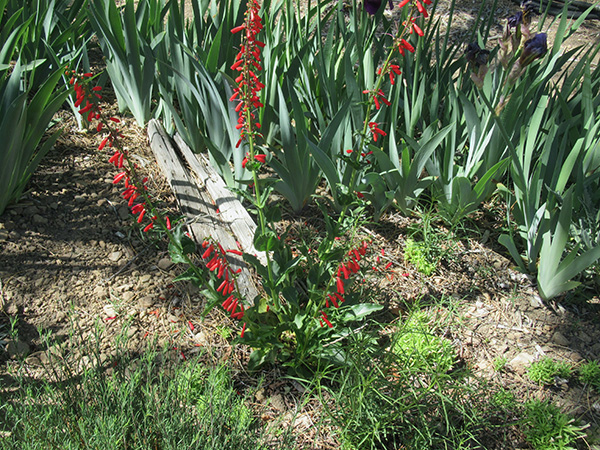
Firecracker beardtongue (Penstemon eatonii) with its
tubular red flowers is a hummingbird attractor.
Photo by Becky Colwell.
Thanks to these two botanical adventures, penstemons, also commonly known as beardtongue, have become a clear favorite and have inspired me to learn more about this genus. So here we go:
Penstemons are one of the largest genera in North America. The latest national penstemon count is 281 native species. Additionally, there are many cultivated hybrids. Penstemons occur naturally in all U.S. states except for Hawaii, with the biggest concentration being in the southwest. There are 51 species that grow wild in Nevada. Utah’s Red Butte Botanical Garden claims that Utah has over 100 natives. Colorado State University says that Colorado has over 60 natives. The University of Wyoming reports 40 natives in that state, and the University of California Marin County Master Gardeners claim that there are over 100 species native to the Golden State.
Penstemons have been the subject of many scientific studies regarding pollination and co-evolution of plants and animals. The ancestral plants were pollinated by insects, primarily native bees. In comparatively recent times (perhaps several scores of plant life-cycles) some penstemons have evolved to attract and be pollinated by hummingbirds. Now about one-fifth of all penstemons are exclusively pollinated by hummingbirds.
Cross-pollination creates more genetic diversity, which increases the adaptability and survivability of the penstemon genus. For example:
Insect-pollinated penstemons usually have blue, purple, or white flowers. They have larger lower petals that act as insect landing pads, and often have floral tubes that are shorter and wider. Hummingbird-pollinated penstemons have red, magenta, or other reddish-toned flowers, longer, more tubular floral shapes, and nectar with a higher sucrose concentration. Some penstemons, like Palmer’s penstemon (Penstemon palmeri), have characteristics that are attractive to both insects and hummingbirds.
With their pink color and wide bottom lip, Palmer penstemons are popular with
both insects and hummingbirds. These are very xeric, needing little to no
water during the hot summer months.
Photo by Janice Brown-Silvia.
One theory that explains the recent evolutionary shift is that bees typically collect as much pollen as possible on their legs. Then they can carry it back to their young to feed them. In contrast, hummingbirds unintentionally collect pollen on their foreheads when they reach into the flower to feed on the nectar. Then they distribute it to the next flowers they visit. They have no interest in the pollen. That makes it more available for cross-pollination.
Penstemons grow in a wide range of environments, from deserts to alpine regions; therefore, different species may do well in different microclimates in your garden. In general, penstemons like well-drained soil, often nutrient- poor, and full to partial sun. Hence, it has popularity as a versatile and low-maintenance plant.
Perhaps this article will give you a touch of “penstemania” or maybe it will encourage you to dive into some research on one of your own favorite plants.
References:
- Langelas, Linda; “Growing Penstemons,” Colorado State University Extension, February 2021
- Salas-Arcos, Lucia; Lara, Carlos; Francisco Ornela, Jua, “Reproductive biology and nectar secretion dynamics of Penstemon gentianoides,” NIH National Library of Medicine, August 2017
- Kratsch, Heidi, “Penstemons are for Great Basin Gardens,” University of Nevada Cooperative Extension, 2013
- Schmotzer, Constance; “Pollination and Pollinators,” Pennsylvania State University Extension, June 2025
- Tuthill, Dorothy; “Add plucky, pollinator-friendly penstemons to your garden,” University of Wyoming, Barnyards and Backyards, Summer 2023
Poinsettia Fun Facts
Photo & article by Joanne McClain
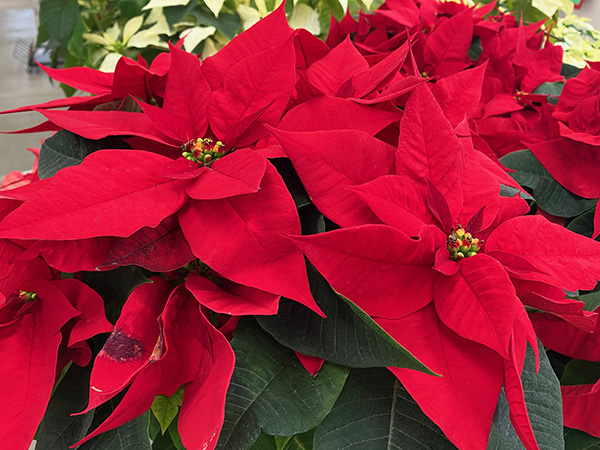 Notice the poinsettia flower buds in the center of the red bracts.
- Poinsettias are part of the Euphorbiaceae or Spurge family. Botanically, the plant is known as Euphorbia pulcherrim. (Leafy Spurge is Euphorbia esula. Compare the flower buds.)
- Joel Roberts Poinsett introduced the poinsettia plant to the United States from Mexico. Poinsett was a botanist, physician and the first United States Ambassador to Mexico.
- In Mexico and warmer climates, poinsettias can grow 10 feet tall.
- The flower buds on a poinsettia are the small center buttons that open to small yellow flowers. The colorful bracts are modified leaves.
- The colors of the bracts are created through "photoperiodism," which means that they require at least 12 hours of darkness to change color. Once poinsettias turn red, the plants require abundant light during the day for the brightest color.
- Poinsettias are NOT poisonous! This was a myth that was believed for many years until several institutions tested the theory. They are irritating if eaten, however, and can cause an upset stomach. The leaves are not tasty, so consuming large amounts is unlikely. The milky sap can cause skin irritation. Avoid contact with eyes and mouth. It is still best to place out of reach of cats, other pets and small children.
- Poinsettias come in a variety of colors ranging from creamy white to red. The blue- or purple-colored plants you see are cream-colored varieties that have been spray painted.
Caring for Poinsettia
- Place where the plant will receive bright daylight—a south, east, or west window is best.
- Poinsettias prefer temperatures of 65 to 70 degrees, and do not like large fluctuations in temperature, which can cause leaf drop. Do not place near fireplaces or under heating vents, and avoid cold drafts or cold windows. Temperatures below 50 degrees will kill them.
- Water when top of soil feels dry but do not let soil completely dry out. Plants are sensitive to overwatering and develop root rot quickly. Make sure excess water can drain out of the bottom. Either remove the foil from around the pot, or make a hole in it for drainage.
Caring for Poinsettia After the Holidays for Re-bloom Next Season
January: Start to fertilize monthly with an all-purpose household plant fertilizer at half the recommended amount. Continue to provide light and water. Keep watch for insects and manage as you would any other houseplant.
February/March: When your plant starts to lose leaves and becomes leggy, cut back to about five inches tall to encourage compact growth. Keep leaves away from the soil surface and add more potting soil if roots are visible.
May: Transplant into another container about 2” to 4” bigger than the current pot.
Mid-June: You can move your plant outside if you place it in indirect light.
July: Trim the plant again. Gradually acclimate the plant to full sun. Continue to water and fertilize.
Sept. 1: Move the plant indoors before temperatures go below 60 degrees at night, and place it where it will get at least 6 hours of direct light.
Reduce fertilizer to one-quarter of the recommended amount.
Sept. 21/No later than Oct. 1: The poinsettia will need complete darkness for 14-16 hours, followed by eight hours of bright light every day. Place in a closet or put a bag or box over the plant. Do not allow the plant to receive ANY light during the dark hours. The leaves will change color in response to the shorter hours of light. Continue reduced fertilizer and reduce the amount of water. A night temperature in the low 60s is preferred. Rotate the plant for even growth.
Thanksgiving: Discontinue the long nights. Enjoy your plant and enjoy it for another holiday season.
Below are links to more detailed information on caring for poinsettia. Advice varies slightly-
-especially on the amount of light they should receive.
https://extension.usu.edu/news_sections/gardening/poinsettia-care
https://extension.colostate.edu/topic-areas/yard-garden/poinsettias-7-412/
https://extension.umn.edu/houseplants/poinsettia
Ongoing Experimentation With Soils
Article and photos by Diane Miniel
When I first started gardening in Washoe County in 2022, I knew nothing about the importance of soil. My husband found some topsoil discarded by a homeowner. The sign “Free Soil” posted in someone’s yard was attractive because it was FREE. Because the soil in our backyard was very rocky, my husband also found an unlimited supply of free 16-gallon black containers. We layered the bottom with compost and the top half with the topsoil. Yes, we were naïve and cheap.
While the zucchini and summer squash plants grew in these containers and “free” layered soil, they didn’t produce many vegetables.
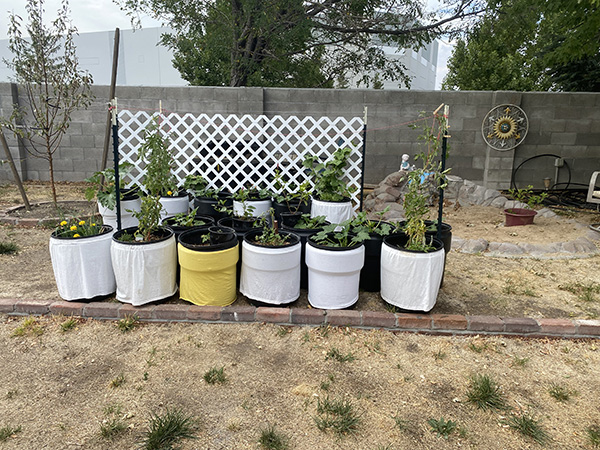
Squash plants in 16-gallon containers with layered soil (2022).
The white T-shirts helped reflect the sun off the black-plastic containers.
While my squash plants were trying to grow, I took an introductory horticulture class where my instructor was concerned about the quality of the soil I had found. At that time, I didn’t get it. Dirt was simply dirt. Pardon me, SOIL.
Now that I’ve volunteered at a nursery for a couple of years, I’ve learned a little about soils. Not only that harmful germs and bacteria can grow in them, especially those left in a front yard and labeled “free.” I’ve also learned that annuals, perennials, and native plants thrive best in certain kinds of soils.
Depending on the state you live in, the hardiness zone, and the type of plants you want to grow, you’ll most likely need to amend the soil for plants to thrive. And some plants will never do well in your area. For example, while growing avocado trees in Northern Nevada is a novel undertaking, it is literally a fruitless experiment.
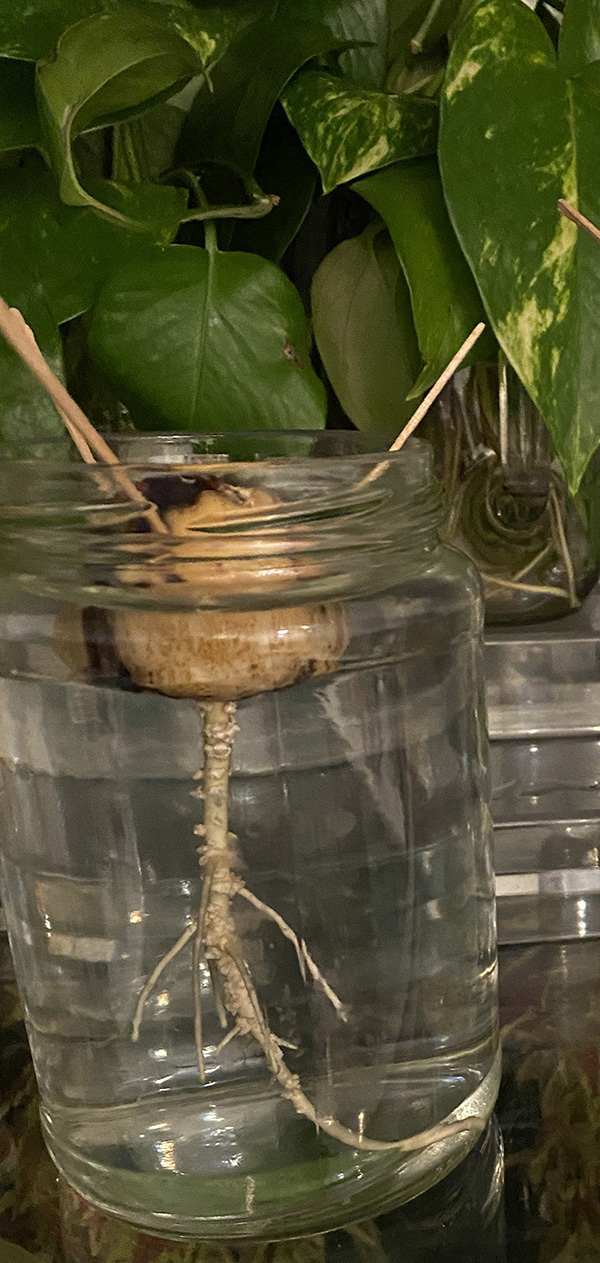
Avocado seeds rooting in water.
A first step is to identify the types of soil you have. You might think you and your neighbors share the same kind of soil, but that might not be the case. After World War II, housing construction often resulted in different houses getting different types of backfill soil. My husband, a soil compaction technician, can testify to that practice. That means your neighbor might have sandy soil while your soil tends to be more clay. Thus, assessing the soil you have where you plan to grow is critical.
You might be able to obtain documentation on the types of soil surrounding your house through your county office of records. You can also look at the Web Soil Survey (https://websoilsurvey.sc.egov.usda.gov/App/HomePage.htm) to see if it includes the soil at your address. But it might just be easier to have your soils tested through a reputable lab.
Soil tests should identify pH, salinity, texture, and nutrient status, all important factors in deciding what plants you should select.
Annuals are plants and flowers that usually last for one year, though some may survive a mild winter or produce seeds that will sprout in the spring. They mostly prefer moist, well-drained soils. Most big-box stores sell a variety of soils for in-ground beds, raised beds, and containers along with a variety of amendments. Unfortunately, not many box-store clerks have majored in horticulture, and your questions may be answered with blank looks or a shrug of their shoulders.
Local nurseries are more trusted suppliers of specific soils for specific plants, and their staff is usually much more knowledgeable. They can provide you with a few suggestions to experiment with.
Gardening success often rests on learning which plants will thrive in your region and meeting their needs with the proper soils and amendments. Some plants, for example, prefer soil with a pH on the acidic side, while most native Nevada soils tend to be alkaline.
Perennials are foliage and flowering plants, shrubs, and trees that will live for more than one year – some of them for many decades. A good start in the right soil is an investment in years of healthy growth and beauty, and horticulturists point out that some soil amending will need to be done yearly. For new perennial beds, many plant experts suggest adding three to four inches of compost mixed in with amendments like sulfur and fertilizer according to the recommendations of a soil test.
The planted beds can then be covered with an additional three to four inches of mulch, which will conserve moisture and decompose gradually to further enrich the soil.
Plants native to Northern Nevada grow best here, of course; some even thrive in the rocky, dry, and nutrient-poor soils that are so common in the region. Nearly all need plenty of sun, however, and don’t do well in heavy clay soils that don’t drain well.
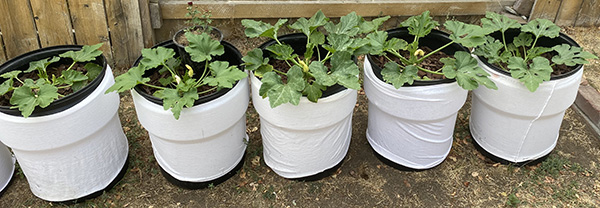
Squash plants in 16-gallon containers (2022).
Mixing in soil amendments is another important step. In a University of Nevada Reno, publication referenced below, three UNR extension colleagues (including Melody Hefner, a retired Master Gardener program coordinator who is now a Master Gardener herself) gave a warning about “interfacing,” a problem that can occur when soils and amendments of different textures are layered in a planting bed. The uppermost layer may become saturated before any water moves to the layer below. This means water does not permeate throughout the planting bed, and thus plants have difficulty rooting deeply enough and/or accessing sufficient water.
That may be one reason my squash plants didn’t produce much: We layered the soil in the 16-gallon containers with the compost at the bottom.
Thus, when planting a tree or shrub, you must be careful to backfill the hole with similar surrounding soil or take the time to thoroughly work the amended soil into a large enough area of the native soil. “Large enough” will depend on how big the plant is, but typically a planting hole twice as wide as the root ball of the plant is recommended.
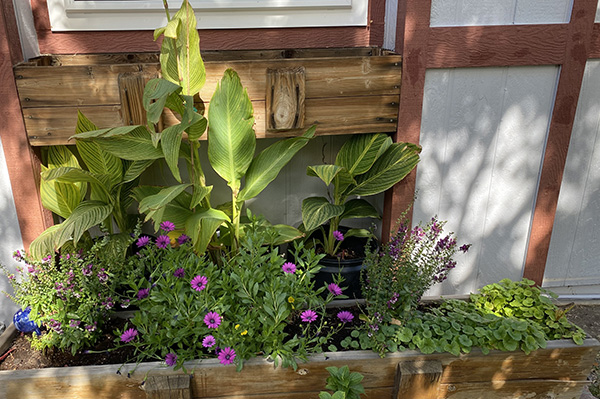
A mix of annuals and perennials in my front garden (2024).
My 2025 garden did a lot better after I experimented with appropriate soils and amendments purchased from a local nursery and made sure to thoroughly mix them together in elevated beds. I look forward to next year’s garden and further practice with the soils I have decided to work with over the long-term.
May your own experiments also prove fruitful.
References
- Barber, Alicia; Historic MidTown, Reno Historical, https://renohistorical.org/tours/show/10
- Hefner, Melody; Skelly, JoAnne; and Donaldson, (2009), “Fact Sheet-09-14: Nevada’s Soils – Worth the Toil,” UNR Extension. https://extension.unr.edu/publication.aspx?Pubtitle=3066
- Pugliese, Paul (2013). “Field Report: Soil amendments can be key factor in flower growth.” Oct. 2, 2013. https://fieldreport.caes.uga.edu/news/soil-amendments-can-be-key-factor-in-flower-growth/
- Roberts, Aggie; and Robinson, M.L. (1998), “Perennials in the Garden,” University of Nevada Reno Extension. https://extension.unr.edu/publication.aspx?Pubtitle=3260
- Russ, Karen; and Polomski, Robert F. (1990). “Fact Sheet HGIC 1152: Growing Annuals.” Clemons University Cooperative Extension. Revised Jan. 23, 2017, by Joey Williamson. https://hgic.clemson.edu/factsheet/growing-annuals/
A Moment of Gratitude
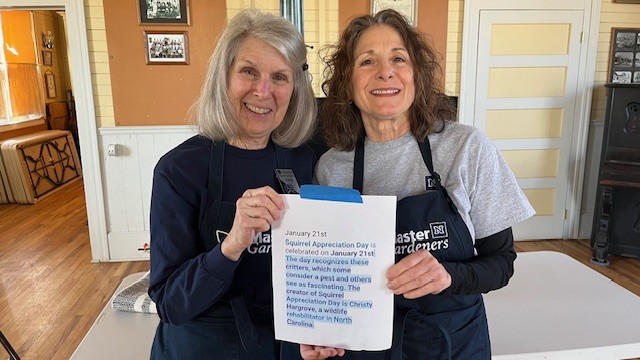
Lead Cindy Edwards, and Mimi Richards.
Photo credit Mimi Richards.
Mimi Richards
Photo credit Rachel McCLure.

Cindy Edwards
Photo credit Rachel McCLure.

Friendship garden planted with marigolds, cosmos, Ageritum, and snow in summer.
Photo credit Mimi Richards.
We have so much to be thankful for. The University of Nevada, Reno, Extension Master Gardener Volunteer Educator program is full of amazing volunteers who are committed to finding and providing scientifically based, university-researched horticultural information for people in our community.
We could not do what we do without the help and support of our community, our university and extension partners, and the dedication of our Master Gardener volunteers. Within our program we have some special volunteers known as leads. Leads are Master Gardeners who dedicate extra time to organize, plan, and execute tasks related to their project or activity. They do this by committing extra time to the program to lead and mentor other Master Gardener volunteers and give them the resources and confidence to support our community. They make a huge difference in our community as a whole and especially to the Master Gardener program.
One such activity is overseeing the gardens at the Historic Huffaker School, located at Bartley Ranch Regional Park. The park is just off Lakeside Drive south of McCarran Boulevard at 6000 Bartley Ranch Road in Reno. The leads, Mimi Richards and Cindy Edwards, are responsible for the landscaping of the “friendship circle” and beds around the old school house. Along with a few other Master Gardener volunteers they have been working hard to restore the gardens to their former status as the “Jewel of the Park.”
Q. What sparked your interest in gardening?
Cindy: Interview by phone, transplant in the greenhouse. My early childhood. I had two great-uncles in the agricultural business, one a nursery man and one a chicken farmer. My chicken rancher uncle always had a huge vegetable garden that I roamed when visiting him and my aunt. When I was 10, I went to Butchart Gardens in British Columbia, Canada, and it was amazing. I don’t know if that is normal for a 10-year-old, and it has shaped me.
Mimi: My mother was always interested in gardening. I was always interested in her succulent garden, and she was never afraid to try new things. When I was of 4-H age, I became a 4-H gardener, doing tons of weeding with my pet crow on my back to keep me company.
Q. Pet crow?
Mimi: Yes. We grew up on a ranch and begged to have baby squirrels and crows. We wanted to teach a baby crow to talk.)
Q: What is your gardening passion??
Cindy: Flowers and houseplants. I love the beauty and the color they bring to the garden.
Mimi: Enhancing our yards with a variety of plants with the thought that herbs and vegetables can be incorporated into the mix of flowers, shrubs and trees, to bring beauty and provide food too.
Q. How has the Master Gardener program scientifically helped you in your garden?
Cindy: The wonder of soil and how important it is. Particularly here, it is so important! Also, the process of propagation, from ground zero to a full plant. Also, learning where to go for information.
Mimi: Oh!! Learning about soil! I grew up gardening with manure readily available, and I didn’t realize how beneficial it was for gardening. Knowledge of soil and the scientific names of plants. I love that.
Q: What makes you smile about the Master Gardener program?
Cindy: I’m smiling right now, just talking about it! The people and shared community where we are all interested in becoming sharper with what we do in the garden. A great group of people.
Mimi: The like-minded friends I have met. We can have talks and conversations about plants, soil, and all things horticultural because they are not conversations you usually have with other circles of friends. My favorite conversation starter is “Do you have a garden?”
Q. Share a meaningful Master Gardener volunteer experience.
Cindy: My work in the Master Gardener greenhouse and the gals that I work with. Seeing what we help do in six months is amazing. I also have to add, working at Old Huffaker Garden, we get so many positive comments from community members walking by.
Mimi: I love working with the other volunteers at the Old Huffaker School because they seem to care about it like I do. We have ownership of these beds, and it has been fun to share that love of this location. I started there in 1995.
Q: One word to describe the Master Gardener program.
Cindy: Inspiring.
Mimi: Educational. Satisfying. (Just one word?!)
Q: Describe your project.
Cindy: We brought back to life the garden beds around the Old Huffaker School & Friendship Circle. It was done in stages. We got free plants, grew plants, added donated compost, and now we have a good base. It’s a constant learning process, what works and doesn’t, and critters! Great camaraderie with volunteers.
Mimi: The Historic Huffaker Garden Project is an area that gets viewed by so many people visiting Bartley Ranch. They always have questions, and we always stop and tell them the history of the garden and what we are doing there, and also share information about the Master Gardener Program and Help Desk. We are like-minded people who share the love for this historic location. It almost feels like we have a special little secret being able to garden there. We have a wonderful relationship and support from the rangers at the park. It is very special. The Historic School was built in 1868, 157 years ago, the same year that Reno was incorporated. My special link is that my children’s grandmother and great-grandfather attended that very school.
Q: How will you put that vision into practice?
Cindy: Adding more perennials for anchor plants and long-term benefit.
Mimi: The future around the school is always determined from season to season and year to year. Cindy and I collect ideas and see what we can change or should keep. It is always changing. Our vision is color, particularly in the friendship circle. The plants need to be good for our pollinators as well. Managing the critters is always our biggest issue.
Q: How does your project benefit the community?
Cindy: Visitors delight in coming into that area, with all the color, and the circle particularly makes people smile. Some people come by every day and stop to say thank you for what we do. Every time we are there someone comments and they are always smiling.
Mimi: It is a very public place; it has a lot of exposure to the public. We are always excited when people say things to us about the garden. It happens every day we are there and it is wonderful and rewarding. People come there to take pictures of special events, weddings, graduations, birthdays, and family reunions. It feels good there and they are drawn to it. It is a beautiful place.
Q: What keeps you involved in the Master Gardener program?
Cindy: The two projects that I am involved in. Each is evolving. It is fun to solve the problems. (Cindy’s projects are Old Huffaker School and Master Gardener greenhouse.)
Mimi: I love learning new things. I love seeing other gardens and techniques that gardeners use. I love our camaraderie and common interest in sharing all things horticulture, even though we come from all different backgrounds and interests. I don’t feel like I have to be an expert; we have access to so much information. I feel like I could accomplish almost anything with the information and knowledge we have collectively.
Q: What little-known facts about your project would you like others to know that they likely don’t know?
Cindy: The big thing is what happens at Bartley, the reason there is such a proliferation of critters is that people illegally relocate marmots and squirrels. They just don’t understand the impact of their actions and that it is not legal.
Mimi: When we were initially trying to fill some of the beds, we asked friends to donate things from their yards. Many of the plants we have are from other gardens and yards. We call it the friendship garden because they initially came from friends. I can name each plant and who gave it to us. Also, many people don’t know that there is deep Reno history here.
Winter Tree Care: Water and Pruning Myths
Article and illustrations by Ryan Daugherty
As we move into winter here in Washoe County, most of us turn our attention indoors as our landscapes fade into dormancy. Appearances can be deceiving though, and winter tree care is more important than many gardeners realize. Our high desert environment, combined with the decisions we make now, can have lasting effects on tree health. Watering and pruning are two areas that are often misunderstood, and understanding the science behind them can set your trees up for success when spring returns.
Winter Watering: More Than Meets the Eye
Tree roots don’t shut down when the leaves drop. As long as daytime soil temperatures remain around 40°F or higher, roots continue to respire, absorb oxygen, and take up water. When the soil profile dries out, especially after long stretches without rain or snow, those roots can become stressed. The damage doesn’t always show right away; more often it appears the following spring as poor leaf-out, branch dieback, or greater vulnerability to pests and disease.
Washoe County’s climate adds to the challenge. Our winters bring repeated freeze-thaw cycles, drying winds, and light snow that often evaporates before it can replenish soil moisture. Reno averages just over five inches of precipitation between November and March, much of it from storms too light to soak in. That means many landscapes benefit from occasional winter watering.
Even established trees may need irrigation every four to six weeks during extended dry spells, especially in windy or sunny exposures. Watering trees deeply once or twice a month during dry winters can make a big difference in spring vigor. Water slowly, allowing the moisture to soak to a depth of 12 inches around the dripline, not directly at the trunk.
Timing and frequency matter. If you’re like me, you’ll forget, so I use holidays as reminders. Ask yourself: Has there been a good rain or snow between Halloween and Thanksgiving, between Thanksgiving and Christmas, by Martin Luther King Day, and by Presidents Day? If not, it may be time to water. Always check your soil first by pushing in a screwdriver or digging a small hole. If it’s dry six to 12 inches down, water on a mild day above freezing so the moisture can soak in before nightfall.
Deep, slow watering is key, whether by soaker hose, drip irrigation, or a garden hose set to a trickle. The standard recommendation is about 10 gallons per inch of trunk diameter, distributed around the dripline. Mulching the root zone with two to four inches of organic material can further moderate soil temperatures and reduce evaporation.
Pruning Myths and Realities
Another common misconception is that winter is the best time to prune everything. While dormant season pruning does have benefits, like reducing disease spread and providing a clearer view of branch structure, it isn’t a one-size-fits-all rule.
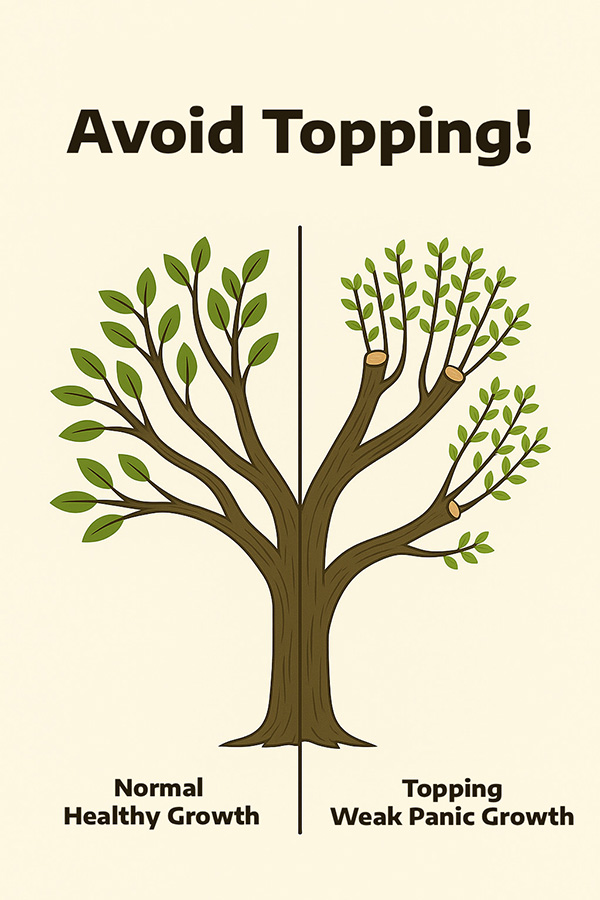
In late fall, trees move carbohydrates into their roots and stems for storage, saving them for spring growth. At the same time, growth-regulating hormones called auxins are produced in the shoot tips. Those auxins normally suppress dormant buds along the trunk and branches, a process known as apical dominance. When we prune heavily, we remove those auxin-producing tips. Without that hormonal brake, the dormant buds suddenly get the signal to grow. In spring, the tree responds with “panic growth”, fast upright shoots called water sprouts. These grow so quickly that their wood doesn’t have time to form properly, leaving them weak, poorly attached, and vulnerable to pests.
Even without leaves, intact branches and canopy provide shade and protection for the rest of the tree. Removing branches in midwinter exposes bark to more sunlight during the day. This warms tissues that can then freeze rapidly at night. The repeated expansion and contraction can cause frost cracks and sunscald, especially in smooth-barked species like maple, linden, and birch.
Pruning in late winter to early spring, just before new growth begins, minimizes these risks and allows wounds to heal quickly once growth resumes. During this time, cell division increases, callus tissue forms faster, and the risk of freeze injury lessens.
If you have to prune during dormancy, limit cuts to dead, diseased, or broken branches, which can be removed any time of year. For healthy limbs, keep live pruning light and intentional. As a general rule, remove no more than 10 percent of live foliage from mature trees in a single season. As Purdue Extension stresses, “each cut “has the potential to change the tree forever.”
Pruning Techniques That Protect Your Tree
- Use the three-cut method for large limbs to prevent bark tearing. First, make an undercut about one-third through the branch, 12 inches from the trunk. Then make a top cut a few inches farther out to remove the weight of the branch. Then remove the remaining stub just outside the branch collar (not flush with the cut)
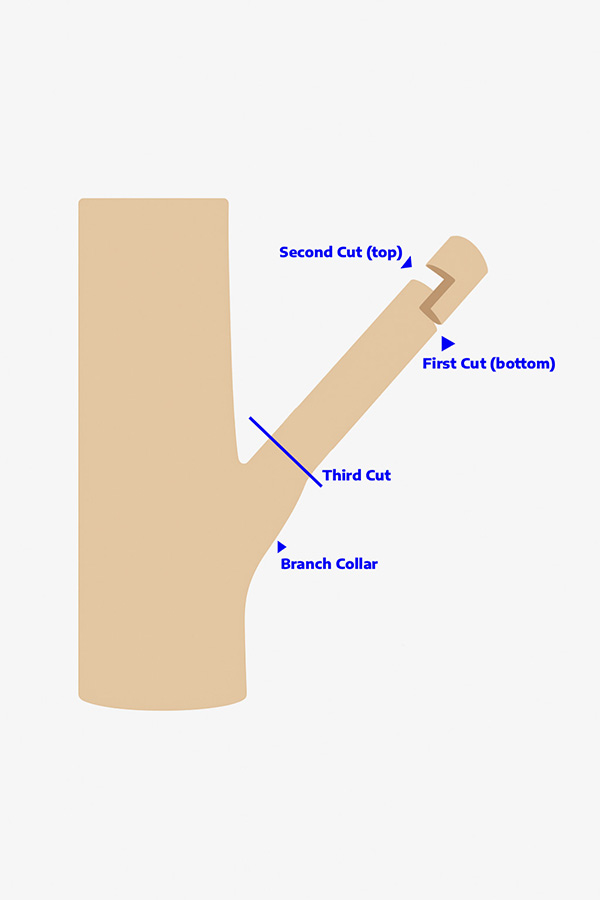
- Avoid stubs and wound dressings. Healthy trees seal naturally.
- Make smaller cuts whenever possible; they heal faster.
- Skip “topping” – cutting back main limbs to stubs or random points. This practice weakens trees, encouraging poorly attached sprouts (sometimes called “witch’s brooms”), and increases decay.
- For broadleaf trees, late winter to early spring is ideal. For conifers, timing depends on species:
- Pines can be “candled” (soft new shoots pinched back) in late spring.
- Spruce and fir should only be cut back to healthy buds or side branches.
- Arborvitae and juniper don’t regrow from bare wood; avoid cutting into the brown interior.
If you’re unsure or dealing with mature or high-risk trees, contact a certified arborist. Winter storms and frozen wood make tree work dangerous, and improper cuts can cause permanent harm.
Quick Checks Before You Prune or Water
- Soil check: Moist six inches down? Skip watering.
- Forecast: Choose a day above freezing with no hard frost expected overnight.
- Tools: Use sharp, clean pruners or saws; disinfect tools before moving to a new tree.
- Target: Remove only what’s necessary -- dead, diseased, or rubbing branches.
- Safety: Never prune near power lines or above your reach.
Winter in Washoe County is tough on trees, but good decisions now can make the difference between weak, stressed growth and a strong flush of green in spring. Giving roots an occasional drink when the soil is dry and pruning at the right time for the right species sets the stage for healthier trees and fewer problems down the road. Trees may look asleep this time of year, but they’re still very much alive, and they’ll thank you for the extra care when the growing season returns.
References:
- Klett, J.E.; “Fall and Winter Watering of Plants and Trees,” Colorado State University Extension, 2004, reviewed 2025.
- NOAA/National Weather Service – Reno, NV. Climate of Reno, Nevada (1893–Present): 1991–2020 Climate Normals. 2021.
- Schalau, Jeff; “Fall and Winter Irrigation,” University of Arizona Cooperative Extension, Backyard Gardener #231, 2024.
- “Watering Trees,” Truckee Meadows Water Authority, September 2016.
- Purcell, Lindsey; “Tree Pruning Essentials,” Purdue University Extension, Forestry and Natural Resources (FNR-506-W), 2015.
- “Late Winter or Early Spring the Best Time to Prune Trees,” Colorado State Forest Service, March 2021.
What’s Cooking in My Garden?
By Beth Heggeness
Leeks are like green onions on steroids -- stout and mild in flavor rather than rotund and sharp like standard bulb onions. They add gentle oniony flavor to many dishes, and are at their best paired with potatoes in a cheesy gratin or a hearty potato and leek soup.
You might think that leeks and potatoes are not natural pot-mates, like tomatoes and basil (pasta sauce!) or corn and lima beans (succotash!). If you want to grow leeks in northern Nevada, you have to start them very early because most of them have a very long growing season (120-150 days. Potatoes like a cold start, too, in March or April, but typically are harvested in 70 to 90 days, most likely well before the leeks are big enough for the kitchen.
But potatoes can be stored in a cool, dark, well-ventilated area for later use. And leeks are extremely cold-hardy. Even when mature, they can stay in the ground long after the advent of cold weather has defeated other veggies. If you toss a layer of loose straw or leaves over them, their long, creamy-white shafts underground and the light green leaves just above the soil surface will stay fresh and edible well into the winter.
This means that a home gardener can fetch some home-grown potatoes from the cellar or garage, dig up a couple of leeks and get them together in the kitchen at the same time for some stellar eating. With luck, the parsley in the garden is still producing (it’s cold-hardy, too) and there may yet be some dried thyme left from the summer’s harvest.
These are the makings of a hearty soup that I crave in the winter. This recipe is vegetarian, but you can add bits of ham or crumbled bacon if you like.
Beth’s Chunky Potato Leek Soup
8-12 servings
This soup’s layers of texture and flavor are developed by slow simmering on low heat. Never allow it to boil or the dairy ingredients will separate. I won’t call it easy. I stir and check pretty often, but it satisfies the cook in me.
Ingredients:
2 Tbsp. butter
2 medium leeks, trimmed to include white and pale green parts of the stalks. Cut in half and wash thoroughly to make sure all dirt and grit is rinsed out. Cut in half again and dice to produce approximately 2 full cups of diced leeks.
3 celery stalks, including healthy leaves when possible. Wash thoroughly, halve lengthwise, and dice to produce approximately 1 1/2 full cups.
2 pounds (approximately) of thin-skinned potatoes, such as Yukon Gold, or red potato, cut in half-inch cubes, approximately 6 cups. (I leave the skins on, because I like the texture.)
2 tbsp. dried (4 tbsp fresh) parsley
6 cups broth, divided. (I use chicken, but if vegetarian, use vegetable broth.)
1 tbsp. celery salt
2 tsp. dried thyme (4 tsp. fresh)
½ tsp. ground mixed peppercorns
Directions:
In a 4-quart pot, melt butter on low heat. Add half of the diced leeks (about 1 cup) and 1 cup diced celery. Saute on low heat until slightly softened, about 5 minutes. Add cubed potato, parsley, and 4 cups (1 quart) broth.
Simmer on low/medium heat about 35-40 minutes until potatoes are tender and broth is mostly reduced. Don’t let the pot become dry!
Add remaining 2 cups broth, 1 cup leeks, and ½ cup celery. I add these vegetables toward the end of cooking because I like the “al dente” texture at the end. Add them sooner if you like the veggies softer. Continue to simmer until broth is fully heated, about 15 minutes.
Finally, add 1 cup milk (whole or fat-reduced is fine) and 1/3 cup heavy cream. Don’t be shy about this ingredient. It’s needed for flavor.)
References:.
https://extension.umn.edu/vegetables/growing-potatoes
https://extension.umn.edu/vegetables/growing-leeks
Master Gardener Photos
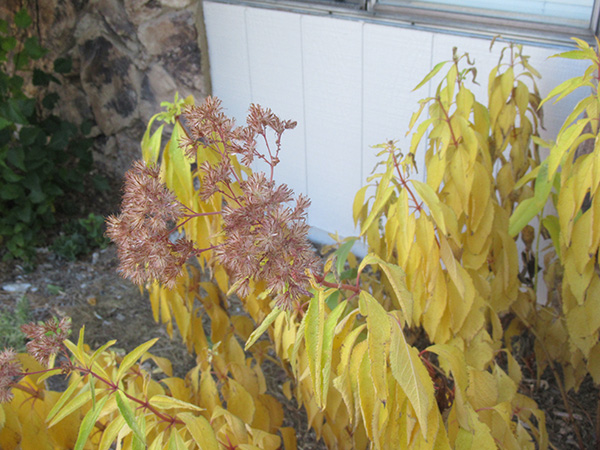
Fall colors of Joe Pye weed.
by Becky Colwell

Honey bee visiting gaillardia flower in November.
by Becky Colwell
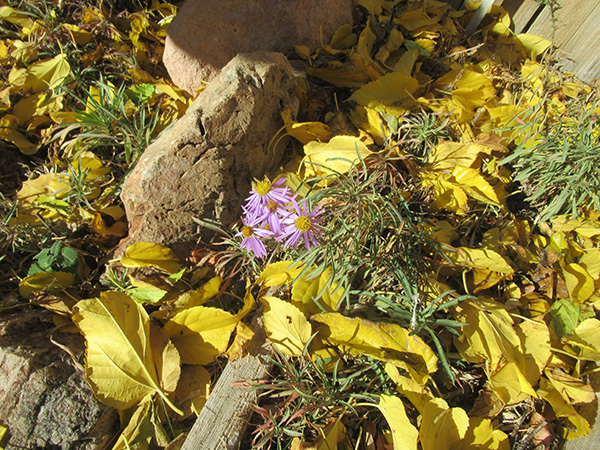
November blooming aster.
by Becky Colwell
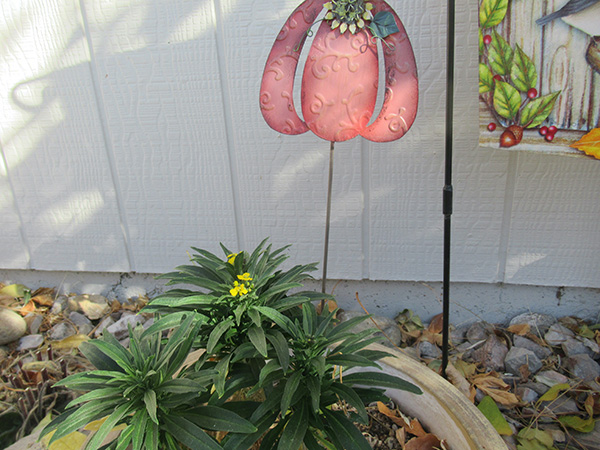
November blooming wallflower.
by Becky Colwell
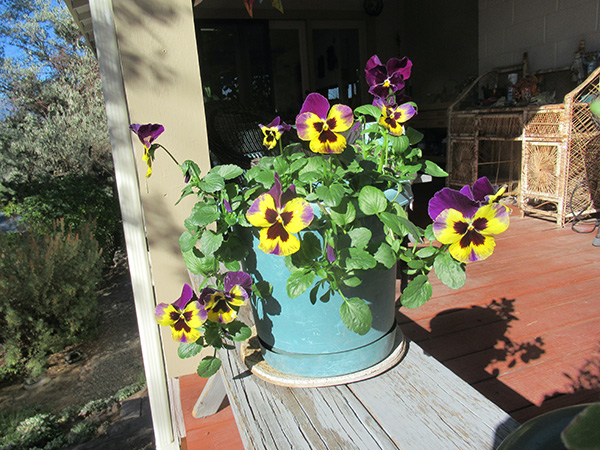
Pansies enjoying the sunny cool weather.
by Becky Colwell
Questions or comments?
Reach out to us!
Help Desk Hours: 10 a.m. - 2 p.m. Tuesdays, Wednesdays & Thursdays
Phone: 775-784-4848
Email: ExtensionWashoeMG@unr.edu
Rachel McClure Master Gardener Coordinator
Phone: 775-336-0274
Email: rmcclure@unr.edu
How to become a Master Gardener
WASHOE COUNTY MASTER GARDENER EVENTS
MASTER GARDENER HELP DESK
Published by:
McClure, R., Colwell, B., Doolittle, C., 2025, Washoe County Master Gardener Newsletter (2025-12), Extension, University of Nevada, Reno, Newsletters
An EEO/AA Institution. Copyright © 2026, University of Nevada Cooperative Extension.
A partnership of Nevada counties; University of Nevada, Reno; and the U.S. Department of Agriculture