Washoe County Master Gardener Newsletter (2025-09)
In this edition
- About This Newsletter
- A Note From the Editors
- Being a Master Gardener
- What's Happening This Fall
- Fava Beans: A Bean Inside a Skin Inside a Bean
- Long Live the Vegetable Season
- Spotlight Interview: Jeff Knight, a Man Who Knows His Insects
- Propagating Rosemary
- Raised Bed Cover Cropping
- A Magnificent Weed
- A Fascinating Nevada Native: The Tarantula Hawk
- A Moment of Gratitude
- Get a Load of That Tomato
- Master Gardener Photos
About This Newsletter
Welcome to our newsletter dedicated to gardening enthusiasts in Nevada! Here, the Master Gardener Volunteers of Washoe County are committed to fostering a community of gardening knowledge and education. Through this publication, we aim to provide research-based horticulture insights for our readers. Each quarter, we offer a wealth of information covering various aspects of gardening, from upcoming garden events to advice on topics ranging from pest control to sustainable gardening practices. Join us as we explore the science and artistry of gardening together!
A Note From the Editors
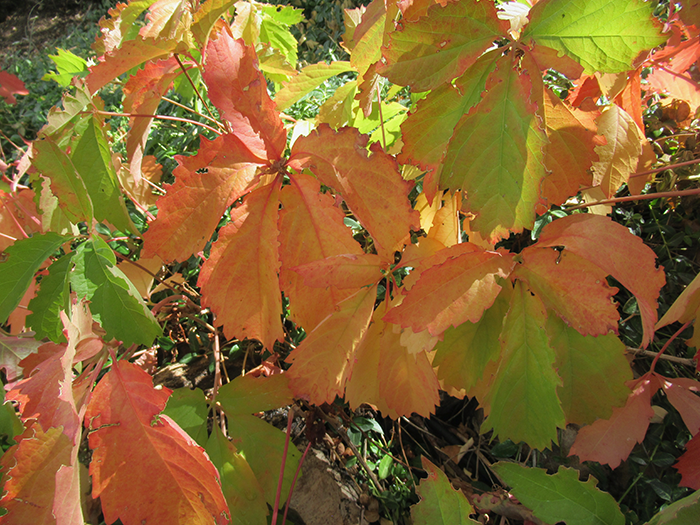
Fall colors of Vrginia creeper.
Photo by Becky Colwell
Welcome Fall! Cooling temperatures and colorful foliage make preparing our landscape for the cold of winter enjoyable.
Here are some garden chores best done in the fall:
• In the vegetable garden, remove all vines, stems, leaves, and other litter after the final harvest. This will reduce hiding places for insect pests, such as squash bugs, and may keep diseases such as powdery mildew from building up. Fall is also the best time to add composted organic matter to your garden beds.
• Protect young and some older trees from sun scald and hungry rabbits by wrapping them with tree wrap, available at local nurseries. The white wrap reflects the winter sun from the trunk so the trunk tissue stays dormant. Wrap the trunk from the base of the trunk to the lower branches. Remove the wrap in spring.
• Do not prune trees and shrubs as they are going dormant. Pruning in the fall will delay dormancy, causing the plant to be more susceptible to damage from freezing temperatures.
• Reduce the mowing height of your lawn mower to two inches for the last mowing. This will help prevent snow molds. After the last mowing, apply a quick-release nitrogen fertilizer; the nitrogen will be stored in the root system ready for an early greening next spring.
• Fall is the best time to direct-seed native species. Let nature do the cold stratification for you!
• Don’t forget to “leave the leaves” in flower beds. These not only provide shelter for our beneficial insects but also protect plants from the winter cold.
• Resist the urge to remove flower stalks and seed heads until late spring as these also provide overwintering spots for some beneficial insects and a food source for our feathered friends.
Happy fall gardening,
Becky and Chris
Being a Master Gardener
Article and photo by Rachel McClure
Washoe County Master Gardener Coordinator
If you follow this newsletter, you have heard me say Master Gardeners are amazing people before. Without doubt, I will say it again. Simply because they are.
Master Gardener Volunteers do so much. They take time to learn science based horticultural information so they can answer questions. They lead educational activities in their community so people can learn. They dig in and get dirty when there is a garden in need. They volunteer their time and share their knowledge in our community week after week. They are amazing.
They make friends wherever they go. They encourage people to do more and be more. They bring meaning to so many different parts of our community. They are generous and kind. If you are lucky enough to know a Master Gardener, that is wonderful! If not, go to one of their events and say “Hi.” It will be worth your time.
Upcoming talks:
Third Thursday Talks @ Rancho San Rafael Community Garden
September 18, 6 PM
Spanish Springs Garden Talks:
September 28, October 26, November 23, beginning at 1:30 PM
What's Happening This Fall?
Master Gardeners will be giving short presentations on a wide range of gardening topics at various locations this year, and a mobile Master Gardener help desk will be available at some locations as well. See locations, dates and times below.
Garden Talks at the Library
Where: Spanish Springs Library, 7100A Pyramid Way, Sparks
Talks will be held monthly on the fourth Sunday from 1:30 to 3 p.m., and the mobile help desk will be available from 1 to 4 p.m..
Sept. 28, 2025
1:30 p.m Planting Garlic: The best time to plant garlic is in the fall. Come learn from Master Gardener Gary Garrett how to prepare and plant your garden to ensure a great garlic harvest next year.
2 p.m Equip Yourself for Gardening: Come join Master Gardener Janet Owens to explore basic garden tools and match them to garden tasks. She has tips for selecting, purchasing, and caring for tools, and shares ideas on tools that make gardening easier on your body.
2:30 p.m. Planting Spring Bulbs in Containers: Tulips, daffodils, hyacinths and other spring bulbs need to be planted in the fall. Did you know you can plant these bulbs in containers? Learn tips and tricks from Master Gardener Diane Miniel for successful spring bulb planting in containers.
Oct. 26, 2025
1:30 p.m. Putting the Garden to Bed: End-of-the-season garden chores can also help reduce pest problems next year. Join Master Gardener Deborah Whitehouse to learn garden management practices that get you off to a good start next year.
2 p.m. Cleaning and Sharpening Garden Tools: Now that the garden is mostly tucked in for the winter, it’s time to take care of our garden tools. Join Master Gardener Frances Munoz to learn proper cleaning and sharpening methods for your hoes, pruners, and more.
2:30 p.m. Amending Soil in the Fall: Fall, when the ground is still warm from the growing season, is a great time to beef up your soil for the next year. Join Master Gardener Robyn Albaeck to learn the benefits and disadvantages of different soil amendments.
Nov. 23, 2025
1:30 p.m. Common Insect Pests of Houseplants and How to Deal With Them: The only thing worse than pests on your outdoor plants is pests inside of your home! Join Master Gardener Intern Abigail Jarrett to learn about common insect pests of houseplants and how to control them.
2 p.m. – Caring for Holiday Plants: Poinsettias, Christmas cactus and other festive holiday houseplants are wonderful decorative additions to your home. How can you help them survive and thrive to enjoy them next year, too? Master Gardener Valerie Ojeman shares techniques to let you enjoy your holiday plants now and in the future.
2:30 p.m. – How Do You Know When It’s Time to Repot? Different houseplants have different needs. Join Master Gardener Sara Marcus to learn when and how to repot common houseplants.
Fava Beans: A Bean Inside a Skin Inside a Bean!
Article and photos by Liz Morrow
It’s always fun to grow something new in the garden—to see how the plant responds to our growing conditions, its nuances, leaf structure, flowers, etc. And this new-to-me plant didn’t disappoint. Bush Bean Fava ‘Broad Windsor,’ Vicia faba, is an English variety dating back to 1836. Unlike other beans, this vegetable is planted in the early spring and enjoyed in early summer.
The large seeds require a six-inch spacing, and once they start to grow, the plants become heavy. Be prepared to stake them or provide a sturdy trellis for them to climb up. I made the fortunate decision to plant them along a cattle panel in my raised bed.
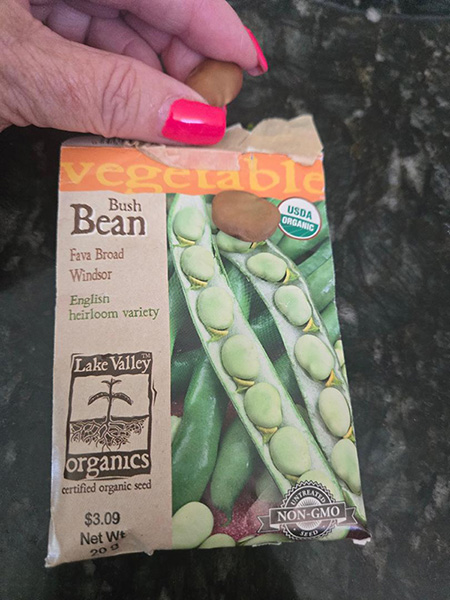
This is the biggest seed I've planted.

Fava bean plants supported by a cattle panel.
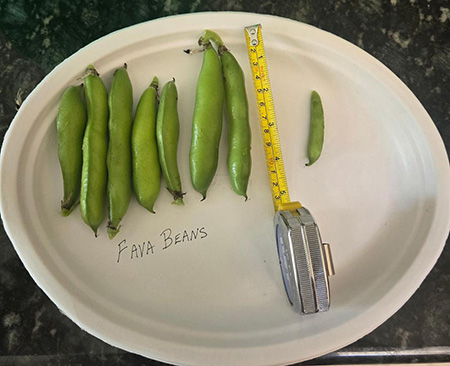
Fava beans can be harvested at different lengths; however, my experience was that when they’re young and tender, about two inches long, the entire bean is easy to eat as is. Prepare it as you would any other string or green bean.
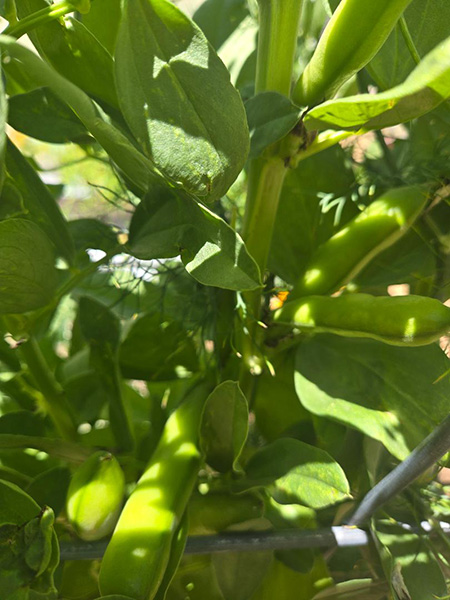
Fava bean pods on a plant.
Most people let the pods get five inches or longer before they harvest them to get the beans inside the pod. At that stage, there is a process involved:
- Starting from the bottom of the plant and working your way up, select and harvest the pods using snips, scissors, or pruners.
- Once indoors, bring a pot of salted water to a boil and toss the pods in for five to six minutes.
- Remove the pods from the pot and let them cool for a minute or so on a dish, then open the pods and remove the beans.
- There’s yet another step: the beans are wrapped in a soft skin that needs to be removed.
- Now you’re ready to cook these vibrant green beans to include in your recipes. The majority of recipes I looked up said to stir-fry them in a pan with olive oil and garlic or just butter. They’re then ready to enjoy, whether straight from the pan or added to a dish.
These are really a “bean” inside a “skin” inside a “bean.” Crazy, right? Essentially you have to shell them twice. But it really didn’t take long. I did my first harvest and decided that three five-inch bean pods would be enough to toss with some pasta for lunch. And it was. From harvest to table was 30 minutes.
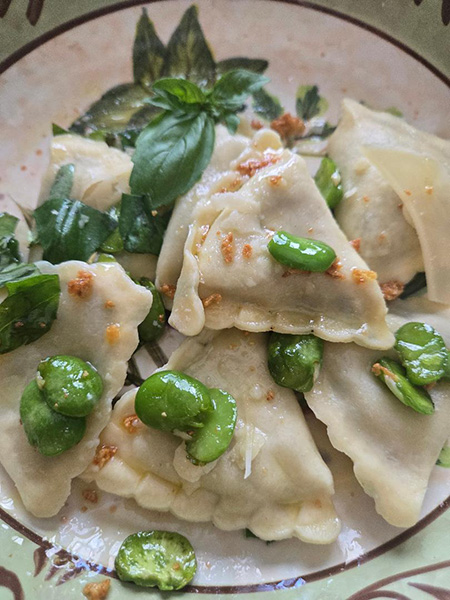
Fava beans, with garlic and basil from my garden, tossed with pasta.
The flowers on this vegetable plant are absolutely gorgeous and distinctive—black and white, so striking.
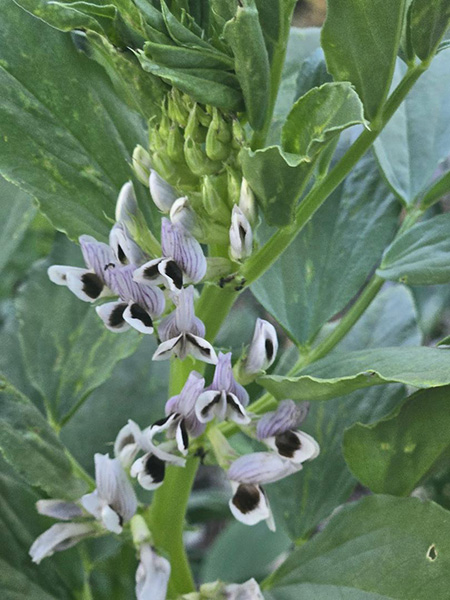
These black and white flowers form from the bottom of the plant and work upwards.
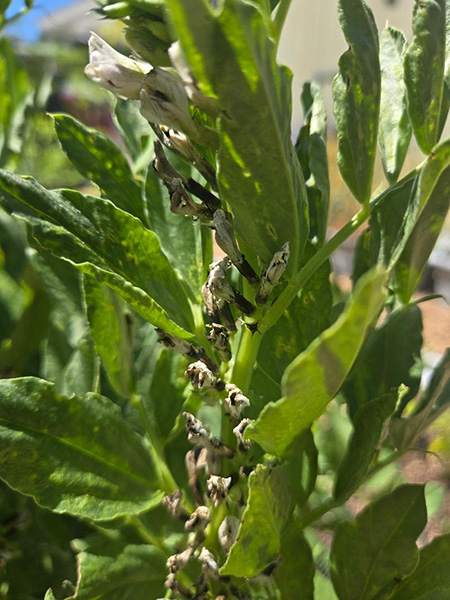
Fading flowers turning to fava beans.
The immature pod to the right can be eaten as is, raw or cooked.
The mature pods to the left must be shelled – twice!
The plate below shows harvested beans, three beans that were parboiled for six minutes, one tender immature bean, the skins of the beans, and, finally, the prize itself: fresh fava beans.
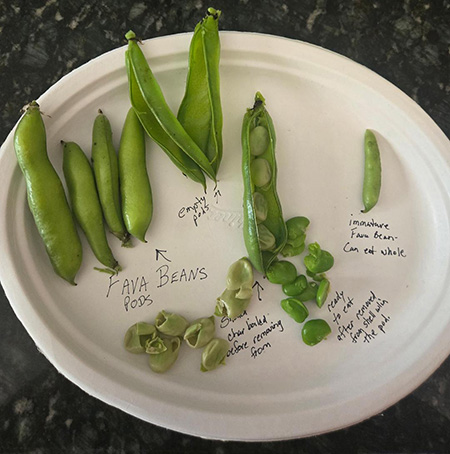
Stages of fava bean preparation.
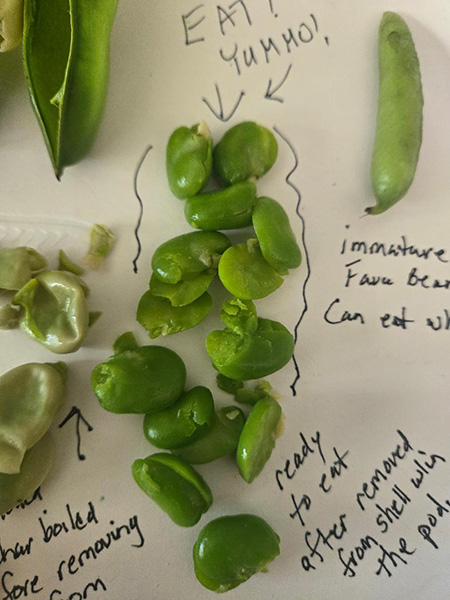
These bright green beans are the Cracker Jack prize from the garden.
For seed saving, keep the beans on the plant until the plant dies back and the pods turn black in the fall. Harvest the pods and open the shell to remove the seeds. Store seeds in a cool, dry place. Reminder: even though this seed seems easily identifiable, label and date when storing them.
Long Live the Vegetable Season
Article and illustration by René King
Among Northern Nevada's many gardening challenges is that there is precious little time for it. It seems that no sooner are the seeds sown than the TV weatherman is sounding the alarm about chilly nights and (gasp!) frost.
But there are strategies that can help the determined gardener extend the vegetable harvest well into the cooler months.
First, Pick a Defensible Battleground
• Choose a well-drained garden site for late-season vegetables to help keep roots better insulated. Early freezes are generally shallow. Mulch can help keep the ground from freezing, too.
• The more sun, the better. Shade encourages dampness. Damp soil on a cold night can mean a layer of crystalline frost in the morning.
• Avoid low-lying areas. As every general knows, the hill is easier to defend than the valley. Cold air is heavier than warm air and will collect in dips and pockets.
Select Stalwart Soldiers
• No faint-hearted squashes, peppers, or frilly lettuces for the fall garden, please. Greens like kale, spinach, mustard, and crisp-leaved romaine or Batavian lettuce varieties are known for their cold tolerance. Chinese cabbage and Swiss chard are other rugged greens for autumnal meals.
• Likewise, root crops such as carrots, parsnips, and beets, and members of the allium family, like leeks and onions, can withstand freezing temperatures. With minimal protection, they can often be harvested throughout the winter.
• It’s too late to seed them now, but if you have thought ahead and have seedlings available to plant, members of the cruciferous family, like broccoli, cabbage, Brussels sprouts, and cauliflower, are excellent candidates for the late-season garden. (There’s a reason Brussels sprouts are traditional at Thanksgiving.)
• Whatever you plant, you want to focus on early-maturing varieties. This is not the time for daikon radishes (70 days to maturity in fall) when French breakfast radishes (30 days) will do.
No Fortress Needed, but a Tent Is Handy
• Frost blankets, also known as row covers, provide protection from cold, wind, and intrepid late-season insects. Lightweight ones will do for quick overnight shelter from a light frost. Be sure to put it on before the sun sets, to trap some heat around the plants.
• Heavyweight covers can shield your veggies from heavier frost and moderate freezes, even down to temperatures in the high teens. These are most effective if installed as temporary low tunnels, with the cover supported by wire hoops at night and opened when the daytime temps rise above freezing. Nevada being what it is, sometimes several days of temps in the 40s follow a cold snap. You might even salvage a crop from late-maturing warm-season veggies with these.
• If you have the space and a site that is both sunny and protected from wind, you can go all out and erect a “hoop house.” These passive-solar structures, popular among market gardeners, are just like covered tunnels, but much bigger. They can straddle several garden rows and be tall enough to work in, on hands and knees at least.
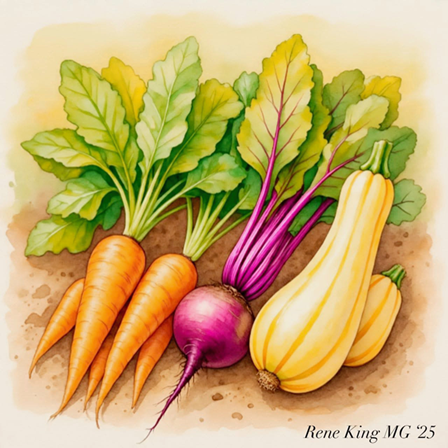
Illustration by Rene King
Resources
Gatzke, H., McCuin, G., and Nelson D.; Plant Season Extension in the Desert, University of Nevada Cooperative Extension, 2009.
Spotlight Interview: Jeff Knight, a Man Who Knows His Insects
Interview by Kim Hobson

Jeff Knight, photo courtesy of the Nevada Department of Agriculture.
Jeff Knight joined the Nevada Department of Agriculture in 1976 with a brand-new Master of Science from Utah State University and an abiding interest in all creatures with six or eight legs. In 1993, he was named Nevada state entomologist. He retired in July after nearly four decades of protecting the state’s environment and its farming economy from invasive insects and agricultural pests.
Will you please tell us what inspired you to become an entomologist?
I grew up in Washoe Valley and was always interested in insects from a young age. I got involved in 4-H entomology and stuck with that until college. My parents were always supportive of my interest in insects and continued to collect insects for me their entire lives.
My 4-H leader, Richard Cameron, was a major influence in my youth, and I also had several mentors through my college studies. I have always found insects fascinating, especially when you look at how diverse the species are. Even today, I find species that I have never seen before.
What are your core responsibilities as the state entomologist of Nevada?
- Survey and oversee the eradication/control efforts aimed at exotic insects that present a threat to Nevada.
- Provide citizens of Nevada with insect and other arthropod identifications and recommendations for control.
- Manage and curate the reference collection of insects and other arthropods. This includes collecting and identifying insects from across Nevada to be added to the collection.
- Oversee the Nevada Department of Agriculture (NDA) portion of the Mormon cricket and grasshopper survey and control program for Nevada (in cooperation with the U.S. Department of Agriculture and the Animal and Plant Health Inspection Service).
- Provide outreach and continuing education programs on insect identification and control for the public, nurseries, pest control companies, and the horticultural and agricultural industries.
What are the most pressing insect-related challenges currently facing Nevada?
The most pressing challenge is how Nevada, with limited resources, can keep various invasive species like red imported fire ant, spongy moth, Japanese beetle, emerald ash borer, and several more from being introduced and becoming established in the state.
How do Nevada’s unique desert and mountainous ecosystems affect insect populations and your work as an entomologist?
Nevada’s diverse climate creates many different localized insect issues. Going from near-alpine conditions in one part of the state to the Mojave Desert in southern Nevada, each brings its own set of insect issues.
Can you discuss the impact of climate change on insect migration, survival, and invasive species in Nevada?
About the only thing I can speak to on this is the increase in introduced invasive pests into Nevada. This is most likely due to the increase in and speed of worldwide and transcontinental trade and travel. With limited personnel, we are not able to fully inspect incoming materials for pests and enforce quarantines.
What role do you play in monitoring and managing invasive species that threaten Nevada's agriculture and ecosystems?
The Nevada Department of Agriculture has several insect quarantines that I, as the state entomologist, oversee. These insects are a threat to Nevada or are identified under state and federal quarantines that the NDA helps to enforce. We try to prevent the introduction or spread of these species in Nevada.
The NDA places and monitors over 2,000 traps around Nevada for almost 30 different invasive species. If one is found, we then evaluate the population and oversee eradication and quarantine efforts if those goals are deemed achievable.
How have the advancements in tools and technologies improved entomology efforts during your tenure as state entomologist?
Through my tenure as state entomologist beginning in 1993, I have seen the introduction and use of various developments in technology, including cellphones, desktop computers, and GPS units. This has allowed the NDA to transition from paper forms to personal digital devices—cellphones and tablets—over the years. Around 2010, I fully converted the paper identification forms to digital to speed up response time. Now we have initiated a complete laboratory information management system to digitally handle sample information throughout the department. Literature used for identifying specimens has gone from standard paper publications to fully digital multivariate keys available on the internet, making hundreds of years of published information on insect groups readily accessible at my desk.
How does your office collaborate with farmers, researchers, and other agencies to address pest outbreaks?
The NDA is always available to assist any group in Nevada needing entomological expertise, including identification and treatment options.
What recent pest-related issues have had significant impacts on Nevada's communities or agriculture?
In recent years, Mormon crickets have impacted both urban areas and cropland in northern Nevada. We have treated over 100,000 acres in the last two years and have more planned for this year.
Are there any emerging pests or insect-borne diseases the public should be aware of?
Several new pests have become established in Nevada in recent years, such as the elm seed bug, brown marmorated stink bug, and an insect that feeds on Russian thistle. Although these have not become crop pests here yet, they are nuisance pests that move into homes to overwinter. The NDA has collaborated on projects involving some insect- and tick-transmitted diseases, but these typically fall under the Animal Disease Laboratory.
How may community members support your work to help protect Nevada's natural and agricultural environments from harmful insects?
Citizen scientists can play a key role in detecting new insects by submitting specimens or photos to the department to help us catch the invaders early.
What is the most rewarding aspect of your role as the state entomologist?
I always feel good after I have helped someone solve an insect problem, especially if I helped prevent them from spraying pesticides unnecessarily or paying for an expensive treatment. It is also rewarding to receive feedback after my lectures when someone tells me how interesting it was and how much they learned about insects.
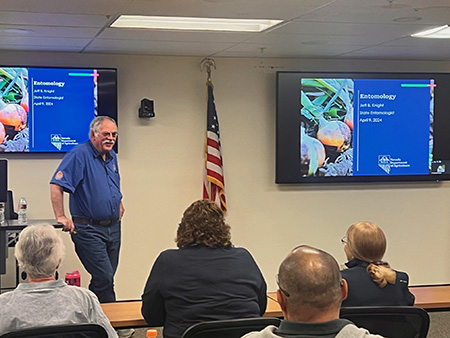
Jeff Knight giving a presentation on insects to a Master Gardener class.
Photo credit Rachel McClure.
What advice would you give to young people interested in pursuing careers in entomology or environmental science?
Being an entomologist has been a rewarding career, and you get to see something new almost every day. If you enjoy it, working will be so much easier.
For more information, visit agri.nv.gov/entomology
Propagating Rosemary
Article and photos by Joanne McClain
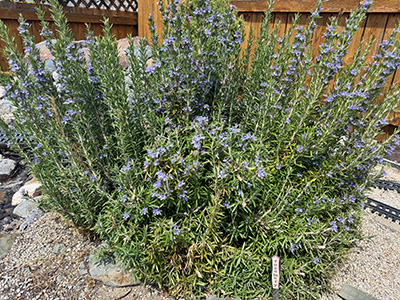
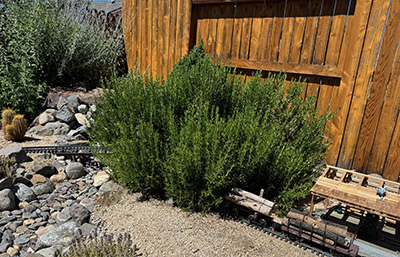
Rosemary originated in the Mediterranean and was brought to North America by Europeans. It is a member of the mint or sage family, Lamiaceae. While it was previously in the genus Rosmarinus, it is now in the genus Salvia and is botanically known as Salvia rosmarinus.
It can be an evergreen shrub in USDA hardiness zones 8 to 12, with a few types being hardy to zone 7, and it grows well in containers. The plant’s fragrant, needle-like foliage is deer- and rabbit-resistant, and its small flowers are very attractive to bees.
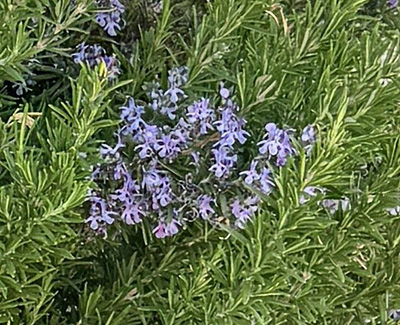
Rosemary flowers appear in spring.
This rosemary bush has lavender flowers,
but the flowers may also be blue, pink or white.
On discovering that you can propagate rosemary from cut stems, I decided to give it a try. You can start them in water or in potting soil. They root quicker in water, so I chose to use that method. I found instructions for using both the young, tender shoots and the older, woodier stems. I recommend only using the young shoots because I did not have success with the older stems.
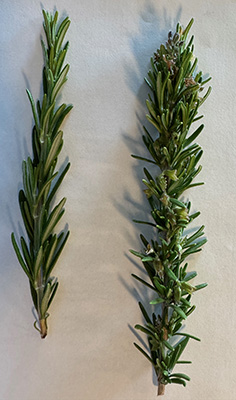
The left stem is an example of a young stem
versus the right stem, which is older and woodier.
Detailed Steps for Propagating in Water
1. Select the right stems. Spring to early summer, when the plant is actively growing, is the best time to take cuttings. Choose young, flexible, healthy-looking stems four to six inches long. Remember to sanitize your tool. Cut just below a leaf node. Do not select shoots that have started to flower.
2. Remove two to three inches of the lower leaves. Use your fingers to strip the leaves from the lower one-third to one-half of the cutting, leaving about five to six sets of leaves at the top. Dipping in rooting hormone is optional.
3. Place in a small container with water. Make sure the leaves are not submerged. Place in a warm area that gets six to eight hours of indirect light.
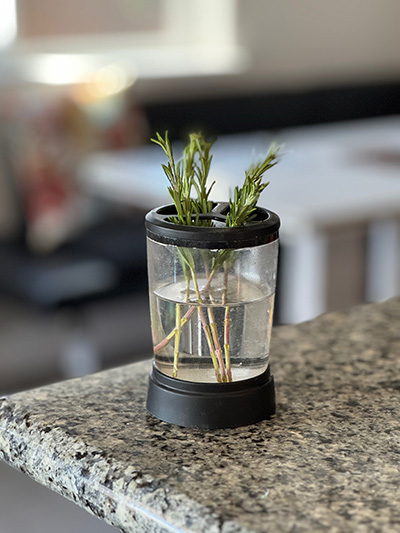
A clear jar will allow you to see the roots starting to form.
4. Change the water. Try to change the water every two to three days. You do not want the water to appear cloudy.
5. Wait. Roots can take from two to four weeks to start, so you must be patient.
6. Transplant. When the stems have developed at least five roots that are about 1/2 inch long, transplant them into containers with potting soil. Grow them indoors until they are about six inches tall.
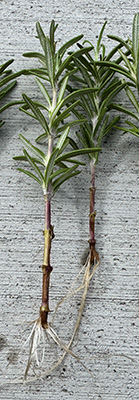
Rosemary roots that are ready to be planted into a container.
7. Sun exposure. Before planting outdoors, you will need to gradually acclimate your new plants to the sun. Once adjusted, they will need at least six hours of full sun.
8. Do not overwater. Rosemary likes to be on the dry side. They do not need a lot of fertilizer.
I have grown rosemary for many years and have never known there were so many variety options until I started to do research for this article. Rosemary plants can have an upright or spreading/creeping growing habit. I realized I was not sure what variety I had in my yard, and I wanted to see what my variety options were at the local nurseries. In the big-box stores, they were simply labeled “Rosemary.” Locally owned nurseries had several varieties. Below is a list of the ones I found locally in Northern Nevada. There are even more varieties available depending upon the zone you live in.
If you want to try growing and propagating rosemary, you may want to explore the different options you have within the varieties listed.
Salvia rosmarinus ‘Arp’
One of the most cold-hardy (to 10°F) and one of the most fragrant, this rosemary grows up to four feet tall and wide and has light blue flowers in the spring. This upright variety has a hint of lemon. I found this variety in most of our local nurseries.
Salvia rosmarinus ‘Common Rosemary’
Common rosemary grows two to four feet tall and is best for cooking purposes. As its name suggests, it is the most common type you will find.
Salvia rosmarinus ‘Gorizia’ (nicknamed Barbecue Rosemary)
The strong straight stems are ideal to make skewers for barbecuing, which is how it got its name. The taste of rosemary will be diffused from the skewer. This upright shrub can grow from two to six feet tall, and four to six feet wide. It blooms June to July with light blue flowers. It is hardy in USDA zones 8-12 and “possibly” to zone 7.
Salvia rosmarinus ‘Huntington Carpet’
This is a low-growing and spreading variety. Huntington Carpet rosemary has an intense aroma with a distinct piney taste. This unique flavor profile makes it a popular choice for culinary purposes such as flavoring oils and adding to bread. USDA zones 8-11.
Salvia rosmarinus ‘Tuscan Blue’
Known for its excellent flavor, this rosemary grows four to six feet tall and three feet wide, with dark blue flowers. It is one of the best rosemary varieties for topiaries, with deep green foliage that can be sheared into any shape. It’s also highly fragrant and can be used for cooking purposes. Hardy to 15 degrees.
Salvia rosmarinus ‘Upright’
This is a pretty shrub with an upright form, up to four feet tall and three feet wide, with lavender-blue flowers in spring. It’s wonderful to grow in a container, and will overwinter outdoors in zone 7.
Salvia rosmarinus ‘Prostratus’
This creeping rosemary is a low-growing shrub that grows only about one to two feet tall and spreads up to eight feet. It does well in a hanging basket or hanging over a wall in USDA zones 8-10.
Salvia rosemarinus ‘Speedy’
Known for its fast growth, this small shrub grows to about two feet and is hardy to zone 7. Its quick growth and smaller size also make it popular for growing as an annual or in a pot to be overwintered indoors.
With all the varieties I found available, just be aware that not all of them are hardy to zone 7. They can grow quite large but are easy to prune.
Rosemary is an attractive plant with the additional benefit of its multiple uses in the kitchen. One of my favorite things to do with rosemary is to simmer it on the stove to make the house smell wonderful. Pour about four cups of water into a pan and add a few fresh rosemary sprigs. You can add lemon peel, cinnamon sticks, and vanilla extract for a variation. You can use minced rosemary on roasted potatoes, vegetables, eggs, in stews or incorporated into your bread dough.
I hope this has sparked your interest in rosemary. I encourage you to plant a rosemary shrub and experiment with propagating to share with friends or just to enjoy this wonderful plant in your garden.
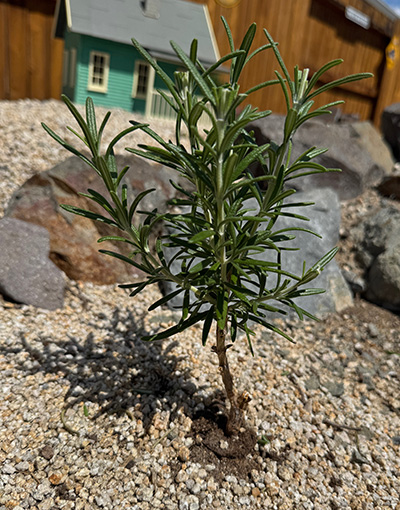
Rosemary that I planted in the spring of 2022
in our garden railroad. It has survived three winters.
Rosemary I have trimmed to be in
the shape of a tree in the garden railroad.
Raised Bed Cover Cropping
by Frances Munoz
In the agriculture industry, a cover crop is a crop that a farmer plants between cash crops. It won’t be harvested and sold; it’s grown to protect the land from erosion by water and wind, to help retain moisture, to suppress weeds, and to add nutrients to the soil for the growing year.
For the same reasons, cover crops have become increasingly popular among gardeners, especially those cultivating challenging soils like those of Northern Nevada. Many gardeners in our area are choosing to use raised beds as an alternative to planting directly into their nutrient-deficient soil. By incorporating cover crops during the fall and winter, we can significantly improve soil health and prepare it for a healthy spring planting.
Certain crops, such as legumes, help increase nitrogen levels, and other crops, like annual grasses and grains, can add organic matter and help cycle nutrients into your soil, making it richer for your spring planting. And any crop that covers the soil will help keep weeds from getting a toehold in your garden over the winter.
Here are some suggested cover crops to use in our area:
- Annual Ryegrass: It’s cold-tolerant and will help fight erosion and improve movement of water through the soil.
- Legumes (like field peas): The roots of these plants produce nitrogen to nourish successive plantings.
- Brassicas (like mustards or daikon radishes): Deep-rooted radishes can help break up compacted soils, and mustards, in addition to providing biomass, release bioactive substances that can help control some soil-borne pathogens like Fusarium and Pythium.
- Winter oats: They can help recycle nutrients and protect the soil from wind erosion.
- Crimson Clover: This legume crop adds nitrogen to the soil and can attract beneficial insects as well.
You can combine cover crops to increase the benefit. For example, winter oats will produce a protective blanket over the soil in the winter and plenty of biomass to incorporate in the spring, but if mixed with field peas or crimson clover, the legumes will also leave nitrogen in the soil as a bonus.
How and When to Plant
Most cover crops are started from seed. When you have chosen your preferred crop, sprinkle the seed on the bed in the fall as crops begin to die down, and cover it lightly or water it in. September or early October is best, so the plants can take hold before cold weather sets in. If you still have plants producing in your garden, you can sow the cover crop right over them and remove them later, when they stop producing or a frost cuts them down.
In our climate, putting a cover over the bed could be beneficial. Examples of covers that can be used would be woven frost cover or chicken wire, which will let the sunshine in and allow for watering, should we have a mild winter. It will also help protect the cover crops from weather events and keep unwanted wildlife out of beds.
What to Do in the Spring
While most cover crops will die and start to decompose by spring planting time, an extended autumn may encourage some to flower and try to set seed. A mild winter may even allow some to revive in the spring. If that happens, be sure to cut back the cover crop before it goes to seed. You don’t want your weed-suppresser to become a weed itself.
Let the cover crop at least partly decompose before replanting your garden in the spring. About three weeks should be enough, depending on the weather. You can use mechanical methods such as tilling or broad forking to break up the plants and incorporate the residue into the soil. Alternatively, you can cover the bed with black plastic or tarps to block sunlight, which not only promotes decomposition but also warms the soil. In this case, the decayed cover crop can become mulch for the bed. This also helps control diseases, weeds, and nematodes without resorting to chemicals.
References:
Walia, M.K.; “Benefits of Cover Crops”; University of Nevada, Reno, Extension; FS-10-11; 2019
Walia, M.K, and Kay, E.R; “Soil Cover, A Soil Health Principle”; University of Nevada, Reno, Extension; FS-22-16; 2022.
Udayakumar Sekaran, Karthik Karuppanan, Vigneshwaran Raja, Jemila Chellappa, Ruijun (Ray) Qin, and Joel Felix; "Biofumigation cover crops: Enhancing soil health and combating pests"; Oregon State University Extension; June 2025
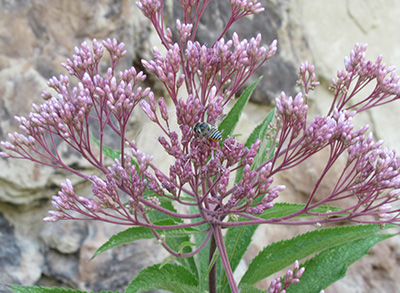
A Magnificent Weed
Article and photos by Becky Colwell
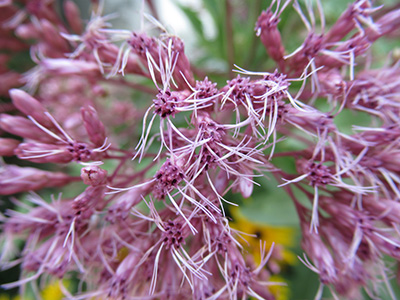
One of my favorite late-summer bloomers is a weed that I had to coax to grow in my garden. It’s called Joe-Pye Weed, and its showy mauve/pink flower clusters nod at the top of stalks that grow up to seven feet tall, attracting swarms of butterflies and other pollinators. It is a common sight this time of year, growing wild in meadows and at the edge of woods and streams from Maine to Georgia and as far west as Arizona.
But of the five species of Joe-Pye Weed, in the Eutrochium genus of the Asteraceae family, only one, E. maculatum, commonly known as Spotted Joe-Pye Weed, is found wild in the western United States. Even then, it is not native to Nevada (nor to California or Oregon). I got mine years ago as a division from my sister-in-law, who was growing it in Lovelock, NV.
It took a few years to get it going, and it takes regular attention to keep it thriving, but its rewards are many. Joe-Pye Weed is a great late-season nectar source and is resistant to deer, rabbits, and most plant diseases and insect pests.The mature flower heads also make a nice fall dried arrangement.
 Spotted Joe-Pye Weed florets forming in late July.
The common name is derived from the purple-spotted stems.
According to folklore, the genus was named after Joe Pye (Jopi), a Native American healer from New England. He used another species, E. purpureum, or Sweet Joe-Pye Weed, to treat many ailments such as fevers, typhus, kidney stones, and other urinary tract ailments.
Like its eastern cousins, Spotted Joe-Pye Weed likes soil that is moist but well drained, and average to rich in fertility. Mine would be average, and I put mulch on top to help keep the soil moist and cool. They also like full sun, although in the high desert most plants appreciate at least some shade. Mine face west, and get shade until about noon.
I typically water three times a week, but if it is extremely hot I water every morning. The mulch, watering, and morning shade help them withstand the heat and dryness in our area. They spread by rhizomes as well as by seed and often form small clonal colonies.
It grows very tall, four to seven feet, with large three- to six-inch showy flower bundles at the top. The plants may need staking or other support, unless they are protected from the wind or grown in the back of a flower border with sturdier plants in front of them to hold them up.
I cut the stalks back in late fall to about one foot, then in the spring when the new growth starts coming up I cut the dead stalk to the ground.
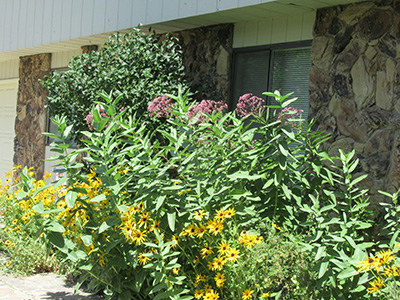
Showy mauve/pink flower heads blooming on top of seven-foot stalks.
Typical blooming time is from July to September. Mine usually starts blooming in the middle of August. In late July the florets start forming and by mid-August are replaced by achenes with tiny tufts of bristly hair. These hairs assist the seeds to get scattered by the wind. Where conditions are to its liking, Joe-Pye Weed will prolifically self-sow. That is not generally a problem in our growing conditions, but it’s something to keep in mind if your garden space is limited and your plot well watered.
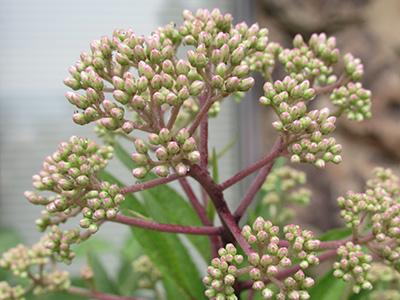
Spotted Joe-Pye Weed florets forming in late July.
The flowers are actually tiny tufts of bristly hair.
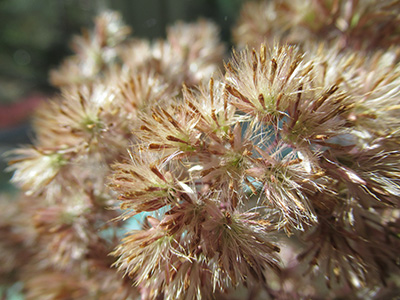
What the flower head looks like when gone to seed.
The bristly hairs of the flower will help the seeds scatter in the wind.
Joe-Pye Weed species can be divided in early spring or fall. Despite its ability to self-seed prolifically in some climates, propagation by seed in our area is harder. The seeds need to be cold-stratified, so if you want to direct-sow seeds, plant them in the fall. They may also be planted indoors if cold-stratified first for at least 30 days in a moist medium, like a paper towel, in the refrigerator. Since the seeds need sunlight to germinate, cover lightly with soil when you plant them and keep the soil moist. Germination may take two to three weeks. The seedlings can be planted outdoors about two months after germination. Make sure you acclimate them first.
Native leaf cutter bee visiting the flowers.

Gray hairstreak butterfly feeding on the flower nectar.
References:
• King, L., and Robins, H.E.; Eutrochium maculatum Plant Fact Sheet, United States Department of Agriculture Natural Resources Conservation Service, 2012.
• Marcus, Joseph A.; Lady Bird Johnson Wildflower Center, Eutrochium maculatum plant database, modified 2022.
A Fascinating Nevada Native: The Tarantula Hawk
Article and photo by Sara Marcus
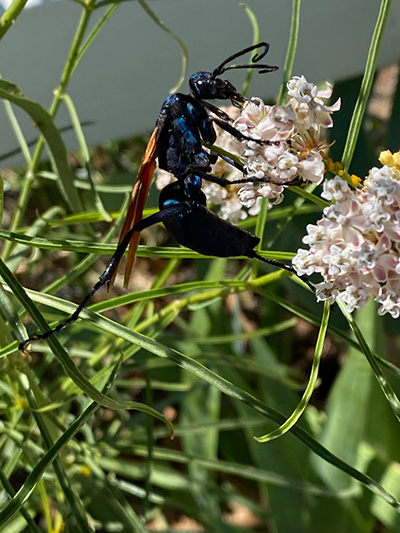
A tarantula hawk wasp on a narrow-leafed milkweed flower at
the community garden in Rancho San Rafael Regional Park in Reno.
If the tarantula hawk’s name alone weren’t enough to make your hair stand on end, its appearance and reputation might.
Tarantula hawks are not birds but wasps – very big ones, up to two inches long – and are said to deliver one of the most painful insect stings known to science. The most common species in Nevada, Hemipepsis ustulata, is the color of Halloween, iridescent blue-black with orange wings. Scary-looking, indeed.
Luckily, these wasps would much rather be sipping nectar at a milkweed flower (they are nectavores, and good pollinators). Despite their fierce appearance, they are docile, and generally will not bother people if people don’t bother them. Plus, only the female has a stinger, which she uses to procure tarantulas as food for her progeny. The male, identifiable by his curled antennae, has no stinger.
Tarantula hawks are in the order Hymenoptera, which includes other venomous insects like bees and ants, and are in the genera Pepsis or Hemipepsis. As the name suggests, the wasp specifically hunts tarantulas to host her eggs.
When a female tarantula hawk captures a tarantula, she stings it to paralyze it, but not kill it, before she drags the immobilized spider to her burrow and lays a single egg on it. The sting doesn’t kill the tarantula spider, which is important, because when the larva of a tarantula wasp hatches, it needs live prey.
The egg hatches in a few days, and the tarantula hawk larva has a fresh, albeit paralyzed, meal waiting for it. It takes about three weeks for the larva to mature, and it doesn’t eat the spider’s vital organs and nervous system, killing it, until it reaches its last instar, or growth stage. Larvae then pupate for two to three weeks before becoming adult tarantula hawks.
Around dusk from September through early November is a good time to watch for both tarantulas and tarantula hawks. That is tarantula mating season and, probably not coincidentally, tarantula hawk egg-laying season. Male tarantulas will be out of their burrows and on the hunt for females – and the hawks will be watching.
As for that sting, the late Arizona entomologist Justin Schmidt, who created the Pain Scale for Stinging Insects, rated the tarantula hawk’s just behind that of the South American bullet ant, Paraponera clavata. A critical difference, he said, was that the pain from the bullet ant sting lasts 24 hours; the tarantula hawk’s sting, which he described as “instantaneous, electrifying and totally debilitating,” subsides in about five minutes.
Still, that’s reason enough, if you happen to see one of these beautiful wasps hanging around some milkweed, to enjoy the view but respect its space.
References
Colorado State University, 2017, “Colorado Insect of Interest: Tarantula Hawk”; Colorado State University PDF, accessed Aug. 8, 2025, at https://wci.extension.colostate.edu/wp-content/uploads/sites/14/2017/04/Tarantula.hawks_.pdf
Safford, M.M., 2015, “Tarantula Hawk”; National Park Service web page, accessed Aug. 8, 2025, at https://www.nps.gov/articles/tarantula-hawk.htm
Jones, Austin; 2024; “Wasp uses paralyzed spiders to feed growing larvae”; University of Arkansas web page, accessed Aug. 8, 2025, at https://www.uaex.uada.edu/media-resources/news/2024/october2024/10-07-2024-ark-tarantula-hawks.aspx
Miller-Cripps, R., 2024, What Is That Huge Thing on the Milkweed? (aka Tarantula Hawk Wasp). University of California Cooperative Extension Master Gardener PDF, 2 p., accessed August 8, 2025, at https://ucanr.edu/sites/default/files/2024-09/402196.pdf
Osterloff, Emily; “Tarantula hawks: The most painful wasp sting in the world explained;” The Museum of Natural History, London. https://www.nhm.ac.uk/discover/the-most-painful-wasp-sting-in-the-world-explained.html
A Moment of Gratitude
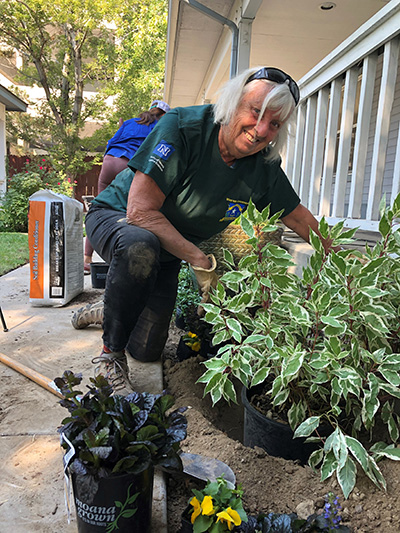
Master Gardener Angela White, who has lead
responsibilityfor the gardens at the Ronald McDonald House in Reno.
Photo by Rachel McClure
We have so much to be thankful for. The University of Nevada, Reno, Extension Master Gardener Volunteer Educator program is full of amazing volunteers who are committed to finding and providing scientifically based, university-researched horticultural information for people in our community.
We could not do what we do without the help and support of our community, our university and extension partners, and the dedication of our Master Gardener volunteers. Within our program we have some special volunteers known as Leads. Leads are Master Gardeners who dedicate extra time to organize, plan, and execute tasks related to their project or activity. They do this by committing extra time to the program to lead and mentor other Master Gardener volunteers and give them the resources and confidence to support our community. They make a huge difference in our community as a whole and especially to the Master Gardener program.
One such activity is overseeing the gardens at the Ronald McDonald House on Maine Street in Reno. The house provides lodging for families with children who are receiving medical care in the Reno area, and Master Gardener Angela White has made it a personal mission to create and maintain a beautiful place of respite for these guests. Let’s take a minute to get to know Angela from a recent interview:
Q. What sparked your interest in gardening?
A. My mother. I grew up in England, my parents fought in World War II. Everyone had gardens then, Victory Gardens. We had mostly vegetables and berries.
What is your gardening passion?
Rescuing dying plants. It happens to be very economical.
How has the Master Gardener program scientifically helped you in your garden?
I don’t know. It did make me learn the scientific names for plants. I was a research scientist, a microbiologist.
What makes you smile about the Master Gardener program?
People.
Share a meaningful Master Gardener volunteer experience.
The thanks we get both in person and on social media for helping make the environment at the Ronald McDonald House welcoming for patients and their families.
One word to describe the Master Gardener program.
Fulfilling.
Describe your project.
Renovate and maintain the gardens at the Ronald McDonald House. We do everything from pruning roses to adding flowers and colorful plants. And, of course, weeding.
What is your vision for your project?
To get a grant to update the watering system and to replace much of the original landscaping with a tastefully designed perennial garden.
How will you put that vision into practice?
Wishful thinking and continual communication with sponsors of the project. We also get plants donated from the Master Gardener greenhouse. Many of our team members also donate perennial plants.
How does your project benefit the community?
The Ronald McDonald House dwelling provides a “home away from home” for families with children receiving medical treatment at local hospitals. Our project provides a welcoming, restful, and tranquil outdoor environment for them.
What keeps you involved in the Master Gardener program?
The people.
What little-known facts about your project would you like others to know that they likely don't know?
The east-facing garden was designed using flowers that match the colors of the Ronald McDonald color scheme, which were orange, red, and yellow. We recently found out the color scheme is changing, so we will be updating to blue, pink, and white soon.
Get a Load of That Tomato!
Article and photos by Chris Doolittle
As the gardening season turns to September, two topics consume the tomato gardener. First, loud complaints about what a difficult year it was. Too hot. Too cold. Too windy. Too buggy. Too short.
And second, just look at this beauty!
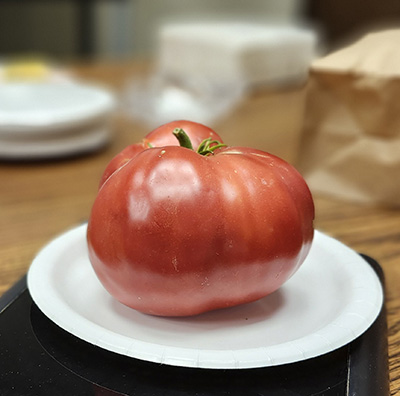
Weighing at 588 grams (almost 1.3 pounds), Michael Jackson’s Brandywine.
As the deadline arrived for submissions to the annual Master Gardener Tomato Contest on Sept. 8, some growers blamed their empty hands on hail, some blamed rabbits, and some lamented that their fruit, though surely worthy of prizes, still hung unripe on the vine.
Some, however, turned in winners. Lots of them.
Three veteran tomato growers – Mark Humphries, Michael Jackson, and Jeff Curtis – practically swept the four categories: Largest Tomato, Most Unusual Tomato, Best-Tasting Large Tomato, and Best-Tasting Small Tomato.
The Largest category drew only two submissions, neither of them a tomato to be sneezed at. Michael’s plump pink Brandywine, at 588 grams, bested Jeff’s 382-gram Evergreen.
In the Most Unusual category, Mark grabbed first place with his Orange Accordion and second place with his Blue Beauty. In third place, Rachel McClure’s Magic Bullet delivered the unusual for sure, but not, at least this time, the magic.
The Best-Tasting categories were decided by cumulative point totals from all four judges: Megan Andrews, program coordinator for community horticulture; Wendy Hansen Mazet, program coordinator for community plant health; Angeline Jeyakumar, assistant UNR professor and nutrition specialist; and Bethany Steiner, 4-H coordinator.
The judges gamely sliced and sampled eight Large contenders, taking periodic breaks to nibble bread as a palate cleanser, ranking each fruit on a 1-to-10 scale.. Mark took the win for his Pink Berkeley Tie Dye; Jeff took second place with another Evergreen (proving it had superior quality as well as size); and Mark snagged a third-place tie with a Purple Cherokee and a Blue Beauty.
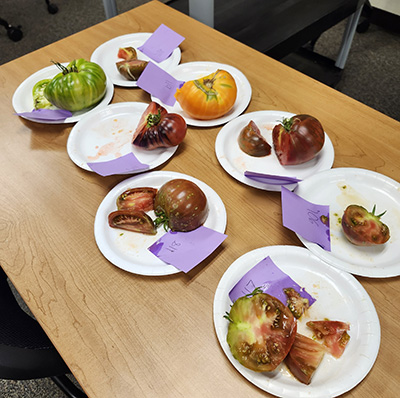
The contenders for Best-Tasting Large Tomato. The winner
(mostly devoured), at far right, is Michael Jackson’s Pink Berkeley Tie Dye.
In the Small contest, Jeff won top honors with Blush and Linda Fulton took second with the simply named but expertly grown Cherry Tomato. In third was Michael, who offered Isis Candy, a diminutive bicolored fruit.
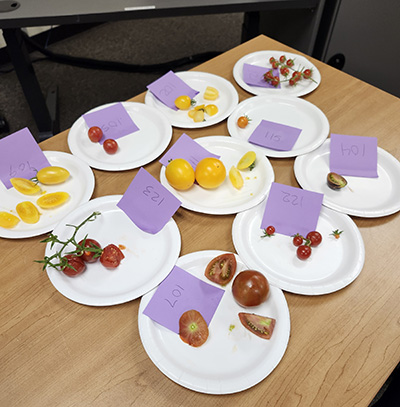
Best-Tasting Small Tomato honors went to Blush,
the yellow tomato at far left, submitted by Jeff Curtis.
Master Gardener Photos
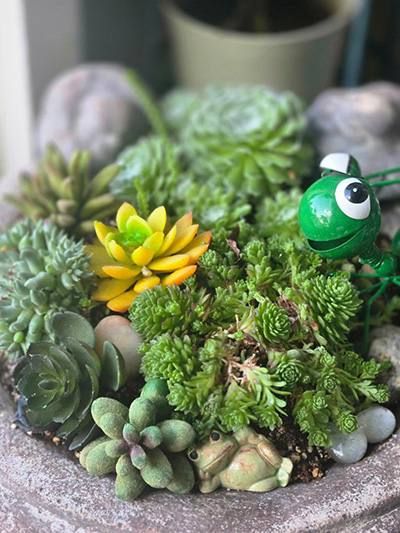
A birdbath of sempervivums.
Photo by Liz Morrow
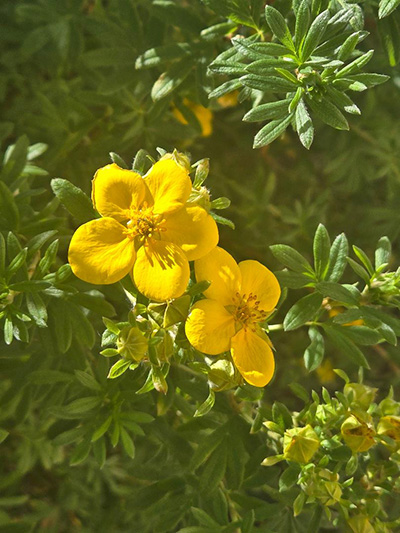
Happy face of potentilla.
Photo by Liz Morrow
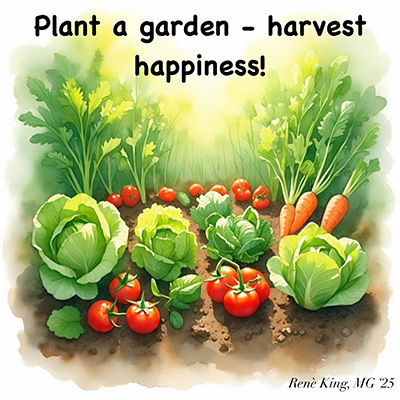 Art by René King
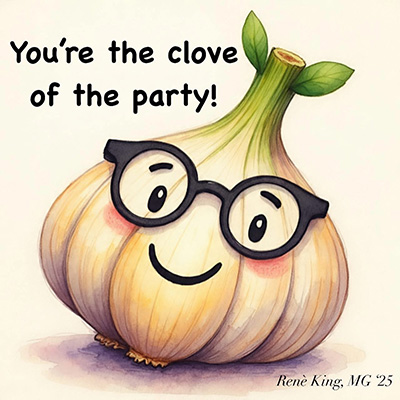
Art by René King

Art by René King
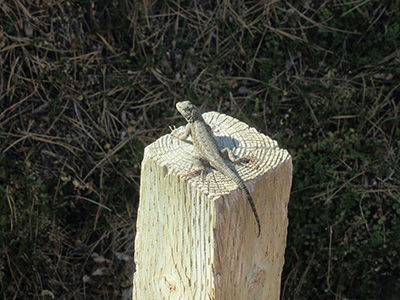
Lizard warming up while looking for a meal.
Photo by Becky Colwell
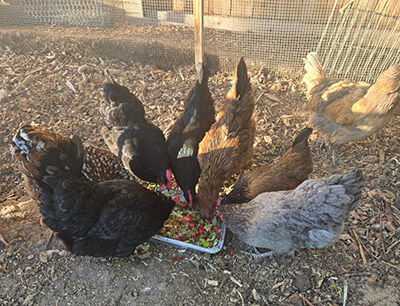
My chickens enjoying a Greek salad.
Photo by Liz Morrow
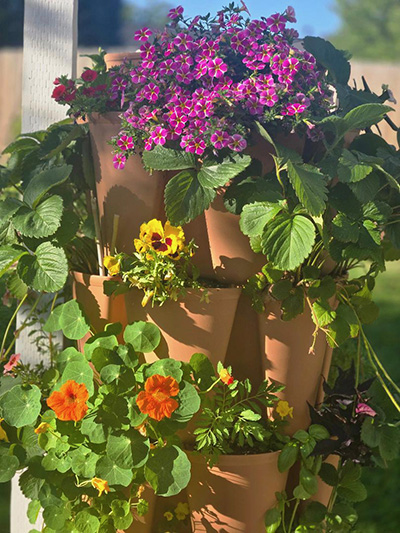
My Greenstalk vertical planters with a plethora of plants.
Photo by Liz Morrow
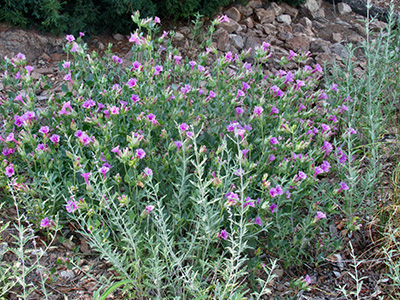
Native desert four o'clock in full bloom.
Photo by Becky Colwell
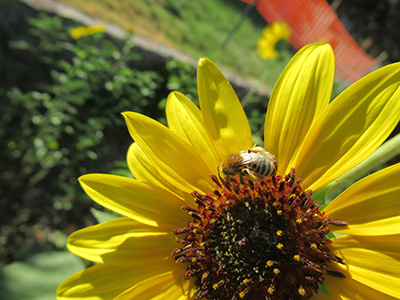
Native sweat bee gathering pollen from a common sunflower.
Photo by Becky Colwell
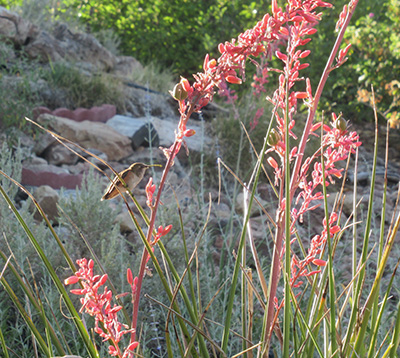
Resting rufous hummer on false Texas yucca.
Photo by Becky Colwell

Vego raised bed with nasturiums, sunflowers, and tomatoes.
Photo by Liz Morrow
Questions or comments?
Reach out to us!
Help Desk Hours: 10 a.m. - 2 p.m. Tuesdays, Wednesdays & Thursdays
Phone: 775-784-4848
Email: ExtensionWashoeMG@unr.edu
Rachel McClure Master Gardener Coordinator
Phone: 775-336-0274
Email: rmcclure@unr.edu
How to become a Master Gardener
WASHOE COUNTY MASTER GARDENER EVENTS
MASTER GARDENER HELP DESK
Published by:
McClure, R., Colwell, B., Doolittle, C., 2025, Washoe County Master Gardener Newsletter (2025-09), Extension, University of Nevada, Reno, Newsletters
An EEO/AA Institution. Copyright © 2026, University of Nevada Cooperative Extension.
A partnership of Nevada counties; University of Nevada, Reno; and the U.S. Department of Agriculture