In this edition
- A Note From the Editors
- Washoe County Master Gardener Coordinator
- Spotlight Interview
- What's Cooking in My Garden
- Seed Harvesting and Cleaning: Part 1
- Dill Pickle Recipe
- Autumn Planting for a Spring Extravaganza
- Praying Mantis
- Potato Berries
- A Fall Nuisance
- Planting Winter Veggies
- The Blooming Truth About Boron
- Gratitude
- Photos
- Creative-Inspirational Photos Needed
About This Newsletter
Welcome to our newsletter dedicated to gardening enthusiasts in Nevada! Here, the Master Gardener Volunteers of Washoe County are committed to fostering a community of gardening knowledge and education. Through this publication, we aim to provide research-based horticulture insights for our readers. Each quarter, we offer a wealth of information covering various aspects of gardening, from upcoming garden events to advice on topics ranging from pest control to sustainable gardening practices. Join us as we explore the science and artistry of gardening together!
A Note From the Editors
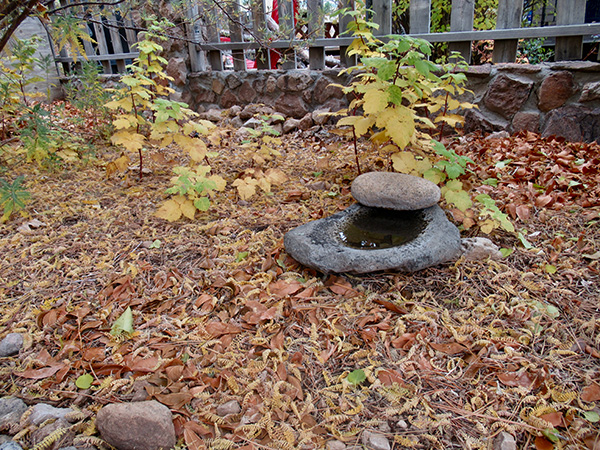
Leaving the Leaves,” provides critical over-wintering spots for our pollinators and beneficial insects.
Photo by Becky Colwell.
Ah, September. You can feel the dog days of summer fading into the cooler air of fall! As we transition from summer chores to fall chores don’t forget to leave some over-wintering spots for the beneficials. “Leave the Leaves” to “Save the Pollinators.” A covering of leaves in our flower beds not only provides food and shelter for butterflies, moths, and native bees, but also shelters the plants from extreme cold. Resist the urge to remove flower stalks and seed heads until late spring. Not only do these provide winter interest to our gardens, they are another safe place for insects to overwinter and a food source for our feathered friends.
We hope you benefit from the diversity of articles in this issue. Enjoy your gardening as the days cool and the beautiful colors of fall begin.
Becky and Chris
Washoe County Master Gardener Coordinator
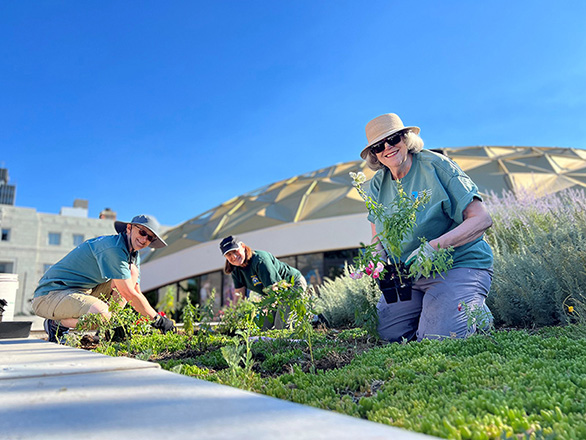
Photo by Rachel McClure.
It’s Fall!
Such an amazing time in the garden! This season here in Northern Nevada did not disappoint! Mother Nature was out in full force, causing us to say, "This is such an unusual year!" The humor in that statement is that we seem to say that every season, every year.
This summer, we had a long, hot, dry spell that caused many gardens to "stall out." Gardens stopped blooming or fruiting, and turf turned brown. In many cases, this happened because automated or timed watering systems were not adjusted to account for the high temperatures, increased evaporation, and plants' greater need for moisture in the soil.
On the flip side, this August we had SNOW in Washoe County. Is it unheard of? No. Is it unusual? Yes. Garden enthusiasts in our area are tough and not easily deterred, even by snow in August. An example of this resilience is the annual Master Gardener Garden Tour hosted by Rail City Garden Center. It was amazing this year. We had so many beautiful gardens, and yes, we had rain, sleet, snow, and also bright sunny days. Attendees and gardeners alike seemed to be almost energized by the weather and were out in droves in support of the Master Gardener Program and indulging in garden gazing. We are so fortunate to live in this amazing community!
The milder temperatures of fall will often reward the gardener here in Northern Nevada. Those at higher elevations will need to start watching for frost warnings, but those in the lower areas will now have moderate temperatures and will see a flush of blooms and fruiting bodies in flowers and vegetables.
Rachel
Spotlight Interview
by Kim Hobson
Featuring Shannon Swim, University of Nevada Reno (UNR), Research Scientist/ Native Seed Bank Manager.
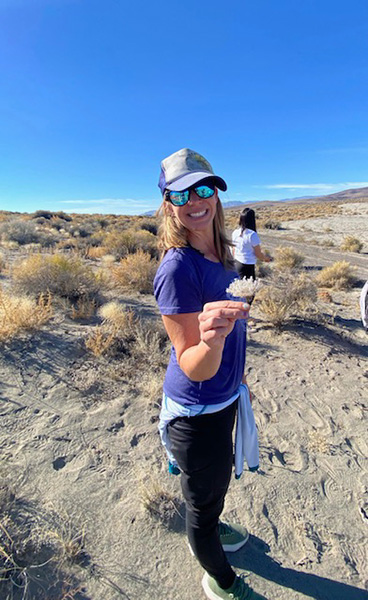
Shannon Swim, playing in the desert with native plants,
with the University of Nevada Reno plant identification class.
Photo by Beth Leger.
Can you tell us a little about your background and how you became involved in the pollinator program at the university?
I fell in love in plants when I was about 14 years old. They are so fascinating and impressive! So naturally, my love of plants led me to a career working with plants. I got my B.S. in Forest Management and Ecology and my M.S. in Natural Resource Management (both at UNR—I am a die-hard local kid). I started out working at Moana Nursery and owning a gardening business. The information I learned while getting my degrees really solidified my appreciation for plants and that is when I learned the importance of native plants. Towards the end of my M.S. program, I got wind that Beth Leger (UNR professor of biology and director of the UNR Natural History Museum) and Sarah Kulpa (a botanist and restoration specialist with the U.S. Fish and Wildlife Service) were getting approvals to put in a native pollinator garden in the Fleischmann Agriculture Quad and I was like, cool! I want to be a part of that and have been ever since. Since that first garden, we have installed three more native pollinator gardens on campus.
What is the primary mission of the university’s pollinator program?
The UNR native pollinator gardens have several objectives. We want to support native pollinators (they are kind of important), showcase the beauty of native plants, support our Natural History Museum’s mission to educate folks on the importance of our natural system, and to provide an easy access spot for research.
How do pollinators impact our environment and why is it important to support them?
One in every three bites of food we take is the result of pollination! Have you ever seen those pictures of what our meals would look like without pollinators? Pretty bland, boring, and missing a whole lot of nutrients. Non-native honeybees are used for most large-scale agricultural operations, but we have over 1,000 native bee species in Nevada! We need to support those native pollinators and the best way to do that is to plant locally adapted native plant species. The more diversity there is, the more resilience there is to change.
What are some of the biggest challenges facing pollinator populations today?
I am definitely not an expert on the insect population declines, but pesticides, especially neonicotinoids, and habitat fragmentation are two of the biggest challenges our pollinator populations face.
How does your program collaborate with Master Gardeners in our community to promote pollinator health?
Our Master Gardener volunteers are invaluable! We have struggled for years to piece together help to maintain the gardens and now that we are connected with the Master Gardener program, the gardens are getting more of the love they need. And they are just the loveliest folks you could ever meet; excited to learn about native plants and they match my nerdiness with plant excitement. It’s great!
What are some simple steps people can take in their own gardens or local areas to help pollinators?
This is a great question! Folks can plant native plants in their gardens. Native plants can be hard to find in Northern Nevada, but here is a link to some sources. Another thing folks can do is to stop or minimize pesticide use, especially neonicotinoids which are essentially insect neurotoxins. Just doing those two simple things of adding native species to your yard and not using pesticides can make a huge difference for our native pollinators.
Direction to College of Agriculture
Street parking is available outside the College of Agriculture building located on Evans Avenue. To your right of the entrance to the College of Agriculture is the Fleischmann Agriculture quad (FA), where several native plant beds are in full view. As you continue along the paths towards the Engineering Labs, you will see “Cactus Hill” and “Pollinator Hill” just beyond and to the left of the Engineering Lab Building.
You may view our gardens on the UNR campus
What's Cooking in My Garden?
Photos and article by Beth Heggeness
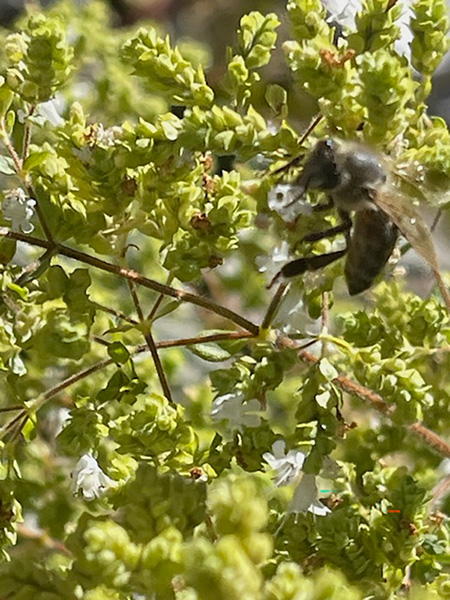
Honey bee visiting Greek oregano flowers.
Growing herbs for culinary use is by far the most satisfying part of my home garden. Fresh herbs (or even dried ones) are expensive in the grocery store. But I can walk out to my patio, snip just a sprig or two of fresh herbs (one tablespoon minced is equivalent to a teaspoon dried), and get superior flavor for much less money.
Not only is growing herbs a “hot, hot, hot” activity, many herbs can also stand up to the “hot, hot, hot” challenge of Northern Nevada’s climate. Most herbs like at least six hours of daily sun, and they are easy to grow in containers, raised beds, or in-ground. Herbs may be planted among other ornamental plants as hardy parts of a sustainable, drought-tolerant, pollinator-friendly landscape. Establishing an herb in your garden or patio pot is almost like settling in a long-term friend.
Most herbs like well-drained soil, but it does not have to be especially fertile or constantly moist. Over-fertilizing and over-watering can produce excessive amounts of foliage with a lower oil content (thus weaker flavor), and encourage root and stem rot diseases. Established herbs can tolerate dry conditions, but this is the desert, so some supplemental water, preferably by drip irrigation, is recommended. Allow the soil to dry between watering. If you use mulch to conserve soil moisture, keep it away from the base of the plants.
Because I’m fond of “Mediterranean-style” cooking, one of the herbs I use the most is oregano (Origanum vulgare), also known as wild marjoram. The genus name, derived from the Greek, means “joy of the mountain.” It is a fragrant culinary and medicinal herb that has been used for thousands of years.
There are different types of oregano:
- Greek oregano (O. vulgare hirtum) is also known as Mediterranean oregano or common oregano. Savory and earthy, this oregano is the one most commonly sold as dried oregano.
- Italian oregano (O. x majoricum) is a hybrid of oregano and marjoram, and has a sweeter flavor that’s ideal for seasoning pasta and pizza sauces.
- Mexican oregano (Lippia graveolens) is a relative of lemon verbena. It is native to Mexico, but also grows in Central and South America and is sometimes referred to as Puerto Rican oregano. Although this herb shares the basic pungent flavor of Mediterranean oregano, it also has notes of citrus and mild licorice.
- Cretan oregano (Origanum onites) is also called Turkish oregano and pot marjoram. This species, grown throughout Greece, Turkey, and Italy, is similar in flavor to common oregano.
Clipping herbs before they flower, or from stems that have been dead-headed, yields a more tender and slightly less pungent product.
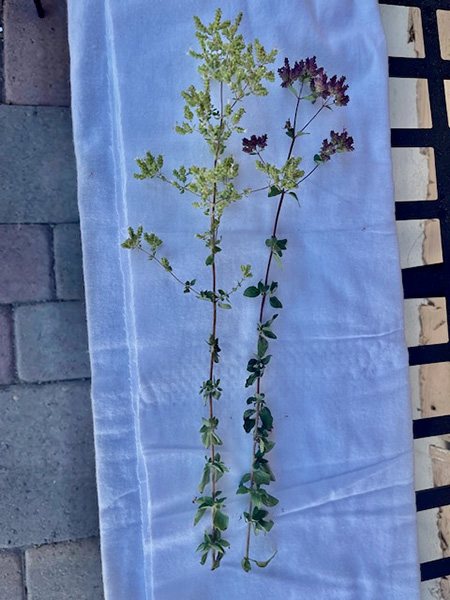
Greek oregano, left, and Italian oregano, right, in flower.
In the early fall, when fresh tomatoes from the garden are plentiful, one of my family’s favorite noshes is homemade fresh salsa. I make gallons of it, by request!

Beth's Salsa.
Beth’s Family-Requested Salsa
Never made from a “recipe.” I just use these ingredients, in roughly these amounts, and taste to adjust.
5-6 large ripe tomatoes (about 3 pounds), chopped.
½ large white onion, finely diced
1 bunch fresh cilantro, finely chopped, including some stem (enhances flavor).
Juice from 2 fresh limes
1 tbsp. ground cumin, 1 tbsp. fresh oregano finely chopped, or 1 tsp. dried
Salt and pepper to taste
If your family likes it spicy, add finely diced fresh jalapenos or hot sauce to taste. Serve with your favorite corn tortilla chips.
Resources:
CMG GardenNotes #731 : Herb Gardening.
Herbs for the Home Garden
Selected Culinary Herbs: Harvesting, Preservation and Usage
Seed Harvesting and Cleaning: Part 1
Photos & article by Rod Haulenbeek
(This is the first of a three-part series about turning seeds from this year’s flowers into next year’s plants.)
You see an annual or perennial plant you’d like for your yard, and want to get a few of them. Off you go to the nursery, only to find one of two scenarios: 1. These wonderful plants are not available. 2. They are in stock, but only as single plants in 4-inch pots with a sticker-shocking price tag of $13.99. What to do?
How about planting a plant from seed and enjoying its growing into your dream plant?
I’m infected with what I call “Plant Variety Sickness” – I have around 150 kinds of annuals and perennials in my landscape. In Master Gardener potlucks and seed swaps from this fall to next spring, I’ll be giving away seeds. If you want to join me in the sickness, grow your own plants!
I start by harvesting seeds in summer and early fall. The secret to harvesting seeds is timing. Harvest a seed too early and it won’t be ripe enough to germinate; too late, and it’s gone from the plant, either eaten, dropped, or blown away in the wind.
Here are the steps I take to harvest seeds:
1. Identify the desired plant (with location) while in bloom. If you don’t know what it is, you can sign up for an identification app on Inaturalist.org.
2. Once you know what it is, download a picture of the desired plant’s seed from the internet.
3. Return to the plant after one month.
4. Look for a seed head (or fruit or pod, whatever the plant uses to package its seeds) getting brown or gray, indicating it is ripe for harvest.
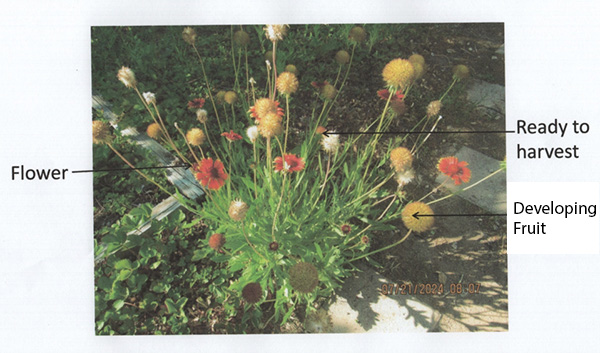
A blanket flower (Gaillardia spp.) showing flowers, developing seeds or “fruits”, and the ready-to-harvest seed heads
5. Peel back the seed covering or break it apart to reveal the actual seeds. Examine the seeds (with a hand lens if necessary) and compare them with the internet picture.
6. If the seeds seem to be mature, remove some seed heads, but don’t be greedy! Seeds feed many creatures.
7. Put the seed heads into a plastic baggie, add a strip of masking tape or other writing surface, and label it immediately. Many seeds look similar; I speak from experience.
Here are the steps I take to clean seeds:
1. Leave the top of the baggie open and allow the contents to dry completely (the seed heads, pods, or fruits should not be soggy when you collect them).
2. This allows the non-seed parts to dry out and fall apart, making it easier to separate seeds from the rest of the plant material.
3. Dump the contents of the baggie onto a piece of white paper.
4. Separate the actual seeds from surrounding material, checking with the hand lens. If you don’t clean perfectly, it’s okay. Chances are, the first time you do this, you will spot the seeds easily.
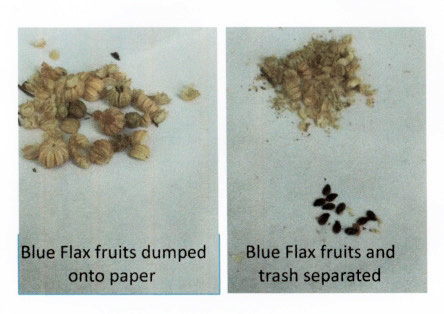
A harvest of blue flax (Linum lewisii) showing its seed pods before and after cleaning.
5. Discard the non-seed plant material.
6. Put the seeds back into the baggie, and store them in a cool, dry place to await planting when the time comes.
Part 2, “Indoor Seed Planting,” will be in the December Master Gardener newsletter, and Part 3, “Transplanting Indoors or Outdoors,” will be in the March Master Gardener newsletter.
Dill Pickle Recipe
Article and photos by Doreen Spires
My sister gave this recipe to me, but I don’t know where she got it. I have made these changes: I leave the pickles on the counter to develop their flavors (no longer than one or two days, especially in warm weather), then store them in the refrigerator. And I add Pickle Crisp to the jars. Pickle Crisp is a Ball product used to keep pickles from getting soft. These pickles get better with time. It’s a great way to enjoy homemade pickles even if you only get a few cucumbers at one time from your garden.
Dill Pickles (1 Quart Jar)
- 1 tsp dill seeds
- 1 tsp black peppercorns
- 1 bay leaf
- 2 tsp kosher salt
- ¼ rounded tsp Pickle Crisp
- 1 pound cucumbers sliced into spears
- 1 sprig fresh dill or more to taste
- ½ onion cut in wedges
- 2 cloves garlic (or more), smashed
- ¾ cup white wine vinegar or white vinegar
- ¾ cup hot water
Put the first five ingredients in the bottom of a one-quart wide mouth canning jar. Add the cucumbers, garlic, onion, and fresh dill. Add the vinegar, then the hot water. Add more vinegar if needed to cover the cucumbers. I leave the jars on the counter no longer than one or two days, but they can stay at room temperature for up to two weeks. Then store in the refrigerator.
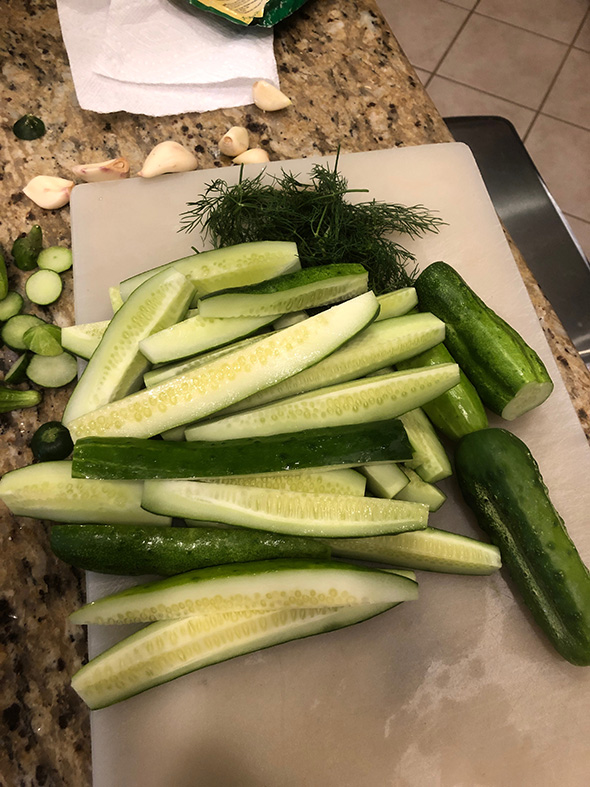
Cucumbers, dill, and garlic.
Traditional spear shapes are easy to slide into jars.
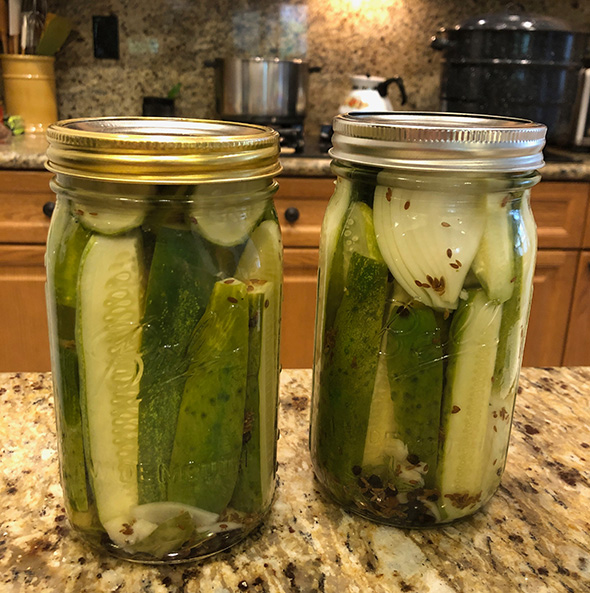
The finished product, ready to enjoy.
Autumn Planting for a Spring Extravaganza
Photos & article by Diane Miniel
As summer fades and autumn leaves begin to fall, it’s the best time to dream a little about next spring’s flowering extravaganza. One dream-worthy project is planting bulbs or corms in September or October, depending on your area’s hardiness zone.
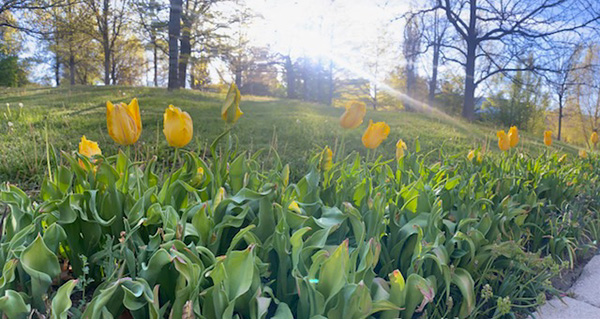
Yellow tulips at Rancho San Rafael Regional Park, Reno.
Planning
Dreaming of next year’s flower colors is one of my favorite garden activities. You can envision your yard with such colors as brilliant yellows, tangy oranges, royal purples, and Mediterranean blues. They can be planted in containers as well as in the ground – even under a large shade tree, as bulbs and corms bloom before most leaves on trees appear.
So, consider what works for your yard. A half-wine barrel near the mailbox? A hedge of yellow daffodils near the sidewalk? A mass of tulips along the walkway to your front door? Grape hyacinths in a variety of purples in front of your living room or kitchen window?
You need only decide where to plant the bulbs, what to plant them in, and how many to plant. And if this is your first dabble in spring’s colorful bulbs, no worries! Start in one or two noteworthy places in your yard and save dreaming of your yard looking like spring in Holland for another year.
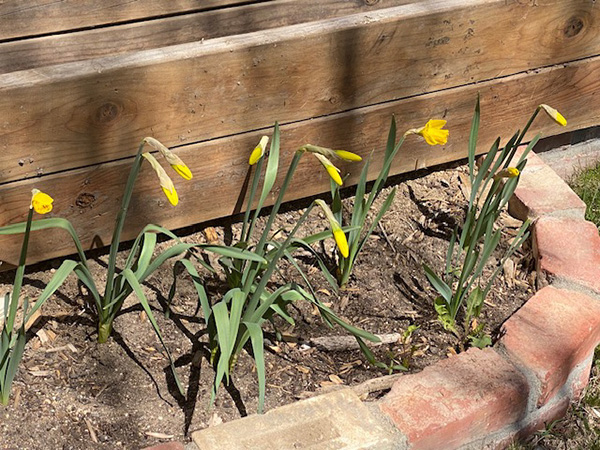
Early daffodil and crocus blooms, Stead, NV.
Selection
Think about the colors you love and what bulbs come in those colors. Daffodils, tulips, hyacinths, crocus, winter aconite, scilla, and snowdrops are just a few bulbs to research and sleep on. Bulbs are generally priced according to size, and the bigger the bulb, the bigger the bloom. The adage about getting what you pay for applies. A better-quality bulb is worth the cost. Select firm, unblemished bulbs that feel heavy for their size. Shop at reputable nurseries, local or online, in late summer or early fall.
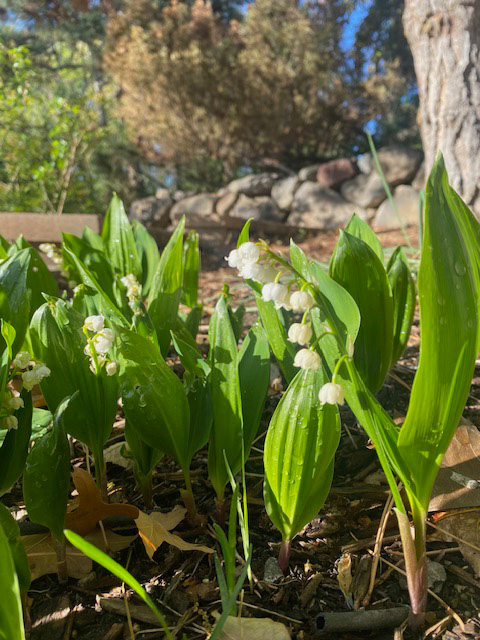
Snowbells, Rancho San Rafael Regional Park, Reno.
Planting
Early shopping means a better selection from nurseries. Many bulbs are planted in late September through October to allow roots to become established before freezing weather. But some bulbs, like tulips, do best when planted in November.
Most bulbs do best in well-draining soils. If your soil does not drain well, you’ll need to amend it so it does. In addition, fertilizer should be mixed into the bulb’s root zone. A commercial bulb fertilizer might be easier if you are a bulb novice.
Follow the specific instructions provided on the package, but most bulbs should be planted growing tip up and at a depth three times their height (tip to bottom). To encourage root growth, loosen the soil under and around where the bulbs are planted, and top the bed with mulch to help retain moisture and maintain soil temperature.
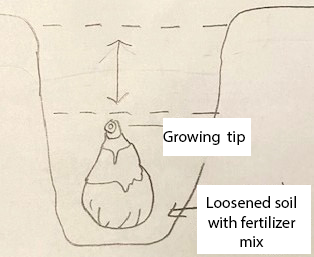
Sketch illustrating growing tip and soil depth.
Planting several bulbs of the same color close to each other, but not touching, gives the best burst of color. Depending on the size of the bulb, groups of 10 or more look best. You can also imagine groups of single-color blooms planted throughout your yard.
For container planting, an especially attractive project is “lasagna” bulb planting. Start with a large container and cover the bottom with several inches of potting soil, enough to accommodate roots. Plant the largest bulbs and then cover them with another layer of soil. Medium-sized bulbs are arranged in the middle, and smaller bulbs are planted toward the top, each layer covered with additional soil.
If you choose a variety of bulbs that have different flowering times (like crocus, squill, hyacinth, daffodil, and tulips), the lasagna bulb planter can continue to flower throughout spring. When the show is finished, water the container well and mulch it to await a repeat performance the following spring.
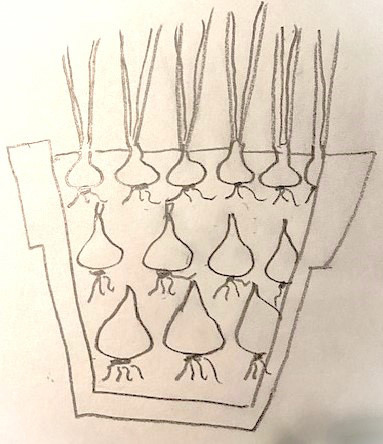
Sketch illustrating lasagna bulb container.
Ongoing Care
Because most bulbs flower, bloom, and die within a few weeks, ongoing care is simple: adequate water, well-draining soil, and sunlight. A dose of fertilizer before the blooms wither, while the foliage is still green, will help nourish the bulb and enhance its performance next year. Don’t remove the leaves until they are dry, but you can plant annuals in the bulb bed to hide the drying bulb foliage, and enjoy those as you start dreaming of your next colorful spring.
After the blooms have faded
If this is your first year of experimenting with bulb planting, you get a late—summer break! First-year bulb beds are usually not dug up. When the first year’s show is finished, water the container well and mulch it to await a repeat performance the following spring.
Second-year beds are dug up in late August to divide the bulbs, which will have multiplied. Separate the bulbs after they dry, and store the largest, healthier bulbs in a paper bag in a cool, dry place for replanting in the fall. Again, big bulb, big bloom. It’s best to save the larger bulbs and purchase new bulbs to replace the smaller ones. Some bulbs, like hyacinths, do not multiply readily, but can rebloom in the same spot for several years.
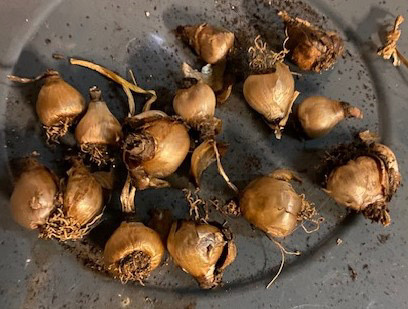
Daffodil and crocus bulbs dug up
after the second year, to dry and be replanted.
Resources:
- “Planting over tulips and when to fertilize tulips,” Elizabeth C. Miller Library, University of Washington, 2024
-
“Planting bulbs, tubers, and rhizomes,” Meyer, Mary H., University of Minnesota Extension, 2024 https://extension.umn.edu/how/planting-bulbs-tubers-and-rhizomes#soil-preparation-1410662
-
“Fall-Planted Bulbs and Corms,” Newman, S.E. Colorado State University, 2009.
- Planting Bulbs, Lasagna Style,” Sandborn, Dixie, Michigan State University Extension, 2020.
Praying Mantis
Photos and article by Joanne McClain
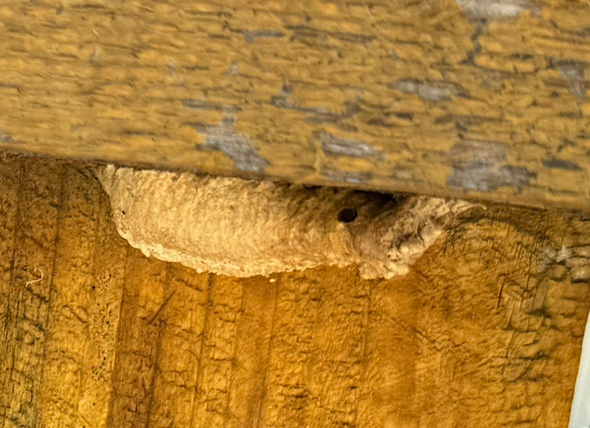
The praying mantis egg sac attached to my fence.
The sac may contain as many as 300 eggs, but only about 60 will live to adulthood.
This is the first praying mantis egg sac I have discovered in my garden. It was on my wooden fence. I kept watching to see if I could catch the babies emerging until I saw a very small one (less than an inch long) in the garden in the middle of June and realized I had missed the emergence.
I discovered this praying mantis at the end of July and wondered if it was the little mantis I had seen in June.
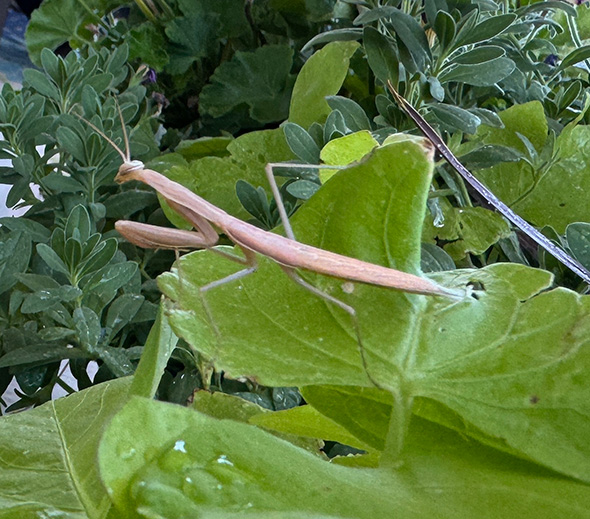
Adult praying mantis, spotted in the garden at the end of July.
While waiting for prey, they hold their front legs upright as if praying.
After doing a little research, I found these interesting facts about praying mantis.
- The most common praying mantis we see in the United States is the European mantis, which can grow over three inches long and can be either green or brown.
- They are considered beneficial insects as they eat insects such as grasshoppers, beetles, and flies as well as spiders, including the black widow. However, they will also eat bees and butterflies.
- Praying mantis are well camouflaged in vegetation and wait for their prey to come within striking distance.
- They can rotate their heads 180 degrees.
Reference:
https://entomology.wsu.edu/outreach/bug-info/european-mantis/
Potato Berries
Photo and article by Liz Morrow
What!? Yes, potato plants can grow berries or fruit. When the conditions are just right; the plant sets flowers that, when pollinated, produce “fruit” that looks like small green tomatoes.
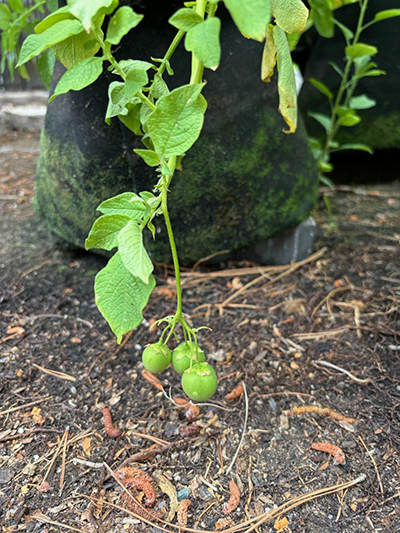
Potato berries on my potato plant. You can’t eat them,
but you can grow potatoes from the seeds they produce.
Potato berries are not edible. In fact, they are potentially toxic, even considered poisonous. They contain high amounts of solanine and can make the eater very ill with headaches, abdominal pain, and more. If children visit your garden, consider removing the berries from the plant lest the youngsters be tempted to eat them. The appearance of potato berries does not indicate that the potato harvest below the ground is damaged or harmful to eat.
The good news is that the berries do contain seeds, which you can plant in your garden.
What’s the difference between seed potatoes and potato seeds? Seed potatoes are whole potatoes, or pieces of potato with two or more eyes, that have been placed in a cool, lighted place to develop sprouts. The sprouted pieces are then planted directly into the soil as a root crop. Potato seeds, on the other hand, like seed from other nightshades such as tomatoes and eggplant, all members of the Solanaceae family, are started indoors weeks before the last frost in our Northern Nevada climate.
Saving the seeds from a potato berry is similar to saving the seeds from a tomato. Remove the seeds from the fruit, and place them in a jar of water to let the gelatinous coating work its way off the seed over several days. Skim off the seeds that float to the top; they are not likely to germinate. Drain the water and spread the remaining wet seeds on a paper towel or paper plate and let dry completely. When dry, place these seeds in an envelope or other container and keep in a cool, dry place. Stored properly, potato seeds will be viable for up to five years.
A Fall Nuisance
Photos & article by Becky Colwell
As the cooling fall temperatures approach, a few insects like to sneak into the warmth of our homes to overwinter. The boxelder bug (Boisea trivittata) is one. These pests belong to the true bug family, Hemiptera, and spend the summer months mostly unnoticed, feeding on plants and seeds on the ground. Only as the weather cools do you spot them sunning themselves outside in warm areas, such as the sides of buildings with a southern or western exposure. They are most abundant in years that have hot, dry summers and mild winters, followed by warm springs.
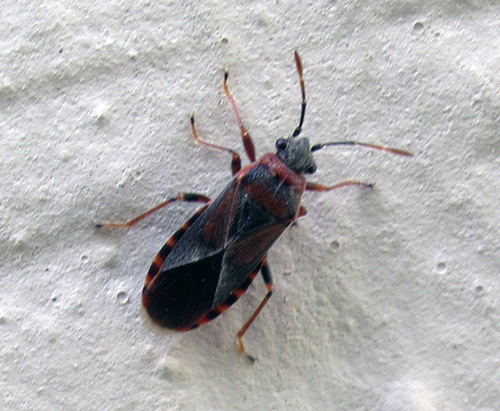
Adult box elder bugs are predominately slate-gray to black
with red on the margins. Notice the “X” formed by the crossed wings, a sign of a true bug.
As the name implies, the most popular host plant for boxelder bugs to lay their eggs is the female seed-bearing boxelder tree
(Acer negundo). Other maple (Acer spp.) and ash (Fraxinus spp.) trees may also be hosts. Although the bugs cause no damage to these trees, they may be the cause of lumpy and misshapen fruits on fruiting trees in late summer.
Overwintering adults emerge in spring to lay their small, oval, red eggs on host trees. The eggs hatch in 10 to 14 days and the nymphs begin feeding by sucking fluids from seeds, foliage, twigs, or fruit. After going through several growth stages, the nymphs become adults and produce a second generation. This second generation of adults is the overwintering one.
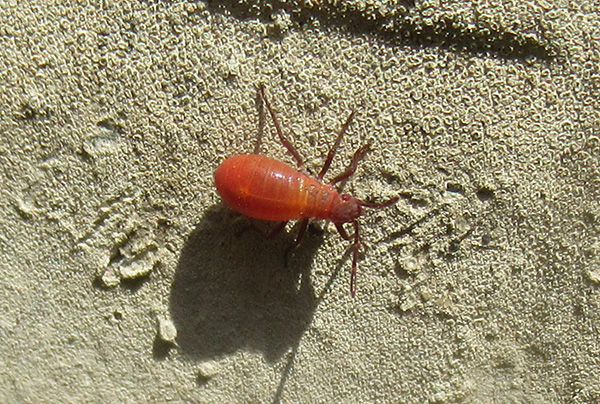
Newly hatched nymphs are wingless and completely red.
The gray and black coloring appears when they are about half-grown.
Boxelder bugs are mostly an annoying nuisance, as their fecal pellets stain walls or surfaces and, if crushed, they give off an offensive odor. The good news is that they don’t bite, nor do they breed or eat food in your home, and they will eventually die.
Controlling Boxelder Bugs
- They are easily drowned: If you find a lot of boxelder bugs congregated on your house, use a garden hose to wash them off.
- Chemical control is difficult and not very effective as large nymphs and adults are tolerant of insecticides.
- A more effective alternative to chemical control is spraying nymphs and adults with a soap mixture. Mix 1/2 cup of laundry detergent into one gallon of water, pour into a pump sprayer, and spray the bugs directly. Repeat as necessary. This will only kill the bugs that are hit with the spray.
- Eliminate overwintering areas by making a 6- to 10-foot weed- and debris-free strip around the house foundation, especially on the south- and west-facing sides.
- Clear fallen boxelder seeds beneath and near the trees.
-
Repair torn screens, and caulk or seal openings to your home, such as foundation cracks or plumbing, gas, and electrical conduits.
- Install weather stripping around doors and windows.
- In the house, you can collect the bugs by hand and drown them in a bucket of soapy water. Vacuuming them up is also very effective.
References:
- Hodgson, Erin W. and Roe, Alan H.; “Utah Pests fact sheet, Boxelder Bug,” Utah State University Cooperative Extension.
- Perry, E.J., Windbiel-Rojas, K.; “Pest Notes: Boxelder Bug,” UC ANR Publication 74114, University of California Statewide Integrated Pest Management Program.
Planting Winter Veggies
Photos and article by Diane Miniel
As of September, it’s time to plant winter vegetables – maybe even a little late to plant if starting from seeds.
My first recommendation is to avoid planting mania. That’s what happened to me when I planted my first garden. I planted zucchini, summer squash, romaine lettuce, and cucumbers from seeds. I must have had more than 20 healthy seedlings for each vegetable. I couldn’t bear the thought of planticide. So, I had 20-something of each vegetable. A rookie mistake. If every plant thrived, I would have been overwhelmed with caring for them and dealing with the produce they provided.
I am now more realistic. I only grow enough seedlings to produce what my friends and family will eat. I also have a much better understanding of the time it takes to prepare a proper planting place, water, weed, feed, prune, manage pests, harvest, and store. But it is still difficult for me to toss away healthy vegetable seedlings.
In September I’m planting a winter garden of brassicas, root vegetables, leafy greens, and alliums.
- Brassicas: broccoli, cauliflower, kale, cabbage, and collard greens
- Root vegetables: radishes, rutabagas, turnips, beets, and carrots
- Leafy greens: chard, arugula, spinach, and lettuce
- Alliums: shallots, onions, and garlic
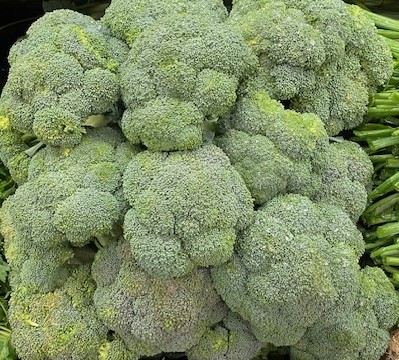
Bountiful broccoli from a winter garden.
If this is your first time planting a winter garden, start small by growing one to three kinds of vegetables. Because my family loves the “little trees,” I’ll focus here on broccoli.
Broccoli:
Days to Maturity:
60 to 100 days.
Which variety?
Whether planting from seeds or buying a seedling from a nursery, choose a variety of broccoli for your region’s climate. Arcadia is known to do well in Northern Nevada as a winter crop.
When to plant seeds?
Start seeds indoors one month before planting outside. Follow the instructions on the seed packet.
When and where to plant the seedlings?
It’s best to plant broccoli seeds in early to late July. The seedlings should have two or three sets of leaves before transplanting them into your garden or a container.This year I will still plant seedlings from a nursery in early September.
Put one plant in a five-gallon container or place them 12-18 inches apart if in the ground. Yes, you will need that kind of space once the vegetable matures. Broccoli does best with at least six hours of sun and well-drained soil with a pH of 6.0 to 6.5. Take the time to test your soil. If necessary, amend it or plant broccoli in containers or raised beds in commercial soil.
How much water?
Broccoli needs about one inch of water a week. But watch for signs of stress from heat and wind, which might require more watering. If you get cooler temperatures and abundant rain, water less.
Temperature:
Broccoli is one of the hardiest vegetables, handling air temperatures of 27 degrees and below. While snow can act as an insulator, vegetables can also be covered with tunnels, cloches, or even newspaper or cardboard on extra-cold nights. Maybe you’ll even be surprised with a spring crop!
Ongoing (daily) care:
Watch out for signs of stress (drooping stalks, withered leaves), inadequate nutrition (pale green to yellow leaves), and pests (eggs on leaves, nibbled leaves, and “frass,” which is bug poop). Plants are like children; they need your daily attention.
Harvesting and storage:
Harvest broccoli heads while the flower buds are still green and tight, not loose and starting to flower. Refrigerator life is about two weeks, but you can also blanch and freeze broccoli, cut into florets.
Eating:
Eating your homegrown vegetable(s) is the best part! When successfully grown, they taste better than those bought from a store’s produce section.
References
“Broccoli,” University of California, UC Master Gardener Program of Sonoma County, February 2022. https://sonomamg.ucanr.edu/Vegetable_of_the_Month/Broccoli/
“Growing broccoli for beginners,” West Virginia Extension, Reviewed May 2023. https://extension.wvu.edu/lawn-gardening-pests/gardening/gardening-101/growing-broccoli-for-beginners
“Growing broccoli in home gardens,” University of Minnesota Extension. Reviewed in 2022. https://extension.umn.edu/vegetables/growing-broccoli
“These cold-hardy vegetables may stick it out through winter,” Oregon State University Extension Service, September 2023. https://extension.oregonstate.edu/news/these-cold-hardy-vegetables-may-stick-it-out-through-winter
The Blooming Truth About Boron
Photo and article by Victoria Gutierrez
If you live in South Reno and particularly the Double Diamond area, you have probably heard of boron. You may have even heard something about the native soil having an excess of it. But maybe you don’t fully understand why it is vitally important to keep boron levels in mind when planning or adding to a landscape.
Maybe, like me, you moved to the area and thought to yourself, “How bad can it be?” You went ahead and planted whatever you wanted. Ultimately, your new addition withered and died, leaving you wondering where you went wrong.
To avoid this in the future, it helps to understand a little about boron. It is a micronutrient that is essential for plant development. It influences cell membrane function, root elongation, the production of pollen, and the transportation of proteins and carbohydrates. But at high levels, boron is toxic to many trees and shrubs – and there is a thin line between what’s essential and what’s harmful.
Symptoms of boron toxicity are species-dependent. For example, conifers may show browning of needles from the tip toward the branch. In many other species, the first signs of boron toxicity are often yellowing of leaves and scorching on leaf edges. But these can also be signs of high salinity or deficiency of iron or manganese, making it difficult to diagnose the real issue. An absolute diagnosis probably will require soil, water, or tissue testing.
These problematic soils are not uncommon in low areas in Nevada, where runoff water collects, along with fine sediment (clay particles) and dissolved salts. As the pooled water evaporates or infiltrates, the fine sediments and salts are left behind. Over time, the concentration of salts and boron can reach levels that inhibit plant growth. An extreme example is the Black Rock Desert in Pershing County, where the Burning Man Festival is held each year.
It is not possible to eradicate boron in native soil. It is water-soluble and mobile, meaning it moves up in the soil as water evaporates and is pushed down when fresh water is applied. Even if all the topsoil in a given area is replaced, boron will eventually travel up from below to permeate the new soil. Amendments such as organic matter, gypsum, and sulfur can improve soil structure, but have little effect on the presence of boron.
So what can be done to improve the situation? Careful plant selection is a must. Some trees and shrubs are more sensitive to boron than others. One suggestion is the practice of planting in mounds, where new topsoil (or other planting substrate) is placed on top of native soil. This places many of the feeder roots above the boron-laden soil. Mounds should be at least 12 inches high and extend past the drip line of the tree or shrub. This option can work well for group plantings.
Another suggestion is extensive use of raised beds, pots, and planters. These allow for complete control of the planting medium without worry about boron whatsoever. For most homeowners, the answer is a mix of these remedies along with trial and error.
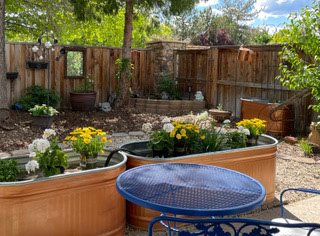
Raised beds and containers are a
useful (and attractive) solution to boron-heavy soil.
In case this has you thinking about your lawn now, boron is not as big of an issue with turf grasses. Symptoms show up in the tips of the blades first. As turf grass is fast-growing and cut regularly, you are not likely to see a problem from boron in the soil. Anyone putting in a new lawn might consider warm-season grasses, such as Bermuda or zoysia, which are more tolerant of boron overall, rather than cool-season grasses, such as Kentucky bluegrass and perennial ryegrass.
Here are some trees and shrubs to consider, and some you probably want to avoid. Please bear in mind that these are not exhaustive lists. The Master Gardener Help Desk at the UNR Extension Office in Reno can provide you with more suggestions, including the publication cited below.
Boron-Tolerant Trees and Shrubs
Atlas cedar (Cedrus atlantica), Washington hawthorn (Crataegus phaenopyrum), Italian cypress (Cupressus sempervirens), purple leaf plum (Prunus cerasifera), and crabapple (Malus hybrids).
Japanese boxwood (Buxus microphylla var. japonica), wild lilac (Ceanothus spp.), wall germander (Teucrium chamaedrys), and pfitzeriana or Chinese juniper (Juniperus chinesis).
Boron-Sensitive Trees and Shrubs
Redbud (Cercis spp.), thornless honey locust (Gleditsia triacanthos var. inermis), magnolia (Magnolia spp.), sweet cherry (Prunus avium), and peach (Prunus persica).
Japanese euonymus (Euonymus japonicus), Oregon grape (Mahonia aquifolium), Fraser photinia (Photinia x fraseri), and Chinese photinia (Photinia serrulata).
Resources
“Boron- and Salt-Tolerant Trees and Shrubs for Northern Nevada,” Kratsch, H., Extension, University of Nevada, Reno, SP-13-04
Gratitude
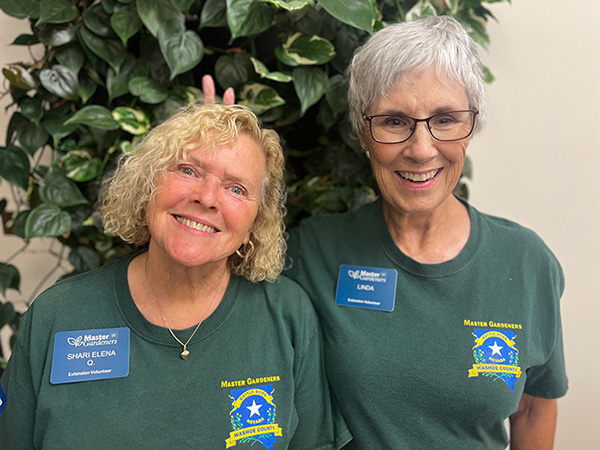
Shari Elena Quinn and Linda Fulton.
We have so much to be thankful for. The University of Nevada, Reno Extension Master Gardener Program is full of amazing volunteers who are committed to finding and providing scientifically based, university researched horticultural information for people in our community. We do a lot! We get to work with and volunteer with amazing people here in Washoe County!
We couldn’t do what we do, without the help and support of our community, our University and Extension Partners and the amazing dedication of our Master Gardener Volunteers. Within our program we have some extra special volunteers knows as Leads. They are the lead volunteers of various programs and activities. Leads are Master Gardeners that dedicate extra time to organize, plan, and execute tasks related to their project or activity. They do this by dedicating extra time to the program to lead and mentor our other Master Gardner volunteers to give them the resources and confidence to provide education to our community. They make a huge difference in our community and especially to the Master Gardener Program.
One such program is the Northern Nevada State Veterans Home with Master Gardeners Lead Shari Elena Quinn and Co- Lead Linda Fulton. Together they are an amazing force. They stepped up during COVID to start a program for a special group of at-risk people who needed more from their community. Let’s take a minute to get to know Shari Elena & Linda from a recent interview:
Interview with Shari Elena:
- What sparked your interest in gardening?
- Shari: I was raised in apartments all my life. I relocated from Los Angeles to Reno, purchased a home and this was the first time we had space to garden. Linda: It all started when my mom let me plant radish seeds when I was 4 years old. After I retired and moved to Nevada, I learned this climate is a whole different ball game than what I was used to.
- What is your gardening passion?
- Shari Elena: To make things grow and survive the heat and weather here in Nevada. Linda: Right now, native plants and vegetables. I always wanted to know how the ancients grew things.
- How has the Master Gardener Program scientifically helped you in your garden?
- Shari Elena: It’s taught me about insects and the right and wrong way to care for plants: watering, shade, soil sun, fertilizer. One of the best classes we had was the botany class and I’m always going over my botany notes. Lately we’ve had insect classes and bee and butterfly classes. I didn’t realize how many species of bees we have in NV. The MG program has been extremely educational. Linda: Right now, native plants and vegetables. I always wanted to know how the ancients grew things.
- What makes you smile about the Master Gardener Program?
- Shari: The events- annually we have different events to attend and each year they vary farm day, field day, home show, appreciation day at Greenhouse Garden Cetner. Linda: The passion the public shows when they tell us about their garden. Also, the other Master Gardeners. They are a bunch of fun folks.
- Share a meaningful Master Gardener volunteer experience.
- Shari: I had the honor of working at Mariposa Academy with Kindergarten through-5th grade students Through Mariposa Academy. I was able to help with classroom exercises on planting seeds. The young children were so excited to plant a seed and press it down in soil and watch it grow, and then harvest. Every kid is different, but I felt every child should have the experience of gardening. Linda: I like it when I don’t understand something and then the lightbulb goes on and I have that A-Ha moment when I understand. Seeing the bigger picture and opening my curiosity.
- One word to describe the Master Gardener Program.
- Shari Elena: Educational- extremely educational. Linda: Educational, but it’s more than that. It’s more about exploring.
- The Master Gardener program could not function without the help of MG Leads. What inspired you to become a Lead?
- Linda: Shari Elena told me I had to 😊
- Describe the program you Lead and how it impacts the community.
- Shari: Northern Nevada State Veterans Home- We have taken the responsibility of keeping the conservatory plants and the four courtyard gardens alive and healthy. We work with the residents by talking to them weekly about what’s in the conservatory, the type of plants, leaf texture, flower fragrance and their reaction to the fragrance, the colors and what they enjoy. We also talk with them about planting and propagating. Linda: We take care of the plants in the conservatory and outside garden courtyards. Most of the residents are long term memory and it brings a smile to their face. They like the interaction with the plants.
- What has been your greatest challenge as a Lead?
- Shari: It would be nice to have more than 7-9 residents participating at a time, but the space is very small. Seven residents make for a crowd in the conservatory. I’d like to find ways to get the residents to participate in planting. We can’t do it in the dining room for cleanliness reasons nor go outside due to temperatures. I’d like, perhaps, to create a monthly flower experience so they could each hold, touch and smell the flower. Linda: I would like to see more Master Gardeners get involved.
- What has been your greatest joy as a Lead?
- Shari: I was thinking about rotating residents- one small group on 1st and 3rd Tuesday and a second group on the 2nd and 4th Tuesdays. We could bring in donated plants and have the residents help pot and water them
- What would like to see next for your program?
- Shari: It benefits the veterans who served our country and who deserve to be living in a beautiful environment. As to the community, it serves the spouses, friends and family members who come to visit their loved ones. It provides enrichment and stimulation for the residents. Also, the staff often takes breaks in the conservatory. Linda: We are a calming presence. We educate and answer questions and give residents meaningful things to do.
- If someone is thinking about becoming a Master Gardener, what would you tell them?
- Shari: It’s extremely rewarding working with the veterans and providing stimulation for them on a weekly basis.
- What keeps you involved in the Master Gardener program?
- Shari: I keep learning new things and new classes keep coming up. Our continuing education has gotten more exciting such as catching and pinning insects and the bee and butterfly class. Linda: I like playing detective, what’s that bug, why is my plat problem. I like being able to find solutions.
Shari Elena, and Linda are in their second year of being a Lead at the Northern Nevada Veterans Home. We are so grateful for what they do for our community! This year they received an award recognizing their volunteer work in excess of $20,000 of volunteer time.
The Master Gardener Program is so grateful to you both!
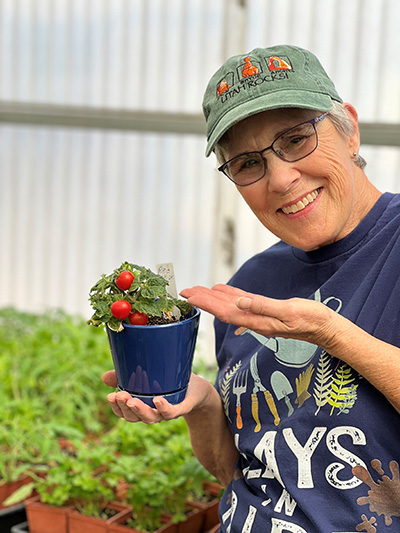
Linda in the greenhouse.
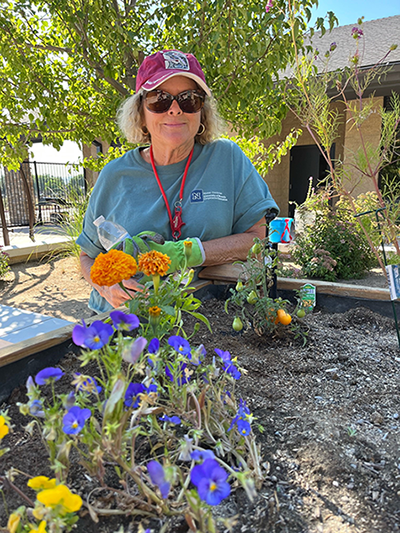
Shari at the Veterans Home.
S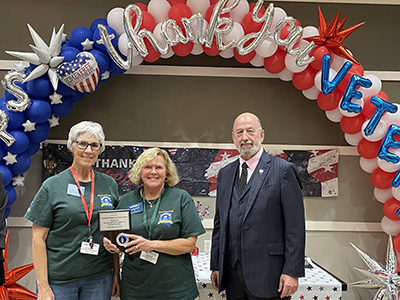
Linda and Shari receiving
the Veterans Home Award.
Master Gardener Photos
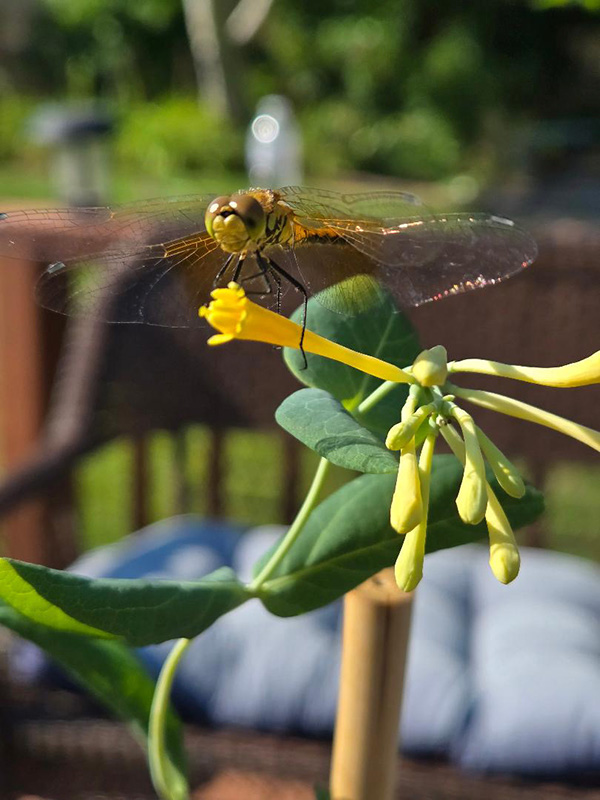
Golden Dragonfly Wing Skimmer.
by Liz Morrow.
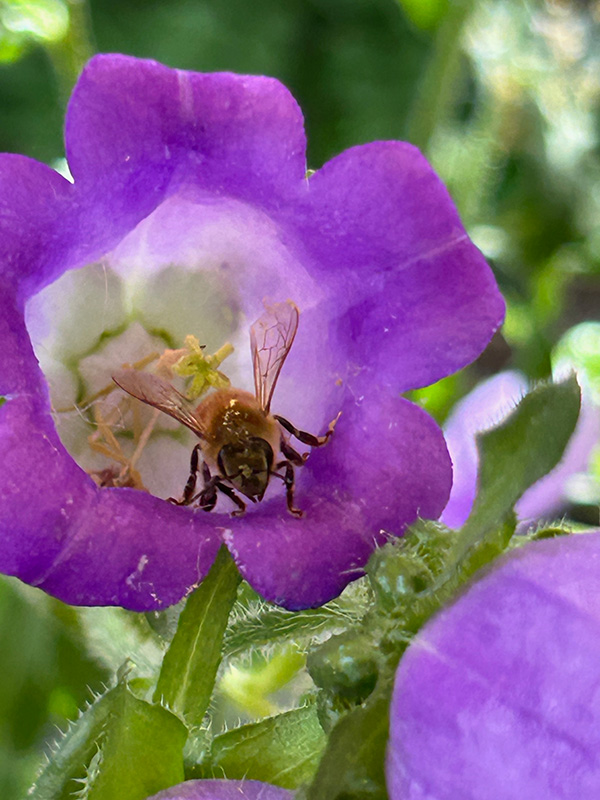
Honey bee visiting Canterbury Storybook Bell.
Photo by Sheri Elena Quinn.
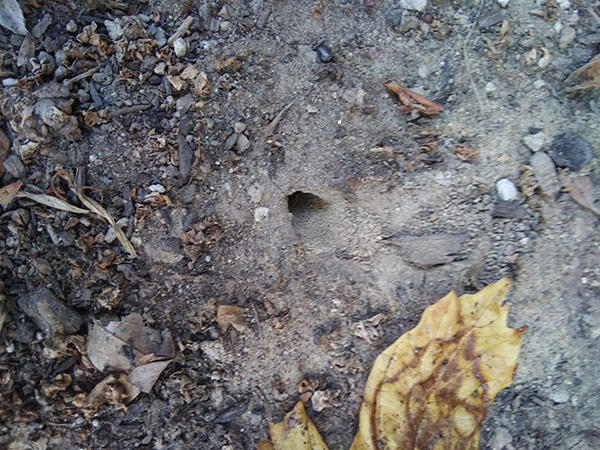
I discovered this native bee nest in my yard.
by Kathi Linehan.
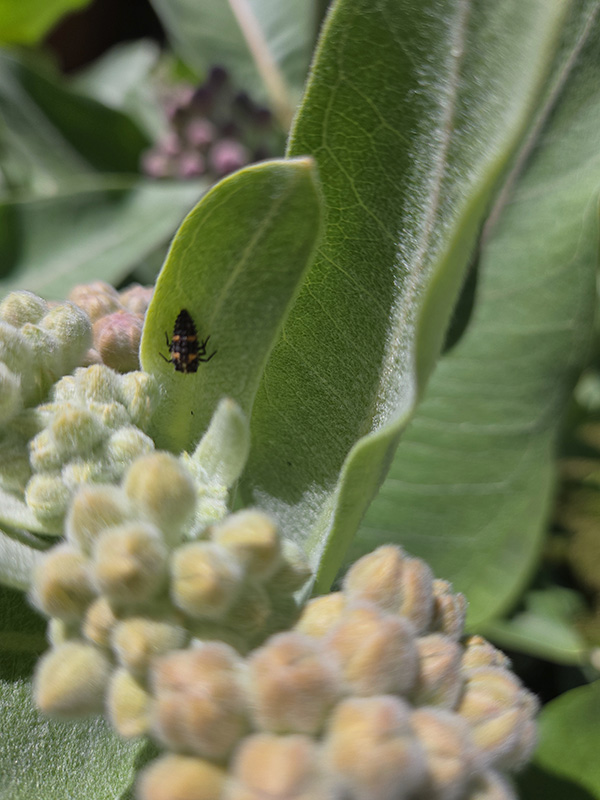
Lady beetle larva on showy milkweed.
Photo by Liz Morrow.
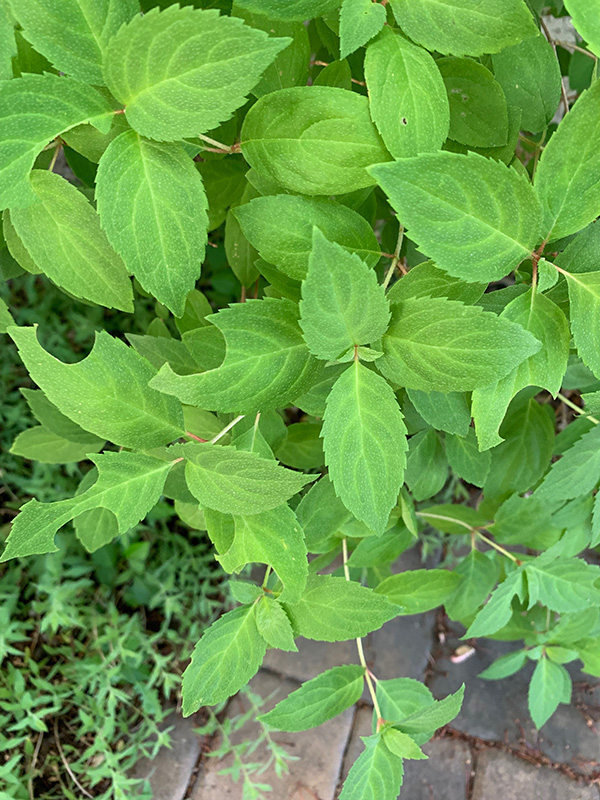
Leafcutter bees love my Bombshell Hydrangea plant.
Photo by Anna Anderson.
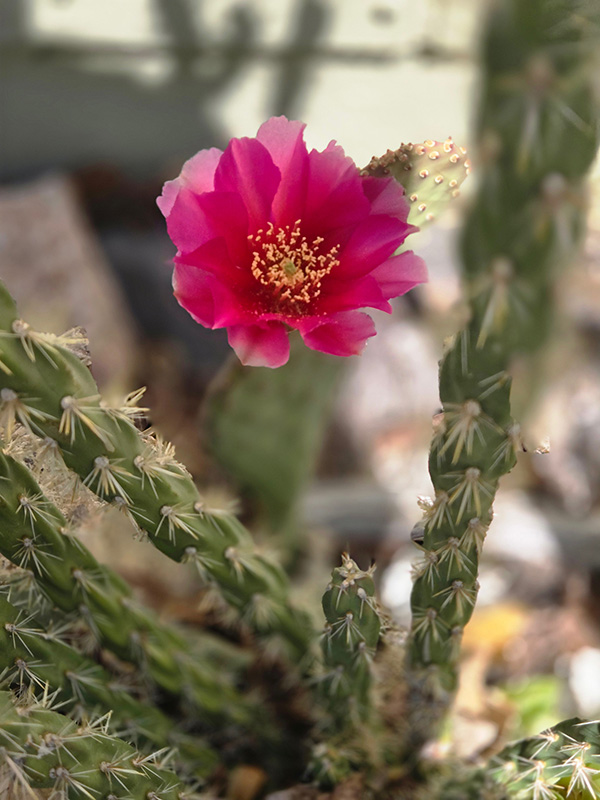
Spineless prickly pear blossom, a gift from Joanne McClain.
Photo by Liz Morrow.
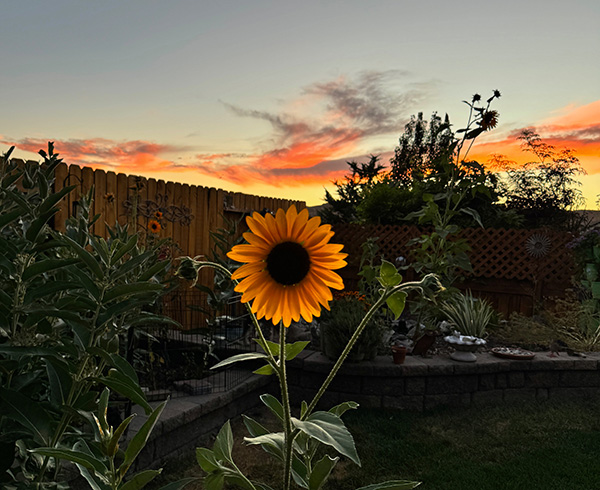
Sunflower at sunset taken with vibrant setting.
by Joanne McClain.
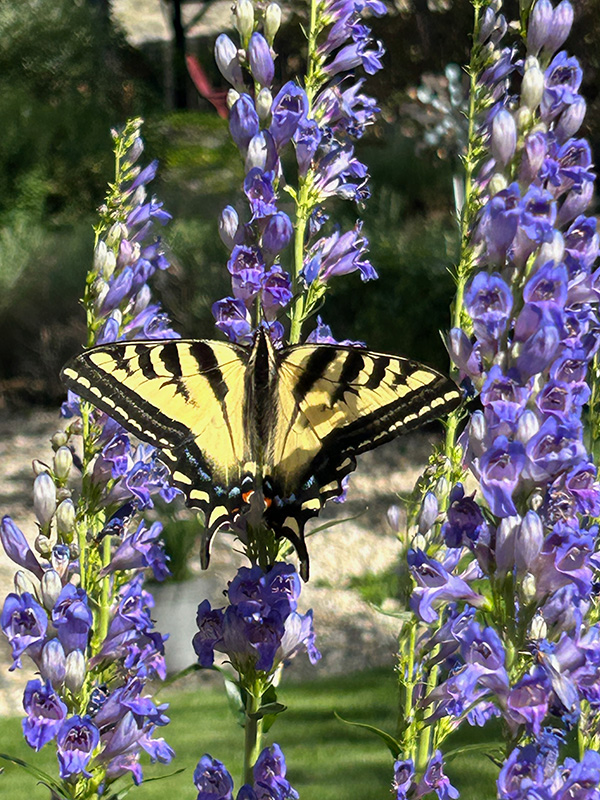
Western Tiger Swallowtail visiting Rocky Mountain Penstemon.
Photo by Shari Elena Quinn.
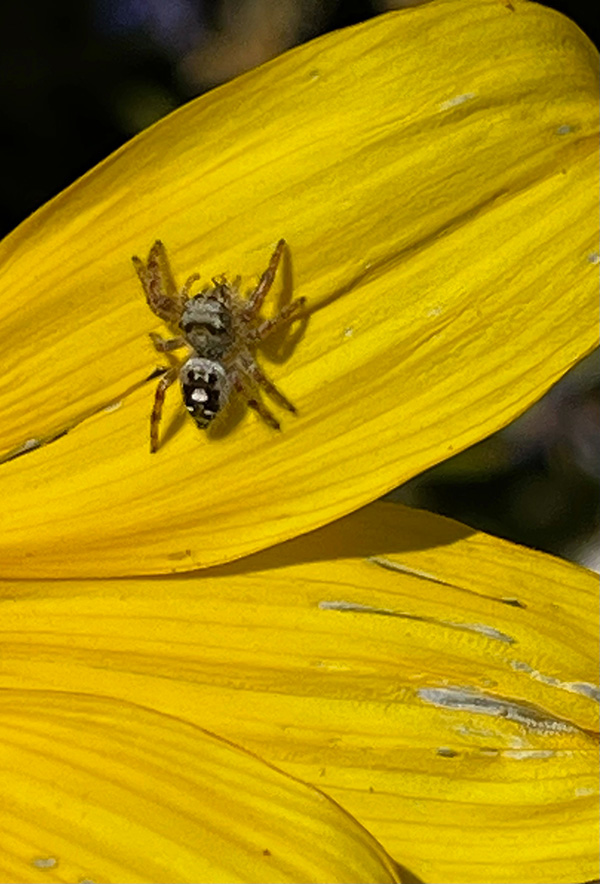
Jumping spider waiting for prey on a sunflower petal.
by Joan Bohmann.
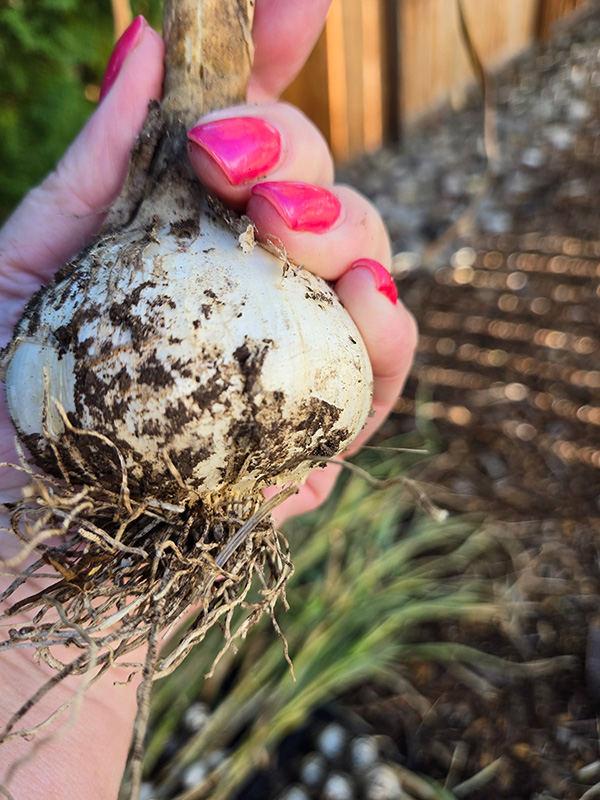
Sample of Transylvania softneck garlic harvest.
Photo by Liz Morrow.
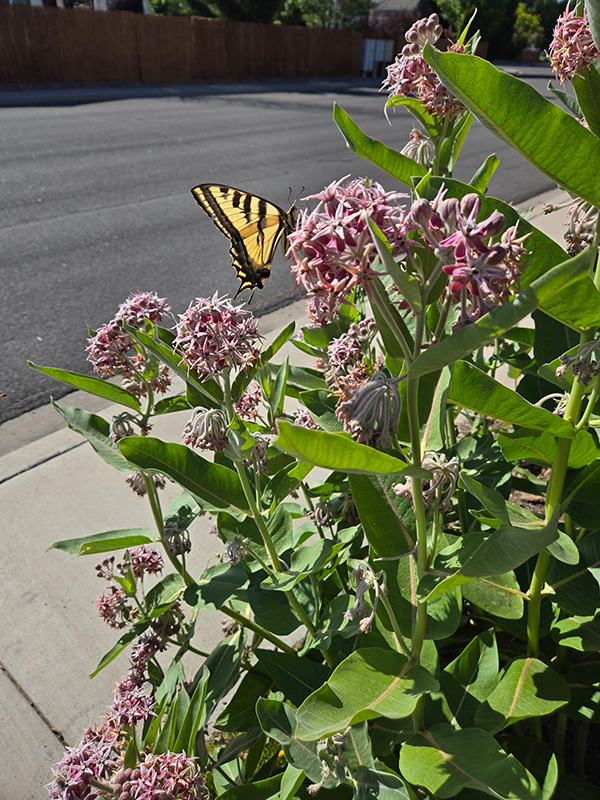
Swallowtail butterfly enjoying showy milkweed flowers.
Photo by Liz Morrow.
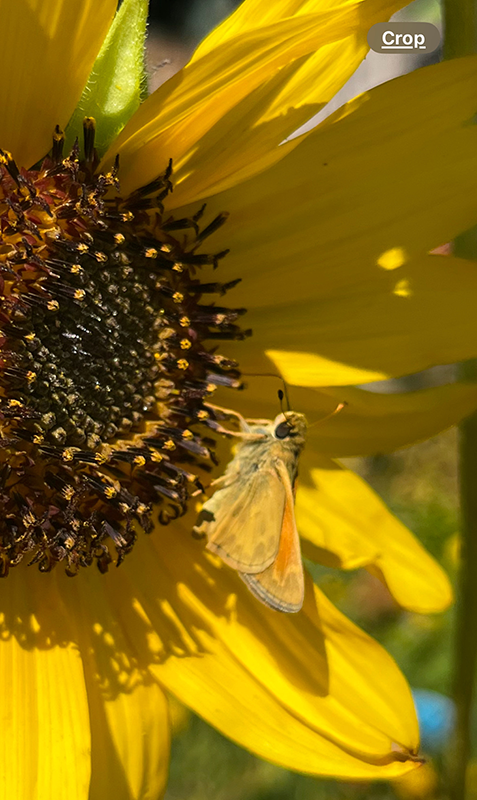
Skipper butterfly enjoying sunflower nectar.
Creative-Inspirational Photos Needed
Photos & article by Wendy Hanson Mazet
Do you grow vegetables, vines, or flowers vertically?
I am looking for photos for a presentation for our 2025 Grow Your Own, Nevada. I would love to use photos from all over Nevada. If you are not familiar with our Grow Your Own, Nevada program, it is a free statewide program we offer via Zoom every spring to anyone interested in learning how to grow for themselves throughout Nevada. My presentations are always made with numerous photos, designed to inspire and share creativity.
If you have photos of vertical growing plants and would be willing to share, email them to hansonw@unr.edu. Please include the following information:
• Your name, location, and the month the photo was taken.
• Plant and variety if you know it.
• Any thoughts you would like to share.
• If you do not want your name credited with the photo, please just let me know.
This is a great opportunity to share your creativity and your successes with struggling and new gardeners throughout Nevada.
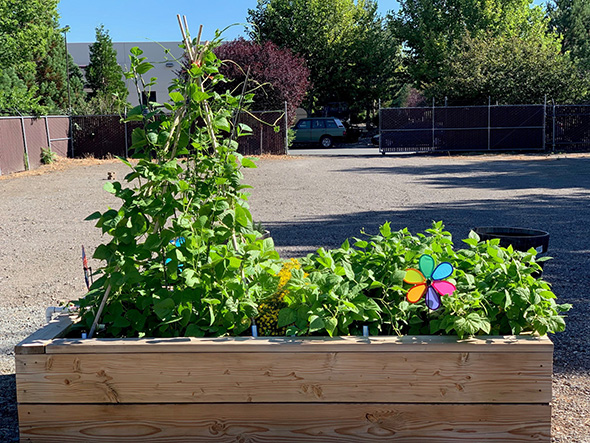
Scarlet Runner bean in a UNR Master Gardener raised vegetable bed.
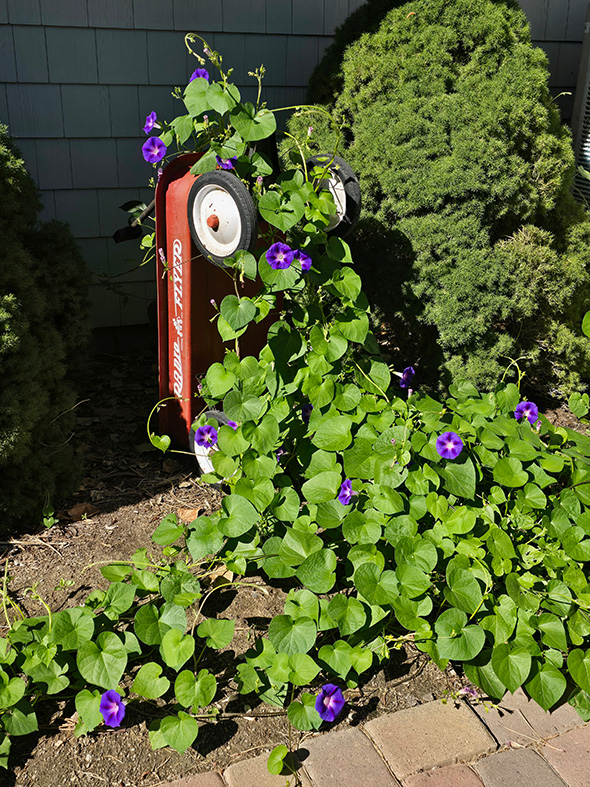
Decorative morning glory growing up and over a Radio Flyer red wagon.
Questions or comments?
Reach out to us!
Help Desk Hours:
May - September, 9 a.m. - 4 p.m. Tuesdays, Wednesdays & Thursdays.
October - April, 10 a.m. - 2 p.m. Tuesdays, Wednesdays & Thursdays.
Phone: 775-784-4848
Email: mastergardeners@unce.unr.edu
Rachel McClure Master Gardener Coordinator
Phone: 775-336-0274
Email: rmcclure@unr.edu
How to become a Master Gardener
WASHOE COUNTY MASTER GARDENER EVENTS
MASTER GARDENER HELP DESK
Facebook


